
We continue from where we left off in the last article and in this article we are going to look at how we utilize microsoft excel for doing logins. Remember this is still the part of our tips and tricks section. This will enable you to get the most of your framework.
Excel Login Method
To access the login data users must first instantiate the login page. The simplest way is to use it like below.
LoginPage oLoginPage = new LoginPage();

Utilize the syntax like shown in line 48 in above code screenshot . we are using the GetDataFromExcelRow method of the BaseTest.cs class. Please check Excel data section below for complete signature of this method.
Once set, all you need to do is call the DoLogin() Method for row you need to access Login data from –

Sample LoginData.xslx file —
The DoLogin() method takes care of all the login related functionalities .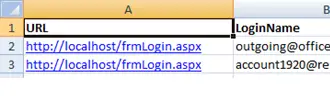
Excel Data
Excel data will typically reside in the following directory – D:\MAGICBLOCKS\GIT\OBQA\Automation\Jkrux.TestAutomation\Jkrux.TestAutomation.Tests\Data
The data needs to be called from the individual tests and not the pages.
The File naming syntax is as per page name – For example if you are creating a new page called AccntGroupListPage.cs then the corresponding data file should be named as AccntGroupListPageData.xlsx .The code handles the data files automatically in this way.
This is defined in the BasePage.cs file

In a typical scenario where a user wants to access account data the can create an object of the page
AccntGroupAddPage oAccntGroupAddPage = new AccntGroupAddPage();
Then initialize the dictionary for fetching the data as in the below code –

Note we are using the GetDataFromExcelRow method of the BaseTest.cs class. This is a generic method with below signature
Signature
GetDataFromExcelRow( <Get dataFilePath>, <Get dataFileName>, <Get workSheetName>, <Get Row# from sheet>);
The signature is straight forward Data file path is generally fixed and is specified in Settings.cs, Data File name is generated from instantiated page class and we specify the worsheet and row number we want to access in the data file.

Typically for an excel or csv file the row#2 is treated as row1 as first one is the header. The values of columns are fetched using column headers like below
string sAccntGroupName = (accntData["AccountGroupName"]);
This can be passed in the code that users would be writing.
Element Clicks
Button or other element clicks can be achieved using the below method
In your Page (For example: PurchaseInvoiceAddPage.cs ) specify the components as:
[FindsBy(How = How.Id, Using = "ctl00_ctl00_cphPageContent_cphPageContent_ddlStore_Input")]
private IWebElement DdlStore { get; set; }
Corresponding method:
public PurchaseInvoiceAddPage ClickStoreDropdown()
        {
            DdlStore.Click();
            return this;
        }
This code can be called in the test (PurchaseInvoiceTests.cs) using:
oPurchaseInvoiceAddPage.ClickStoreDropdown()
.WaitUntil(2);
.WaitUntil(<seconds>) is the delay we have specified after the element is clicked.
Sending Keys in Text Boxes
There are certain application modules that require the use of keys. In short we want to send keys manually as the text fields do not retain the original text entered. This was especially true when we use older components in modules. In that scenario, sending keys comes in handy. Additionally we can use this to simulate specific Keyboard strokes example TAB etc
As an example in your Page (For example: PurchaseInvoiceAddPage.cs ) specify the components as:
[FindsBy(How = How.Id, Using = "ctl00_ctl00_cphPageContent_cphPageContent_grdTableField01_ctl00_ctl04_Qntty")]
private IWebElement TxtQnttyRow1 { get; set; }

Methods we are using:
public PurchaseInvoiceAddPage EnterQnttyRow1(string sData)
        {
            Enter(TxtQnttyRow1, sData);
            return this;
        }
public PurchaseInvoiceAddPage SendKeys_TxtQnttyRow1(string mKeys)
        {
            TxtQnttyRow1.SendKeys(mKeys);
            TxtQnttyRow1.PressKey(Keys.Tab);
            return this;
        }
This code can be called in the test (PurchaseInvoiceTests.cs) using: In this syntax, we are first entering the text field then we simulate sending keys which are fetched from excel data variable sQntty and then we tab the field as in above method and that completes the syntax.
oPurchaseInvoiceAddPage.EnterQnttyRow1("")
                     .SendKeys_TxtQnttyRow1(sQntty)
			.WaitUntil(2);
In the next article we will continue on the tips and tricks part. We will try to read data from excel files and compare it. Its going to be fun and interesting so stay tuned for more.