Unlocking the Power of Professional Cinematic Imagery
The fundamentals remain the same in photography which ever camera you are using. Knowing that color is a really subjective topic, I am still willing to delve deeper to quench my thirst in photographic world. In the realm of professional videography and cinematography, the ability to manipulate and fine-tune the visual aesthetic of a film or video is paramount. This is where Sony Picture Profiles come into play. Designed to offer filmmakers, videographers, and content creators a versatile toolset for customizing the look of their footage, Sony Picture Profiles provide a range of options that can dramatically alter the mood, tone, and overall appearance of a video. These profiles are essentially pre-configured settings that adjust various parameters, such as Black Level, Gamma, Black Gamma, Knee, Color Mode, Saturation, and many others. Understanding how to effectively use these profiles can be the difference between a flat, lifeless image and one that pops with cinematic brilliance.
Sony Picture Profiles are especially popular among professionals using Sony’s lineup of cameras, from the Alpha series to the more advanced FX and CineAlta ranges. These profiles are not just for the experienced filmmaker but are also accessible to enthusiasts who want to take their video production to the next level. By offering a customizable approach to image processing, Sony allows users to experiment with different settings to achieve a specific look, whether it’s for a commercial, a short film, or a YouTube video.
Table Of Contents
Unlocking the Power of Professional Cinematic Imagery.
Understanding Sony Picture Profiles.
Practical Applications of Sony Picture Profiles.
Advanced Techniques with Sony Picture Profiles.
Common Challenges and Solutions with Sony Picture Profiles.
Understanding the Tonal Curve.
Adjustments and Impact on Photography and Videography.
Detailed comparison between Fujifilm Film Simulations versus Sony Picture Profiles.
Creating Sony Picture Profile emulating Fujifilm Eterna film simulation.
Creating Sony Picture Profile emulating Fujifilm ACROS film simulation.
Creating Sony Picture Profile emulating Fujifilm Classic Negative film simulation.
The importance of mastering Sony Picture Profiles cannot be overstated. In an era where visual storytelling is key, having the ability to craft the perfect image through detailed settings like Black Gamma and Knee, or achieving the right color balance with Color Mode and Saturation, is crucial. This article delves into the intricate world of Sony Picture Profiles, exploring each aspect in detail to help you understand how to use these settings effectively for your projects.
Understanding Sony Picture Profiles
What Are Picture Profiles?
Picture Profiles are predefined sets of settings that influence how a camera processes the image before it is recorded. They control aspects like color grading, contrast, and detail, allowing you to create a specific look straight out of the camera without the need for extensive post-production work. Sony Picture Profiles are particularly favored for their flexibility and depth, enabling users to fine-tune every aspect of their image.
Black Level
The Black Level setting in Sony Picture Profiles controls the brightness of the darkest areas in your image. Adjusting the Black Level can make shadows appear deeper or more lifted, depending on the desired effect. Lowering the Black Level will result in a richer, more contrasty image with deeper blacks, which can add a dramatic feel to your footage. Conversely, raising the Black Level can make the shadows appear lighter, which is useful in situations where you want to retain more detail in the dark areas of the image.
Gamma
Gamma settings are crucial in determining the overall tone of the image. Sony offers a variety of gamma curves, including standard gammas, Cine, and S-Log. The standard gamma curves are useful for general shooting scenarios, providing a balanced look with good contrast and color saturation. Cine gamma curves, on the other hand, are designed to emulate the look of traditional film, with a flatter contrast that preserves more details in the shadows and highlights. S-Log gamma curves are intended for professionals who plan to do extensive color grading in post-production, as they offer the widest dynamic range, capturing the maximum amount of detail in both shadows and highlights.
Black Gamma
Black Gamma is a setting that specifically controls the contrast of the darker areas of the image. Unlike the general Black Level, which adjusts the overall brightness of shadows, Black Gamma fine-tunes the gradation within those shadows. This allows for more nuanced control over how the details in the dark areas are rendered. You can adjust the Black Gamma to either lift the shadows, making more details visible, or deepen them for a more contrasty, dramatic effect.
Knee
The Knee setting in Sony Picture Profiles affects how the camera handles highlights, particularly in high-contrast scenes. It compresses the highlights to prevent them from clipping, which is when bright areas lose all detail and become pure white. Adjusting the Knee point and slope allows you to control where this compression starts and how aggressive it is. This is particularly useful in situations with bright skies or harsh lighting, where you want to preserve as much detail as possible in the highlights without compromising the overall exposure of the image.
Color Mode
Color Mode in Sony Picture Profiles determines the color space and overall color rendering of the image. Sony cameras offer a range of color modes, including standard, Cine, Pro, and S-Gamut. The standard color mode is well-suited for general shooting, providing vibrant and accurate colors. Cine and Pro color modes are designed for more cinematic looks, with a more subdued color palette that is easier to grade in post-production. S-Gamut is intended for use with S-Log gamma settings, providing a wider color space that captures a broader range of colors, making it ideal for high-end film production where extensive color grading is expected.
Saturation
Saturation controls the intensity of the colors in your image. Increasing saturation makes colors more vibrant and pronounced, while decreasing it can create a more muted, desaturated look. This setting is particularly useful when you want to either enhance the colorfulness of a scene or create a more somber, subdued mood. It is important to use saturation carefully, as over-saturation can lead to unnatural-looking images, while too little can make the image appear flat and lifeless.
Color Phases
Color Phases allow you to adjust the hue of the entire image, shifting all the colors along the color wheel. This setting can be used to correct color casts or to creatively alter the mood of the footage. For instance, shifting the color phase towards the blue can give a cooler, more clinical feel, while shifting it towards the red can warm up the image, making it feel more inviting or nostalgic.
Detail
The Detail setting controls the amount of sharpening applied to the image. Increasing the detail enhances the edges and textures, making the image appear sharper and more defined. However, too much detail can result in an overly sharp image that looks artificial, with visible halos around edges. Reducing the detail can soften the image, which might be desirable for a more cinematic, filmic look.
V/H Balance
V/H Balance refers to the balance between vertical and horizontal detail enhancement. Adjusting this setting allows you to emphasize either vertical or horizontal details more prominently, depending on the specific look you are aiming for. This is particularly useful in scenarios where one dimension of detail is more critical to the composition of the shot, such as in landscape or architectural photography.
B/W Balance
The B/W Balance setting controls the balance between black and white in the image, essentially adjusting the contrast between the darkest and brightest areas. This can be used to either increase or decrease the overall contrast of the image, making it either punchier and more dynamic or softer and more subdued. This setting is particularly useful for achieving a specific aesthetic, such as high-contrast black and white photography or a softer, more pastel-like color palette.
Limit
The Limit setting is used to control the maximum level of sharpening applied to the image. This is important because excessive sharpening can introduce unwanted artifacts, such as noise or halos around edges. By setting a limit, you can ensure that the image remains sharp and detailed without becoming overly processed or unnatural-looking.
Crispening
Crispening is a more advanced setting that adjusts the threshold at which detail enhancement is applied. It controls how much of the fine details in the image are sharpened. Higher crispening settings will sharpen even the smallest details, which can be useful for high-resolution images where fine textures are important. Lower crispening settings will leave the finer details softer, which can help to reduce noise and create a smoother image.
Hi-light Detail
Hi-light Detail adjusts the amount of detail preserved in the brightest areas of the image. This setting is particularly useful for scenes with a lot of bright highlights, such as sunny outdoor scenes or interiors with strong artificial lighting. By adjusting the Hi-light Detail, you can prevent these bright areas from becoming blown out, preserving texture and information that would otherwise be lost.
Color Filters
Color Filters allow you to apply a tint to the entire image, shifting the overall color balance towards a specific hue. This can be used for creative effect, such as adding a warm orange tint for a sunset scene or a cool blue tint for a nighttime shot. Color filters can also be used to correct unwanted color casts caused by lighting conditions or to match the color tone of the footage to other shots in a sequence.
Practical Applications of Sony Picture Profiles
Creating Cinematic Looks
One of the most common uses of Sony Picture Profiles is to create a cinematic look directly in-camera. By carefully adjusting settings like Gamma, Black Gamma, and Color Mode, you can emulate the look of traditional film stocks, creating footage that feels rich, textured, and visually engaging. For example, using a Cine Gamma curve with a Pro Color Mode and adjusted Black Gamma can give your footage a dramatic, film-like quality that is ideal for narrative filmmaking.
Matching Footage from Different Cameras
Another practical application of Sony Picture Profiles is in multi-camera shoots where you need to match the footage from different cameras. By using the same Picture Profile settings across all cameras, you can ensure that the footage has a consistent look, making it easier to edit and grade in post-production. This is particularly important in professional productions where multiple camera angles need to seamlessly cut together without jarring differences in color or contrast.
Optimizing Footage for Post-Production
For filmmakers who plan to do extensive color grading and post-production work, using Sony Picture Profiles like S-Log and S-Gamut can be extremely beneficial. These settings preserve the maximum amount of detail and color information, giving you greater flexibility in post-production to achieve the exact look you want. By starting with a flat, low-contrast image, you can push the colors and contrast much further in post, without losing detail or introducing artifacts.

Enhancing Detail in High-Resolution Footage
With the rise of 4K and even 8K video, the importance of detail in footage has never been greater. Sony Picture Profiles allow you to enhance the sharpness and clarity of high-resolution images through settings like Detail, V/H Balance, and Crispening. By fine-tuning these parameters, you can ensure that your footage makes the most of every pixel, delivering crisp, detailed images that look stunning on even the largest screens. However, it’s important to strike a balance—too much sharpening can introduce unwanted artifacts, while too little can make the image appear soft or out of focus.
Achieving Consistent Exposure in High-Contrast Scenes
High-contrast scenes, where the difference between the brightest and darkest areas is significant, can be challenging to capture effectively. Sony Picture Profiles offer tools like Knee and Black Gamma to manage these extremes, ensuring that both highlights and shadows are well-exposed. By adjusting the Knee setting, you can compress the highlights to retain more detail in bright areas without overexposing them. Similarly, Black Gamma allows you to control the depth and detail in shadows, preventing them from becoming too dark or losing texture.
Adapting to Different Lighting Conditions
Lighting can vary dramatically between different shooting environments, from bright daylight to dim interiors. Sony Picture Profiles allow you to adapt to these conditions by adjusting the Color Mode, Black Level, and Hi-light Detail settings. For instance, in a low-light situation, you might increase the Black Level slightly to bring out more detail in the shadows, while in bright conditions, you could lower the Black Level to deepen the contrast. Hi-light Detail is particularly useful in situations with strong, directional light, such as sunlight streaming through a window, as it helps to preserve the subtle textures in the brightest parts of the image.
Creative Color Grading
Color grading is an essential part of post-production, allowing filmmakers to set the mood and tone of their footage. However, the choices made in-camera can significantly influence the flexibility and outcome of the grading process. Sony Picture Profiles, with their extensive color controls, provide a solid foundation for creative grading. By starting with a well-balanced Color Mode and Saturation level, you can achieve a wide range of looks in post-production, from the warm, nostalgic tones of a sunset to the cool, stark ambiance of a moonlit night.
Ensuring Broadcast Compliance
For projects intended for broadcast, there are strict technical standards that must be adhered to, including limits on brightness, contrast, and color saturation. Sony Picture Profiles can be configured to ensure that your footage meets these standards straight out of the camera, minimizing the need for adjustments later. By setting appropriate limits on Detail, Saturation, and Black Level, you can produce footage that is ready for broadcast without the risk of technical issues during transmission.
Advanced Techniques with Sony Picture Profiles
Customizing Profiles for Specific Projects
While Sony offers a range of preset Picture Profiles, the real power lies in the ability to customize these profiles to suit specific projects. For instance, a documentary film might require a more natural, true-to-life color palette, while a music video might benefit from a highly stylized look with deep blacks and vibrant colors. By experimenting with different combinations of Black Level, Gamma, and Color Mode, you can create custom profiles that perfectly match the aesthetic requirements of your project.
Balancing Noise Reduction and Detail
Noise reduction is an important consideration, particularly when shooting in low-light conditions or at high ISO settings. However, aggressive noise reduction can sometimes blur fine details, resulting in a loss of image sharpness. Sony Picture Profiles allow you to balance noise reduction with detail retention through the Crispening and Detail settings. By carefully adjusting these parameters, you can reduce noise without sacrificing the clarity of your footage, ensuring that your images remain sharp and detailed even in challenging lighting conditions.
Leveraging S-Log for Maximum Dynamic Range
S-Log is one of the most powerful tools in Sony’s Picture Profile arsenal, offering an extended dynamic range that captures an incredible amount of detail in both shadows and highlights. This makes it ideal for high-contrast scenes, such as landscapes with bright skies and dark foregrounds. However, shooting in S-Log requires careful exposure management and a solid understanding of post-production grading techniques. The flat, low-contrast image produced by S-Log can be challenging to work with if you’re not familiar with color grading, but the rewards are substantial—once graded, S-Log footage can exhibit a richness and depth that’s difficult to achieve with standard profiles.
Using LUTs with Sony Picture Profiles
LUTs (Look-Up Tables) are a powerful tool for applying a specific look to your footage, and they can be used in conjunction with Sony Picture Profiles to achieve consistent color grading across different scenes and projects. By applying a LUT in-camera, you can get a preview of how your graded footage will look, helping you to make more informed decisions about exposure, white balance, and other settings on set. Alternatively, you can use LUTs in post-production to quickly apply a predefined look to your footage, ensuring that your final video has a consistent visual style.
Matching Film Stock Looks with Cine Profiles
For filmmakers who want to emulate the look of classic film stocks, Sony’s Cine gamma curves and color modes provide an excellent starting point. By combining Cine Gamma with a Pro or S-Gamut Color Mode, you can achieve the rich, textured look of traditional film, with smooth gradations and natural skin tones. This is particularly useful for narrative films and commercials, where the visual aesthetic plays a critical role in conveying the story or message.
Using Black Gamma for Stylized Looks
Black Gamma is a particularly powerful tool for creating stylized looks, as it allows you to precisely control the contrast and detail in the shadows. By lowering the Black Gamma, you can create deep, inky blacks that give your footage a moody, dramatic feel, reminiscent of noir films. Conversely, raising the Black Gamma can soften the shadows, creating a more ethereal, dream-like quality that’s perfect for romantic or fantasy scenes.
Creating Consistent Skin Tones
Achieving natural-looking skin tones is one of the most challenging aspects of color grading, and it’s an area where Sony Picture Profiles excel. By carefully adjusting the Color Mode, Saturation, and Color Phase settings, you can ensure that skin tones are accurate and consistent, regardless of the lighting conditions or camera settings. This is particularly important in projects where close-ups of people are a key component, such as interviews, documentaries, or narrative films.
Common Challenges and Solutions with Sony Picture Profiles
Dealing with Overexposed Highlights
One of the most common challenges in videography is dealing with overexposed highlights, particularly in scenes with bright skies or strong artificial lighting. The Knee setting in Sony Picture Profiles is specifically designed to address this issue, allowing you to compress the highlights and preserve detail in these bright areas. However, it’s important to use the Knee setting judiciously—if set too aggressively, it can result in unnatural-looking highlights with reduced contrast.
Managing Shadow Noise in Low-Light Conditions
Shooting in low-light conditions often results in increased noise in the shadow areas of the image. While noise reduction settings in Sony Picture Profiles can help mitigate this, it’s important to balance noise reduction with detail retention. Using the Black Gamma and Crispening settings, you can fine-tune the shadow areas to reduce noise without sacrificing too much detail. Additionally, shooting at the lowest possible ISO setting for the given lighting conditions can help minimize noise.
Avoiding Color Banding in Gradients
Color banding can be an issue when shooting scenes with smooth gradients, such as skies or walls with subtle color shifts. To minimize banding, it’s important to use a Picture Profile that offers a wide color space and smooth gradations, such as S-Gamut or Pro Color Mode. Additionally, ensuring that the footage is recorded at the highest possible bit depth (e.g., 10-bit 4:2:2) can help preserve the subtle color transitions and reduce the risk of banding in post-production.
Balancing Natural and Artificial Light Sources
Shooting in environments with a mix of natural and artificial light can create challenges in achieving consistent color balance. Sony Picture Profiles allow you to adjust the Color Mode, Color Phase, and White Balance settings to match the different light sources and create a cohesive look. Using a custom white balance setting and carefully adjusting the Color Phase can help you neutralize color casts and achieve a natural, balanced image.
Ensuring Consistency Across Multiple Cameras
In multi-camera productions, achieving consistent color and contrast across all cameras is essential. By using the same Sony Picture Profile settings on each camera, you can ensure that the footage matches seamlessly, making it easier to edit and color grade in post-production. This is particularly important when using cameras with different sensor sizes or color science, as it helps to create a uniform look across all shots.
Understanding the Tonal Curve
Adjustments and Impact on Photography and Videography
The tonal curve is a fundamental concept in image editing and color grading, influencing how light and dark areas are represented in both photography and videography. It defines the relationship between the input and output levels of brightness in an image, allowing for precise control over its tonal range. This section explores what a tonal curve is, how adjustments are made, and how these adjustments impact photography and videography.
What is a Tonal Curve?
A tonal curve, often referred to as a “curves” adjustment in editing software, is a graphical representation of the tonal values in an image. It is displayed as a diagonal line on a graph where:
- The horizontal axis represents the input tones (from shadows to highlights).
- The vertical axis represents the output tones (how those input tones are rendered in the final image).
By manipulating this curve, you can control the brightness and contrast of an image, affecting how shadows, midtones, and highlights are rendered.
Types of Tonal Curves
- Linear Curve: The default curve, which results in a direct 1:1 mapping of input to output tones. This means the image will have a standard brightness and contrast, without any adjustments.
- S-Curve: This curve creates an “S” shape, enhancing contrast by making shadows darker and highlights brighter. It is commonly used to add punch and depth to an image.
- Inverted Curve: This curve reverses the tonal values, turning shadows into highlights and vice versa. It is used for special effects or to correct exposure issues.
Adjusting the Tonal Curve
Adjusting the tonal curve involves modifying its shape to achieve desired effects:
- Shadows: Dragging the curve downward in the shadows region darkens the shadows, while lifting it brightens them. This adjustment affects the dark areas of the image.
- Midtones: Adjusting the middle section of the curve changes the midtones, impacting the overall balance of brightness and contrast in the image.
- Highlights: Raising the curve in the highlights region brightens the highlights, while lowering it darkens them. This adjustment impacts the lightest areas of the image.
- Point Adjustments: Specific points on the curve can be adjusted to target particular tonal ranges, allowing for more nuanced control.
Impact on Photography
- Contrast Enhancement: An S-curve adjustment increases contrast by making the darks darker and the lights lighter. This adds depth and dimension to photographs, making them more visually striking.
- Detail Enhancement: By adjusting the tonal curve, you can bring out details in shadows and highlights that might otherwise be lost, providing more texture and clarity.
- Mood and Atmosphere: The tonal curve can be used to evoke different moods. For instance, a lifted shadow curve can create a more ethereal, dreamy look, while a deep shadow curve can lend a dramatic, moody atmosphere.
- Exposure Correction: If an image is overexposed or underexposed, the tonal curve can be adjusted to correct these issues, enhancing the overall exposure and balance of the photo.
Impact on Videography
- Color Grading: In video editing, the tonal curve is crucial for color grading. It allows for fine-tuning of brightness and contrast, helping to achieve a specific cinematic look or match footage from different cameras.
- Dynamic Range: Adjusting the tonal curve in videography can expand or compress the dynamic range, which affects how well details are preserved in both bright and dark areas of the footage.
- Consistency: Applying consistent tonal curve adjustments across multiple clips ensures uniformity in brightness and contrast, maintaining a cohesive visual style throughout a video project.
- Creative Effects: Similar to photography, the tonal curve in videography can be used to create creative effects, such as vintage looks or high-contrast scenes, enhancing the narrative and aesthetic of the video.
The tonal curve is a powerful tool in both photography and videography that allows for precise control over an image’s brightness and contrast. By understanding how to adjust the tonal curve and its impact, you can enhance details, correct exposure issues, and achieve the desired mood and atmosphere in your images and footage. Whether you are aiming for dramatic contrasts, subtle nuances, or consistent color grading, mastering the tonal curve is essential for professional-quality visual content.
Detailed comparison between Fujifilm Film Simulations versus Sony Picture Profiles
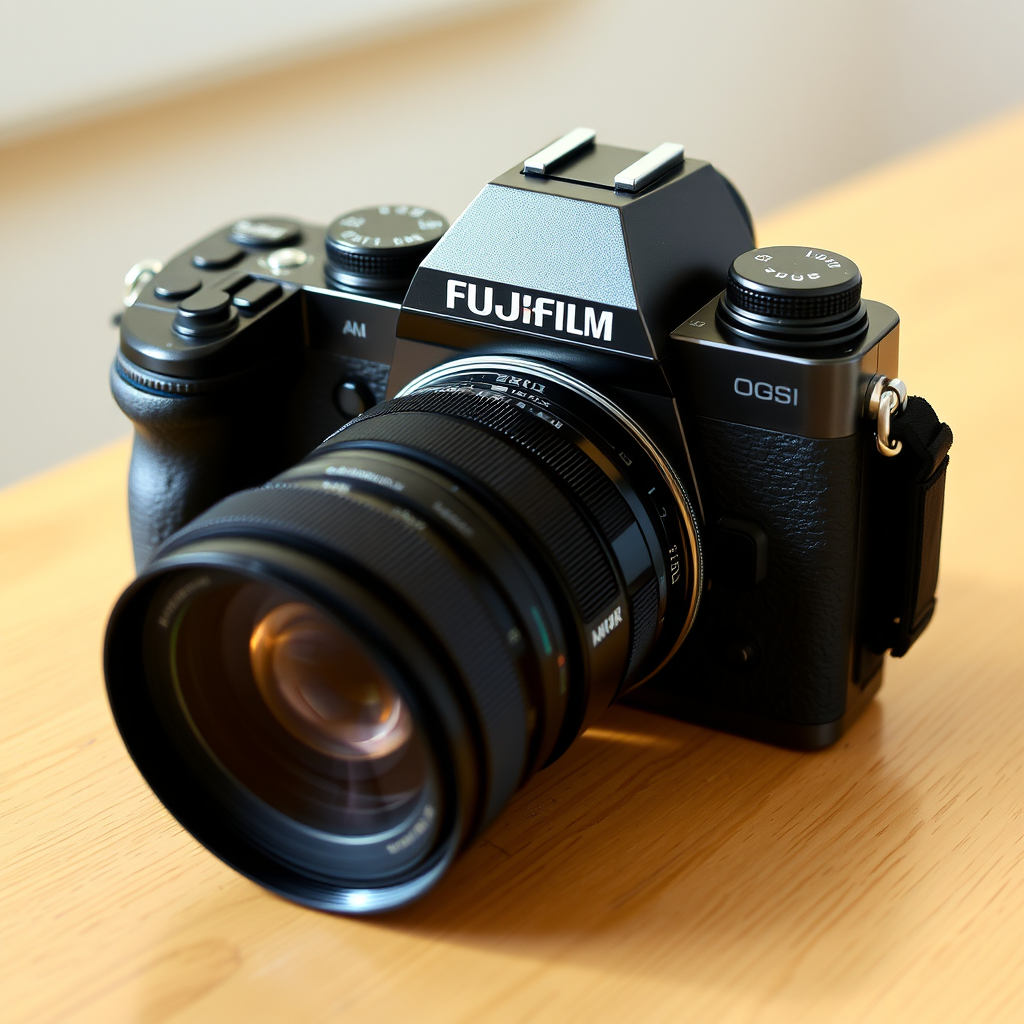
This is a hot favourite topic of photographers in all brands. People love film look and they want that their tool support the same. I am going to pick up Sony camera and check it out against Fujifilm. Admit it that Fujifilm camera’s look like analog Greek Gods! 😉 and rest of them are mere tools (save for Nikon ZF) .Let’s do this.
Detailed Tabular Comparison: Fujifilm Simulations vs. Sony Picture Profiles
| Aspect | Fujifilm Film Simulations | Sony Picture Profiles | Which is Better? |
| Purpose | Primarily designed for JPEG images, offering distinct film-like looks based on Fujifilm’s iconic films. Ideal for photographers who prefer minimal post-processing. | Designed for both photos and videos, providing extensive control over image parameters such as gamma, black level, color, and detail. | Depends on Use: Fujifilm for photography with minimal editing; Sony for extensive control in video production. |
| Flexibility | Limited flexibility; each simulation offers a fixed look with minimal adjustments beyond standard exposure, contrast, and saturation tweaks. | Highly flexible; users can fine-tune every aspect of the image including color, contrast, detail, and gamma, allowing for a wide range of creative expressions. | Sony: Offers more customization and is better suited for complex shooting scenarios. |
| Color Accuracy | Excellent color reproduction, particularly for skin tones and natural colors, with simulations like Provia, Velvia, and Astia being widely praised. | Sony allows for precise color adjustments, making it versatile but requiring careful setup to avoid unnatural results. | Fujifilm: Known for its vibrant yet natural color rendering, especially for photography. |
| Ease of Use | Very user-friendly; select a simulation and shoot. Ideal for those who want to achieve a specific look without needing to adjust numerous settings. | Requires more setup time and understanding of various settings, but offers more control for those who want to craft their image in-camera. | Fujifilm: Easier for quick, consistent results. Sony is better for those who want in-depth control. |
| Dynamic Range Handling | Limited compared to advanced profiles; relies more on the sensor’s native dynamic range. Highlights and shadows are controlled but less customizable. | Extensive dynamic range control through settings like S-Log and HLG, making it ideal for high-contrast scenes and professional video work. | Sony: Superior for high dynamic range scenes, especially in video production. |
| Film Emulation | Direct emulation of classic Fujifilm films like Provia, Velvia, Classic Chrome, and Acros, each offering a distinct, iconic look. | Not designed for film emulation, but can approximate film looks with careful tweaking of color, gamma, and detail settings. | Fujifilm: Best for those who want a genuine film-like look without post-processing. |
| Post-Processing | Minimal post-processing required; images often look good straight out of the camera. Ideal for photographers who prefer JPEGs. | Designed with post-processing in mind, especially for S-Log footage, which requires grading to achieve the final look. | Depends on Workflow: Fujifilm for minimal editing; Sony for extensive post-production work. |
| Video Capabilities | Limited video settings; film simulations can be used in video, but options are less tailored to video production needs. | Extensive video capabilities with profiles like S-Log, Cine, and HLG, making it suitable for professional video production. | Sony: Superior for professional video work with more detailed control over the image. |
| Profiles Available | Around 15 film simulations, each named after classic Fujifilm films, offering a variety of looks for different scenarios. | Multiple customizable profiles including S-Log, Cine, HLG, and Rec.709, each with various settings for tailoring the image. | Sony: Offers a broader range of options and customization, especially for video. |
| Noise Handling | Good noise handling in simulations, but relies on the camera’s base performance. No specific controls over noise reduction in profiles. | Customizable noise reduction settings, especially useful in low-light conditions or high-ISO scenarios. | Sony: Provides more control over noise reduction, especially in challenging lighting conditions. |
| Black Level & Gamma Control | Basic control over shadows and highlights through the camera’s standard settings, with limited customization. | Extensive control over black levels, gamma curves, and knee settings, allowing for precise management of shadows and highlights. | Sony: Superior for detailed tonal adjustments, especially in dynamic lighting scenarios. |
| Highlight Recovery | Limited highlight recovery; relies on the sensor’s native capability and basic exposure settings. | Advanced highlight control through settings like Knee, allowing for better retention of detail in bright areas. | Sony: Better for retaining highlight detail in high-contrast scenes. |
| Custom Profiles | No ability to create custom film simulations; users must choose from the available presets. | Fully customizable profiles, allowing users to save and apply specific settings for different shooting scenarios. | Sony: Offers more flexibility with custom profiles tailored to specific needs. |
| Skin Tone Rendering | Exceptional skin tone rendering, particularly with simulations like Pro Neg Std and Astia, making it popular for portrait photography. | Skin tone rendering is highly customizable, but requires careful adjustment to achieve natural results. | Fujifilm: More consistently pleasing skin tones out-of-camera, especially in portraiture. |
| Target Audience | Photographers who appreciate classic film aesthetics and prefer a streamlined, easy-to-use system for JPEG shooting. | Videographers and photographers who require extensive control over their image, with a focus on post-production and customization. | Depends on Needs: Fujifilm for photographers who value simplicity and film aesthetics; Sony for professionals needing full control over the image. |
Which is Better?
Fujifilm Simulations are generally better for photographers who prioritize ease of use, consistency, and a film-like aesthetic straight out of the camera. The simulations offer beautiful color science and skin tones, making them ideal for portrait, landscape, and street photography. They are particularly well-suited for JPEG shooters who want minimal post-processing.
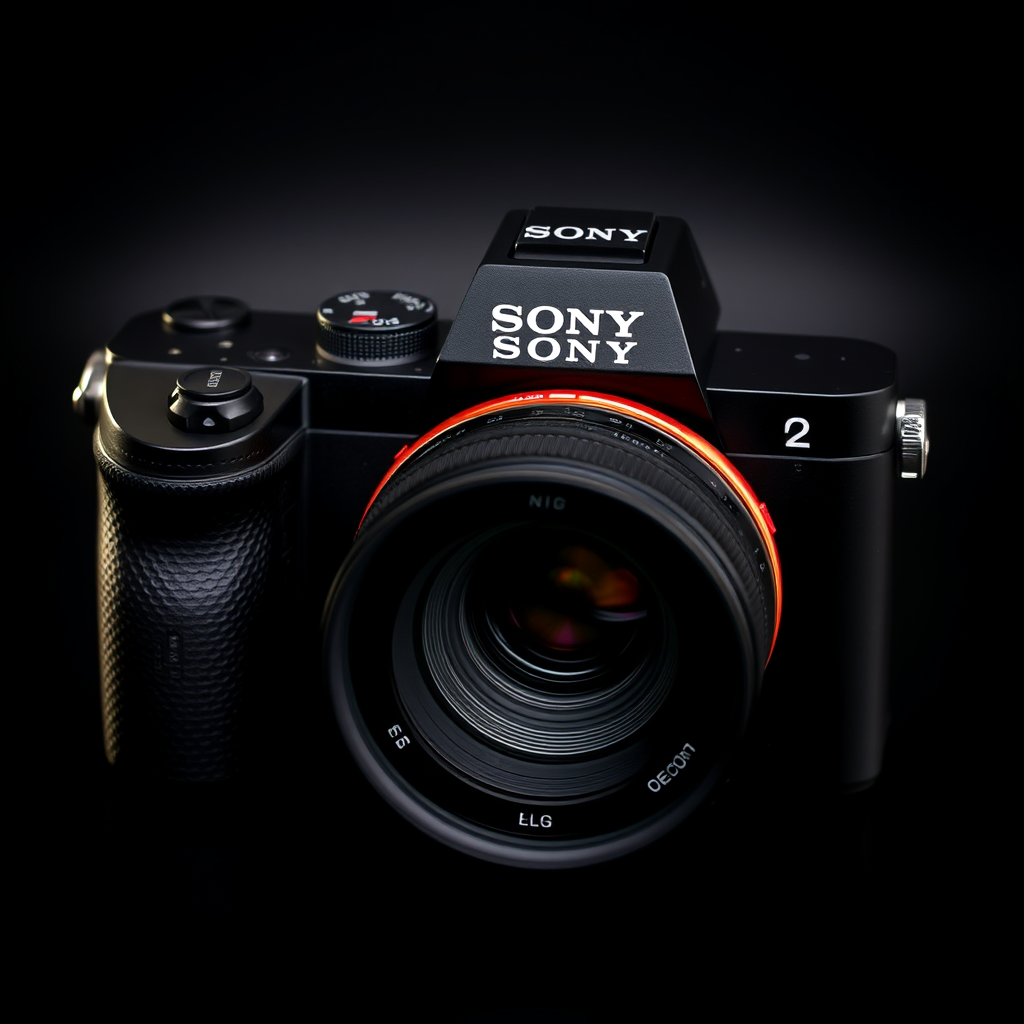
Sony Picture Profiles, on the other hand, are superior for those who require extensive control over their images, especially in video production. They offer a wide range of customizable settings that allow filmmakers and videographers to capture footage that can be heavily manipulated in post-production, making them a better choice for professionals who need flexibility and precision.
To Summarize:
- For photography with minimal editing: Fujifilm Simulations are the better choice.
- For video production and projects requiring extensive post-processing: Sony Picture Profiles excel.
Creating Sony Picture Profile emulating Fujifilm Eterna film simulation
Lets try to create a Sony Picture Profile setting that closely emulates the Fujifilm Eterna film simulation, you can follow these settings in your Sony camera. Eterna is known for its soft contrast, muted colors, and cinematic feel, making it a popular choice for video work. Although for Sony users S-Cinetone more or less does the same thing. Here’s the recipe –
Sony Picture Profile Settings to Emulate Fujifilm Eterna
| Sony Picture Profile Setting | Recommended Value | Description |
| Gamma | Cine4 | Cine4 provides a soft contrast similar to Eterna’s tone, preserving highlights and shadows. |
| Black Level | +5 | Raising the Black Level to +5 gives a softer black, similar to the low-contrast look of Eterna. |
| Black Gamma | Range: Wide / Level: +3 | Adjusting the Black Gamma Range to Wide and the Level to +3 softens the shadows, mimicking Eterna’s flat look. |
| Knee | Mode: Auto / Point: 80% / Slope: +2 | These settings help manage highlights by compressing them smoothly, similar to Eterna’s handling of bright areas. |
| Color Mode | Pro | Pro color mode offers a neutral palette that can be tweaked to match Eterna’s muted color tones. |
| Saturation | -8 | Lowering saturation to -8 reduces color intensity, aligning with Eterna’s desaturated look. |
| Color Phase | 0 | Keeping the Color Phase at 0 maintains neutral hues without any additional tint. |
| Color Depth | R: -2, G: -2, B: -2, C: -2, M: -2, Y: -2 | Reducing the depth of each color channel slightly helps in achieving Eterna’s balanced, understated color palette. |
| Detail | Level: -7 | Setting the Detail level to -7 reduces overall sharpness, emulating Eterna’s smooth, filmic texture. |
| V/H Balance | 0 | Leaving the V/H Balance at 0 keeps detail settings uniform across both vertical and horizontal edges. |
| B/W Balance | 0 | Maintaining a neutral Black/White Balance to avoid color cast, ensuring a clean image. |
| Limit | 0 | Keeping Limit at 0 ensures no additional clipping in highlights or shadows. |
| Crispening | 0 | Leaving Crispening at 0 maintains the intended softness without sharpening the image. |
| Hi-light Detail | -2 | Slightly reducing Highlight Detail mimics Eterna’s subtle highlight roll-off. |
| Color Filter | No Filter | No color filter is applied to retain the neutral color characteristic similar to Eterna. |
Additional Tips:
- Exposure: Adjust your exposure to slightly underexpose (by about 1/3 to 2/3 stops) to preserve more highlight detail, which is in line with Eterna’s look.
- White Balance: Use a slightly warmer white balance setting to mimic the subtle warmth of Eterna, especially in outdoor scenes.
This Sony Picture Profile setting should provide a close emulation of the Fujifilm Eterna simulation, offering a cinematic look with soft contrast, muted colors, and a smooth tonal range suitable for both photography and video work. Adjustments can be made according to personal preference or specific shooting conditions. Let me know if you have used it along with a few images you have taken with it.
Sample Images
Sample Images were taken indoors. These depict how ACROS simulation looks like. Almost no editing SOOC JPG.


Creating Sony Picture Profile emulating Fujifilm ACROS film simulation
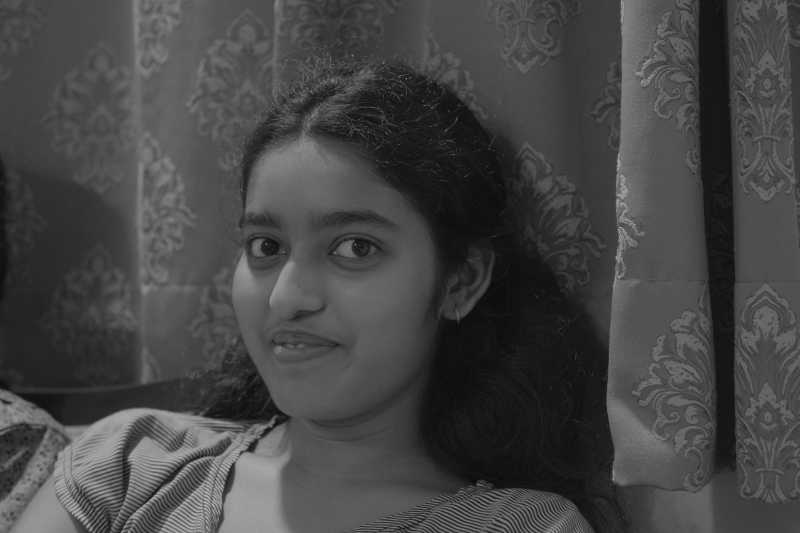
Acros is popular, its got is own charm and the world back in the days in Black and White used to look rich and photos had a character. Lets create a Sony Picture Profile setting that closely emulates Fujifilm Acros, which is known for its rich tonal gradation, deep blacks, and subtle grain structure, follow the settings below. Acros is a black-and-white film simulation renowned for its high contrast and fine detail, making it a favorite for monochrome photography.
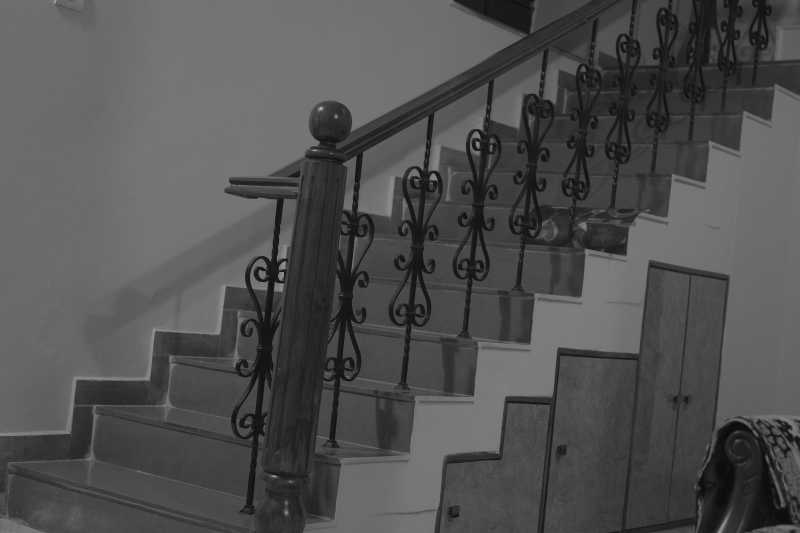
Sample Images
Sample Images were taken in the dark indoors. These depict how ACROS simulation looks like. Almost no editing SOOC JPG.

Sony Picture Profile Settings to Emulate Fujifilm ACROS
| Sony Picture Profile Setting | Recommended Value | Description |
| Gamma | S-Log2 | S-Log2 provides a wide dynamic range that can be adjusted to mimic the tonal depth of Acros. |
| Black Level | -5 | Lowering the Black Level to -5 enhances deep blacks, similar to the high contrast of Acros. |
| Black Gamma | Range: Narrow / Level: -2 | Narrowing the Black Gamma range and setting the level to -2 increases contrast in shadows, replicating the rich blacks of Acros. |
| Knee | Mode: Manual / Point: 85% / Slope: -3 | These settings help in preserving highlight details while maintaining the contrast characteristic of Acros. |
| Color Mode | Black & White | Switching to Black & White removes all color information, essential for mimicking Acros. |
| Saturation | N/A (Black & White Mode) | Saturation does not apply in Black & White mode, as all images will be monochrome. |
| Color Phase | 0 | Keeping Color Phase at 0 ensures no color shifts, which is crucial in black-and-white imaging. |
| Color Depth | N/A (Black & White Mode) | Color Depth settings are not applicable in Black & White mode. |
| Detail | Level: +2 | Increasing the Detail level to +2 enhances the sharpness and fine details, similar to Acros’ fine grain and crisp detail. |
| V/H Balance | +1 | A slight increase in vertical/horizontal balance sharpens the image edges, mimicking Acros’ clear line rendering. |
| B/W Balance | +1 | Adjusting B/W Balance slightly toward the white enhances the highlights |
Creating Sony Picture Profile emulating Fujifilm Classic Negative film simulation
Fujifilm’s Classic Negative simulation is renowned for its nostalgic, filmic look inspired by classic color negative films. It has a unique color palette with rich contrasts, subdued tones, and a distinctive rendering of highlights and shadows, which creates a slightly retro feel. To emulate this look on a Sony camera, the following Picture Profile settings can be adjusted:
Sony Picture Profile Settings to Emulate Fujifilm Classic Negative
| Sony Picture Profile Setting | Recommended Value | Description |
| Gamma | Cine4 | Cine4 provides a balanced dynamic range with slightly lifted shadows and soft contrast, similar to Classic Negative’s tonal curve. |
| Black Level | -3 | Lowering the Black Level to -3 deepens shadows slightly, mimicking the contrasty feel of Classic Negative. |
| Black Gamma | Range: Middle / Level: -1 | A middle range with a slight decrease in Black Gamma helps to create the contrasty, yet smooth shadow details found in Classic Negative. |
| Knee | Mode: Manual / Point: 80% / Slope: +1 | These settings help preserve highlight details while maintaining the filmic quality of Classic Negative. |
| Color Mode | Pro | The Pro color mode offers a neutral base that can be adjusted for the subdued yet rich colors characteristic of Classic Negative. |
| Saturation | -4 | Reducing saturation to -4 helps achieve the muted color palette that Classic Negative is known for. |
| Color Phase | +2 | A slight increase in Color Phase towards the warm spectrum emulates the subtle warm tones in Classic Negative, especially in skin tones. |
| Color Depth | R: -1, G: 0, B: -2, C: 0, M: -1, Y: +1 | These color depth adjustments replicate the Classic Negative’s distinct rendering: slightly subdued reds and blues, neutral greens and cyans, with a touch of warmth in yellows. |
| Detail | Level: -2 | Setting the Detail level to -2 softens the image slightly, emulating the classic film look without too much digital sharpness. |
| V/H Balance | 0 | Keeping V/H Balance at 0 ensures a balanced sharpness across both vertical and horizontal edges. |
| B/W Balance | 0 | Maintaining a neutral Black/White Balance prevents any unwanted color cast, keeping the image true to the intended Classic Negative style. |
| Limit | 0 | Keeping Limit at 0 ensures that highlights and shadows remain within a natural range, similar to Classic Negative’s handling of tonal extremes. |
| Crispening | 0 | Leaving Crispening at 0 ensures the image retains its intended softness and doesn’t become overly sharp. |
| Hi-light Detail | -1 | Slightly reducing Highlight Detail helps retain the softer highlight roll-off that Classic Negative is known for. |
| Color Filter | No Filter | No color filter is applied to maintain the subtle and balanced color characteristic of Classic Negative. |
Sample Images
Here are a few sample images I have posted with this picture profile.

Additional Tips:
- Exposure: Classic Negative often benefits from slight underexposure to enhance its contrast and color rendering. Consider underexposing by about 1/3 stop.
- White Balance: Adjust white balance to slightly warm or cool depending on the scene to match the vintage feel of Classic Negative.
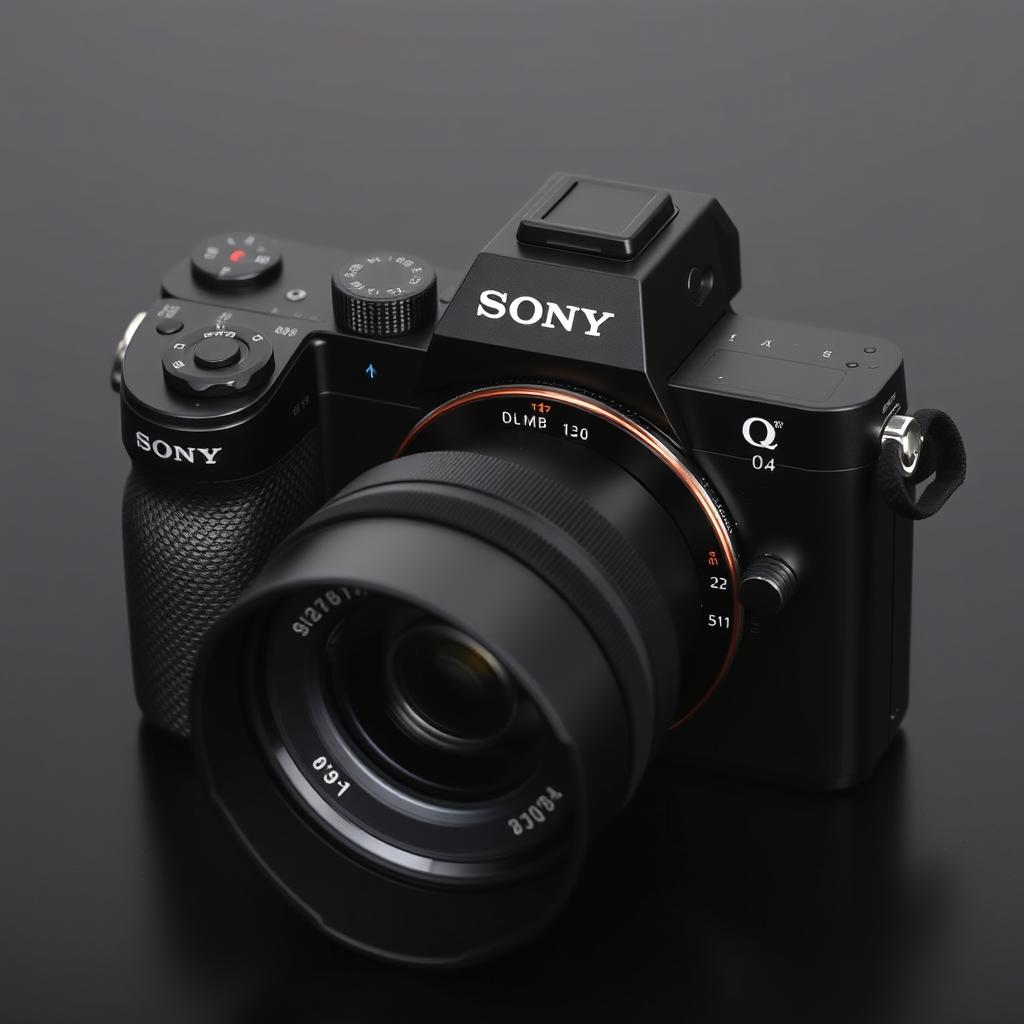
These Sony Picture Profile settings will help you achieve a look reminiscent of Fujifilm’s Classic Negative simulation, with its nostalgic color palette and contrasty yet soft tones. These settings can be fine-tuned further based on specific shooting conditions and personal preference.
Conclusion
Sony Picture Profiles offer an incredibly powerful and flexible toolset for filmmakers, videographers, and content creators looking to achieve professional-quality footage straight out of the camera. From adjusting Black Level and Gamma to fine-tuning Color Mode and Detail, these profiles provide a comprehensive range of options for customizing the look of your footage. Whether you’re aiming for a cinematic look, matching footage from multiple cameras, or optimizing for post-production, understanding and mastering Sony Picture Profiles can elevate the quality of your work and give you greater control over your visual storytelling.
By exploring the various aspects of Sony Picture Profiles—such as Black Gamma, Knee, Hi-light Detail, and Color Filters—you can unlock new creative possibilities and ensure that your footage not only meets but exceeds your creative vision. Whether you’re a seasoned professional or an aspiring filmmaker, the ability to manipulate these settings to achieve the perfect image is an invaluable skill in today’s visually driven world. With practice and experimentation, you can harness the full potential of Sony Picture Profiles to create stunning, cinematic visuals that captivate and inspire your audience.
Interesting Reads


There is definately a lot to find out about this subject. I like all the points you made