

![[keyword]](https://learnxyz.in/wp-content/uploads/2026/04/1775879979_Build-a-NAS-with-FreeBSD-on-a-Raspberry-Pi.jpg)
March 17, 2026
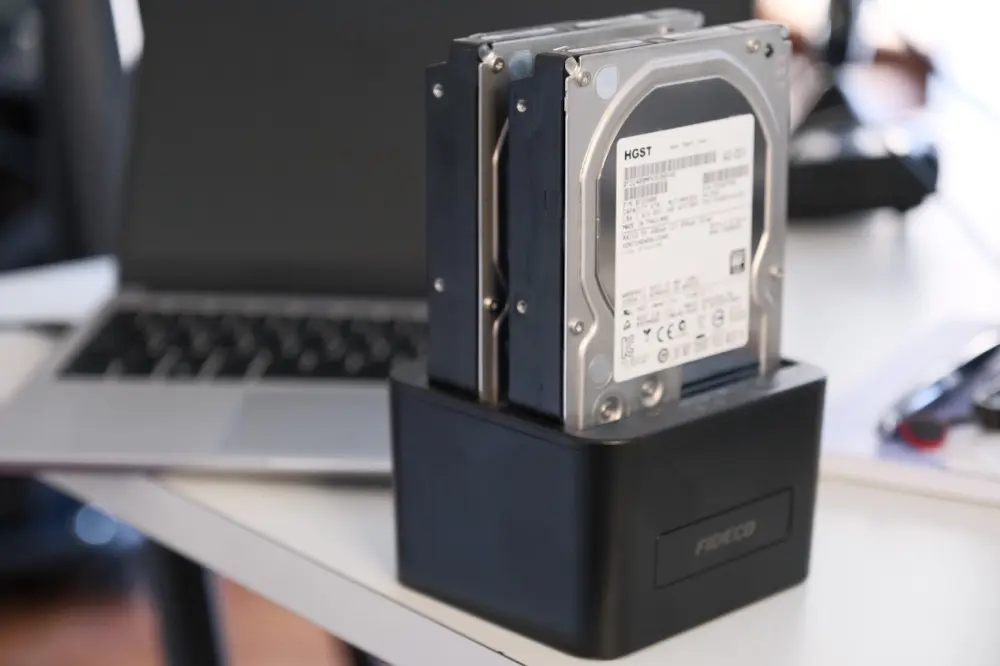
FreeBSD runs on this…

FreeBSD runs on this…

and FreeBSD runs on this …!

Running FreeBSD on a Raspberry Pi is easy. Managing multiple hard drives with ZFS is easy. So we wondered if it was possible to make a simple NAS out of a Pi…
I’m using the latest 15.0 release here – the project automatically generates images for the Pi, which makes life much easier. Download the FreeBSD-15.0-RELEASE-arm64-aarch64-RPI.img.xz image from here and transfer it to a micro SD card for the Pi. If you’re already au fait with putting images on physical media, I won’t say another word. However, if you are new to it, the ‘dd‘ command on any Unix-a-like operating system is your friend, or a GUI tool like Balena Etcher will also suffice.
Before we start the Pi, there are a few things we need to be aware of. We all know FreeBSD as a rock-solid server operating system, although a lot of work has been going on in the last year or so to bring that stability laptops and computers. WiFi support is getting better, but since it hasn’t historically been the connectivity of choice for servers, the Pi’s WiFi isn’t currently supported. That’s all to say, you’re going to want to connect your Pi to Ethernet.
Second, monitoring the Pi’s boot before we have network connectivity is useful – so connect a monitor to the Pi’s HDMI port. The Pi I have here (a 4b) didn’t want to display anything at first, and I found (from this useful Wiki page) that I had to edit config.txt on the boot SD card. Before we do, one last caveat – FreeBSD doesn’t support the latest Pi 5 very well. For now, it’s better to stick with the Pi4.
The EFI partition is MS-DOS format; mount it (if your OS didn’t mount it automatically) and change the (pi) section in config.txt to look like this:
(pi4)
hdmi_safe=0
armstub=armstub8-gic.bin
max_framebuffers=2
hdmi_force_hotplug=1
hdmi_group=1
hdmi_drive=2
hdmi_mode=16
Provided you have the ethernet connected to your network, and you have DHCP, it will automatically get an IP address when it starts up.
By default the image has a ‘freebsd’ account, with a password of ‘freebsd’, and a root account with a password of… you get the idea. However, you can only ssh in with the freebsd account, and su to root.
Let’s build a NAS
I was curious to know if I could use some old hard drives I had, and if I could turn the Pi into a NAS by sharing files over the network.
Not a recommendation for production
Plug in the USB caddy and tail /var/log/messages:
Mar  6 17:04:25 generic kernel: ugen0.4:  at usbus0
Mar  6 17:04:25 generic kernel: umass0 on uhub0
Mar  6 17:04:25 generic kernel: umass0:  on usbus0
Mar  6 17:04:25 generic kernel: umass0:  SCSI over Bulk-Only; quirks = 0x0
Mar  6 17:04:25 generic kernel: umass0:0:0: Attached to scbus0
Mar  6 17:04:25 generic kernel: da0 at umass-sim0 bus 0 scbus0 target 0 lun 0
Mar  6 17:04:25 generic kernel: da0:  Fixed Direct Access SPC-4 SCSI device
Mar  6 17:04:25 generic kernel: da0: Serial Number AAAABBBB0490
Mar  6 17:04:25 generic kernel: da0: 400.000MB/s transfers
Mar  6 17:04:25 generic kernel: da0: 3815447MB (7814037168 512 byte sectors)
Mar  6 17:04:25 generic kernel: da0: quirks=0x2
Mar  6 17:04:25 generic kernel: da1 at umass-sim0 bus 0 scbus0 target 0 lun 1
Mar  6 17:04:25 generic kernel: da1:  Fixed Direct Access SPC-4 SCSI device
Mar  6 17:04:25 generic kernel: da1: Serial Number AAAABBBB0490
Mar  6 17:04:25 generic kernel: da1: 400.000MB/s transfers
Mar  6 17:04:25 generic kernel: da1: 3815447MB (7814037168 512 byte sectors)
Mar  6 17:04:25 generic kernel: da1: quirks=0x2
Let’s create our storage pool with those two drives. I think we will reflect them:
root@generic:~ # zpool create -f store mirror da0 da1
root@generic:~ # zfs list
NAME    USED  AVAIL  REFER  MOUNTPOINT
store   384K  3.51T    96K  /store
Yes, it is it easy!
We want the zpool to come back on reboot, so let’s ensure that zfs loads:
root@generic:~ # service zfs enable
zfs enabled in /etc/rc.conf
If we want our storage to be Network Attached, the obvious solution is Samba. Network shares over SMB will be available for all types of operating systems, including Windows and macOS.
Because this is a fresh install, the pkg command itself has not yet been installed. But helpfully, it can boot itself:
root@generic:~ # pkg update
The package management tool is not yet installed on your system.
Do you want to fetch and install it now? (y/N): y
Bootstrapping pkg from pkg+https://pkg.FreeBSD.org/FreeBSD:15:aarch64/quarterly, please wait...
Now we can install Samba. I selected the latest version available:
root@generic:~ # pkg install -y samba423
Updating FreeBSD-ports repository catalogue...
FreeBSD-ports repository is up to date.
Updating FreeBSD-ports-kmods repository catalogue...
FreeBSD-ports-kmods repository is up to date.
All repositories are up to date.
Updating database digests format: 100%
The following 82 package(s) will be affected (of 0 checked):

New packages to be INSTALLED:
(snip)
Give it a few minutes, depending on your network speed.
Once installed, we’ll need to create Samba’s configuration file, /usr/local/etc/smb4.conf (I just have the textbook):
(global)
workgroup = FOUNDATION
server string = Pi Samba Version %v
netbios name = RaspberryPi
wins support = Yes
security = user
passdb backend = tdbsam

(store)
path = /store
valid users = freebsd
writable  = yes
browsable = yes
read only = no
guest ok = no
public = no
create mask = 0666
directory mask = 0755
Run testparm to check if the configuration is OK:
root@generic:~ # testparm
Load smb config files from /usr/local/etc/smb4.conf
Loaded services file OK.
Weak crypto is allowed by GnuTLS (e.g. NTLM as a compatibility fallback)

Server role: ROLE_STANDALONE

Press enter to see a dump of your service definitions

# Global parameters
(global)
        netbios name = RASPBERRYPI
        security = USER
        server string = Pi Samba Version %v
        wins support = Yes
        workgroup = FOUNDATION
        idmap config * : backend = tdb


(store)
        create mask = 0666
        path = /store
        read only = No
        valid users = freebsd
If you restrict the share to given user(s), you will need to create them for Samba with pdbedit:
root@generic:~ # pdbedit -a -u freebsd
new password:
retype new password:
Unix username:        freebsd
NT username:
Account Flags:        (U          )
User SID:             S-1-5-21-2694234615-196936691-1629692636-1000
Primary Group SID:    S-1-5-21-2694234615-196936691-1629692636-513
Full Name:            FreeBSD User
Home Directory:       \\RASPBERRYPI\freebsd
To make the Pi appear on the mDNS/Bonjour .local network, I also enable the avahi daemon:
root@generic:~ # service dbus enable && service avahi-daemon enable && service dbus start && service avahi-daemon start
dbus enabled in /etc/rc.conf
avahi_daemon enabled in /etc/rc.conf
Starting dbus.
Starting avahi-daemon.
This is probably not pertinent in a data center. But then again, neither is a storage pool connected to a Raspberry Pi via USB… 😉
Everything looks good enough to activate the share:
root@generic:~ # service samba_server enable
samba_server enabled in /etc/rc.conf
root@generic:~ # service samba_server start
Performing sanity check on Samba configuration: OK
Starting nmbd.
Starting smbd.
Finally, on a Pi 4, which is this example, I run sysrc ntpdate_enable=”YES” because there is no real-time clock. You can buy RTC modules for the older Pis, but see previous paragraph.
Let’s see if a computer on the network can see it:
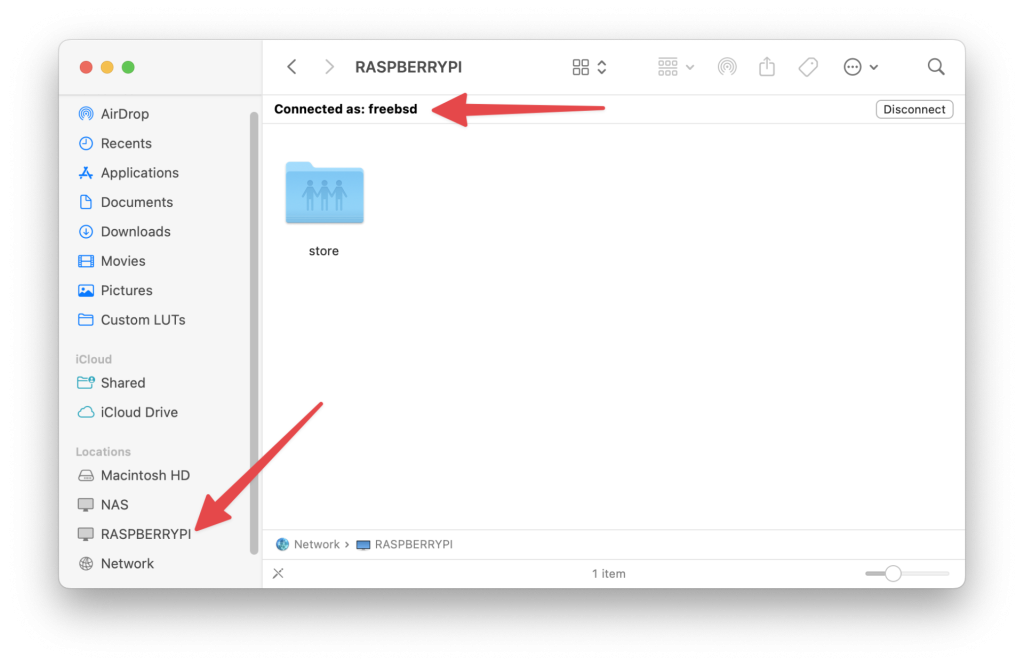
Sorted!
Closure
If we want to disconnect the pool, it is also very simple:
root@generic:~ # service samba_server stop
Stopping smbd.
Waiting for PIDS: 6629.
Stopping nmbd.
Waiting for PIDS: 6622.
root@generic:~ # zpool export store
root@generic:~ # zpool status
no pools available
The USB caddy can now be pulled from the running Pi. And later added again as required:
root@generic:~ # zpool list
no pools available
root@generic:~ # zpool import store
root@generic:~ # zpool list
NAME    SIZE  ALLOC   FREE  CKPOINT  EXPANDSZ   FRAG    CAP  DEDUP    HEALTH  ALTROOT
store  3.62T   596K  3.62T        -         -     0%     0%  1.00x    ONLINE  -
It’s back!
This was a quick look at how easy it is to use FreeBSD on a Raspberry Pi, which is a great little device for testing ideas, or learning some basics of the operating system. It was also a demonstration of how easy it is to use ZFS at a basic level – with volume and file system management built in. Hopefully this has whetted your appetite to go and experience a bit too.
We regularly post new posts – and videos – for technical topics. So make sure you are subscribed to the YouTube channel and follow this feed in your favorite RSS reader. There is also the newsletterif you want to receive updates by email.
We’d like this content series to be interactive too – so what would you like us to cover? What FreeBSD questions can we help you tackle? Get in contact with your ideas.

![[keyword]](https://learnxyz.in/wp-content/uploads/2026/02/Inside-the-app-where-Queer-Gooners-run-for-free.jpg)

![[keyword]](https://learnxyz.in/wp-content/uploads/2026/02/Fix-broken-updates-uCareSystem-new-release-uCareSystem-v2512.jpg)