

![[keyword]](https://learnxyz.in/wp-content/uploads/2026/03/1774969779_How-to-Backup-Your-iPhone-to-iCloud-MacOS-or-Windows.jpg)
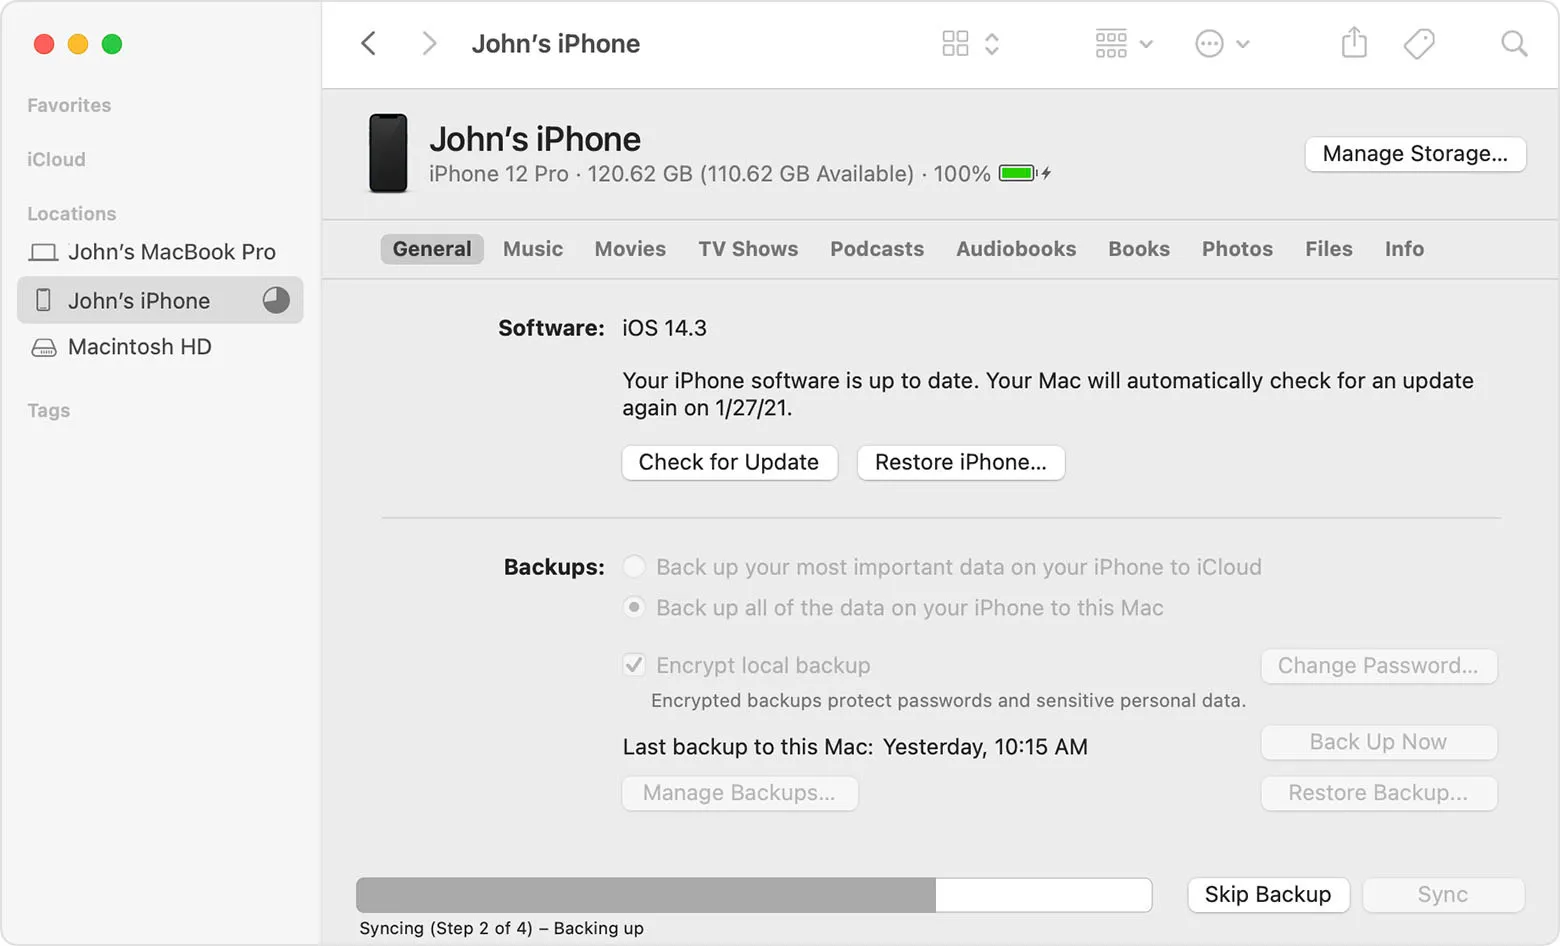
Courtesy of Apple
You can also manage past backups from here and choose to sync different types of media to your computer while you’re at it.
Backup to MacOS Mojave 10.14 or earlier
iTunes isn’t dead yet. The service is still available on older OS versions, so you can still back up everything there. Here’s how:
- Once your phone is plugged into your Mac, open iTunes and click the Device button at the top left of the iTunes window.
- Click Summary under your iPhone.
- Choose Backup now under Backup. This creates a backup of everything on your iPhone, including all your app data, so you don’t have to sign in to all your accounts again. It also saves your home screen layout, so you don’t have to drag a bunch of icons around.
- If you want to encrypt your backup, click on Encrypt backup of iPhone and type a password, then click Set password.
Pro tip: New backups now overwrite the old ones, but if you click Manage backupsright-click on a backup, and select Archiveyou can save multiple backups over time. Just dive into iTunes Preferencesclick on Devicesand click Summary for your iPhone to see a list of each backup. As long as the one you need is there, you can hit Restore backup.
Backup to a Windows computer
You can also backup your iPhone on your Windows computer using iTunes. Here’s how:
- Connect your iPhone to your Windows computer.
- Open iTunes and click on iPhone button at the top left of the iTunes window.
- Click Summary.
- Choose Backup now under Backup.
- If you want to encrypt your backup, click on Encrypt local backups and type a password and then click Set password.
How to Turn on Wi-Fi Sync
You probably don’t want to have to connect every time you back up files. Fortunately, you can turn on Wi-Fi syncing between your iPhone and computer with these steps:
- Connect your iPhone to your computer.
- On a Mac, open Finder and select your iPhone in the sidebar. Click General at the top, and select Show this iPhone when on Wi-Fi. On a Windows computer, open iTunesclick on iPhone button near the top left, then Summaryand choose Sync with this iPhone over Wi-Fi in Options.
- Click Apply.
Backup to other cloud services
We all take a lot of pictures with our phones, and we want to be able to look back on those moments at a later time. Backing up to iCloud or your computer will get the job done, but it doesn’t hurt to store all your family photos and vacation photos in a second location.
The Google Photos app is a great way to make sure your photos stay safe as you get them 15 GB of storage for free. As a bonus, the app allows you to clear your iPhone’s camera roll once all your photos are backed up—nice if your phone is low on storage. If you’d rather avoid Google, we have various alternatives rounded up hereand there are many others cloud storage services to choose from.
Backup locally
Maybe you prefer not to use the cloud or Apple’s services for your backups. You can always use the methods listed above for Mac or Windows to download files, then manually transfer them to a portable hard drive or usb flash drivealthough it is a bit of a hassle.
If you have network attached storage (NAS), there’s probably an app that can automatically back up some of your files when you’re connected to home Wi-Fi. Synology, Asustor and most other NAS manufacturers have applications for photo and video backup and general files. You can also consider something like this iMazing or Photo Syncalthough you may have to pay to access all features.
Backup within applications
Some apps, mostly messaging apps, have their own backup systems built in. Here are some examples, but check out your favorites.
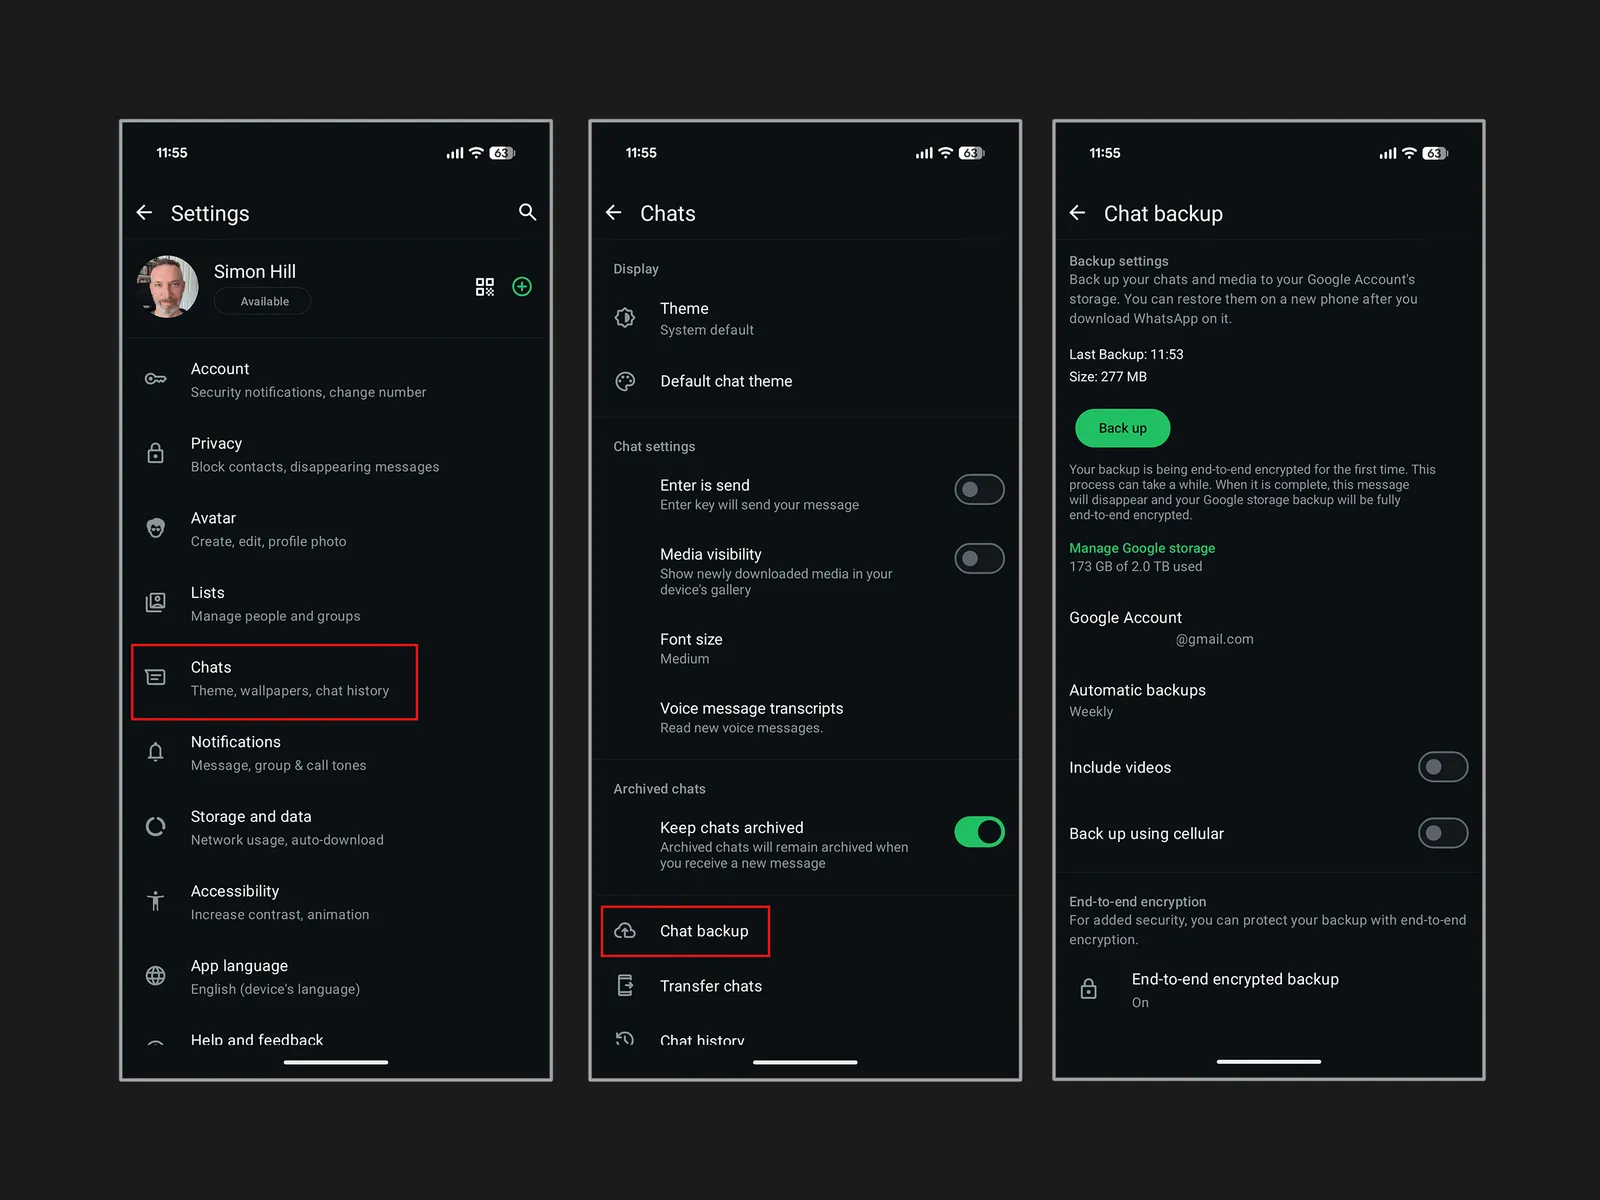
WhatsApp via Simon Hill

![[keyword]](https://learnxyz.in/wp-content/uploads/2026/03/1773591493_3-ओपन-सोर्स-डायग्रामिंग-टूल-जो-वास्तव-में-ल्यूसिडचार्ट-से.jpg)
![[keyword]](https://learnxyz.in/wp-content/uploads/2026/03/1774671428_Most-people-ignore-this-powerful-Windows-productivity-feature.jpg)
![[keyword]](https://learnxyz.in/wp-content/uploads/2026/02/Peacock-Promo-Codes-40-Off-February-2026.jpg)