

You know what’s always been there, but has increased several times over the past decade? Yes, remote work. These days, your teams are usually not in the same place, not sometimes in the same country. With the distributed teams and people working from different locations, it is very common for them to access your business infrastructure from multiple locations such as airports, cafes, their home or even from their mobile data connection. The fundamental problem is that the internet is a public space which means you are at risk all the time. So you need something that can make a secure and private connection between your company’s servers and your teams connected to them.
This is where OpenVPN comes in, you can get it Access to server and easily deploy it on VMs, Cloud like AWS, Azure etc. or even on your own infrastructure. So what it does is it builds a secure encrypted tunnel-like connection between the company’s VPN server and the users (team members). So, it’s really like they’re on the same network, even though they’re thousands of miles apart.
In this tutorial I will show you how to deploy OpenVPN Access Server on Ubuntu 24.04 installed on a VM on my own machine. You can install it on your Ubuntu server in the same way, there is no difference in the procedure.
Part-1: Set up OpenVPN Access Server on Ubuntu 24.04 (VM).
1. Register for OpenVPN Access Server
Register for OpenVPN Access Server account: https://myaccount.openvpn.com/signup
You can get a free 14-day trial.
2. Update and upgrade Ubuntu before installing OpenVPN Access Server
You need to update and upgrade your Ubuntu system using these commands:
Then:
Once done, go ahead and reboot:
Once your system reboots, it will update again.
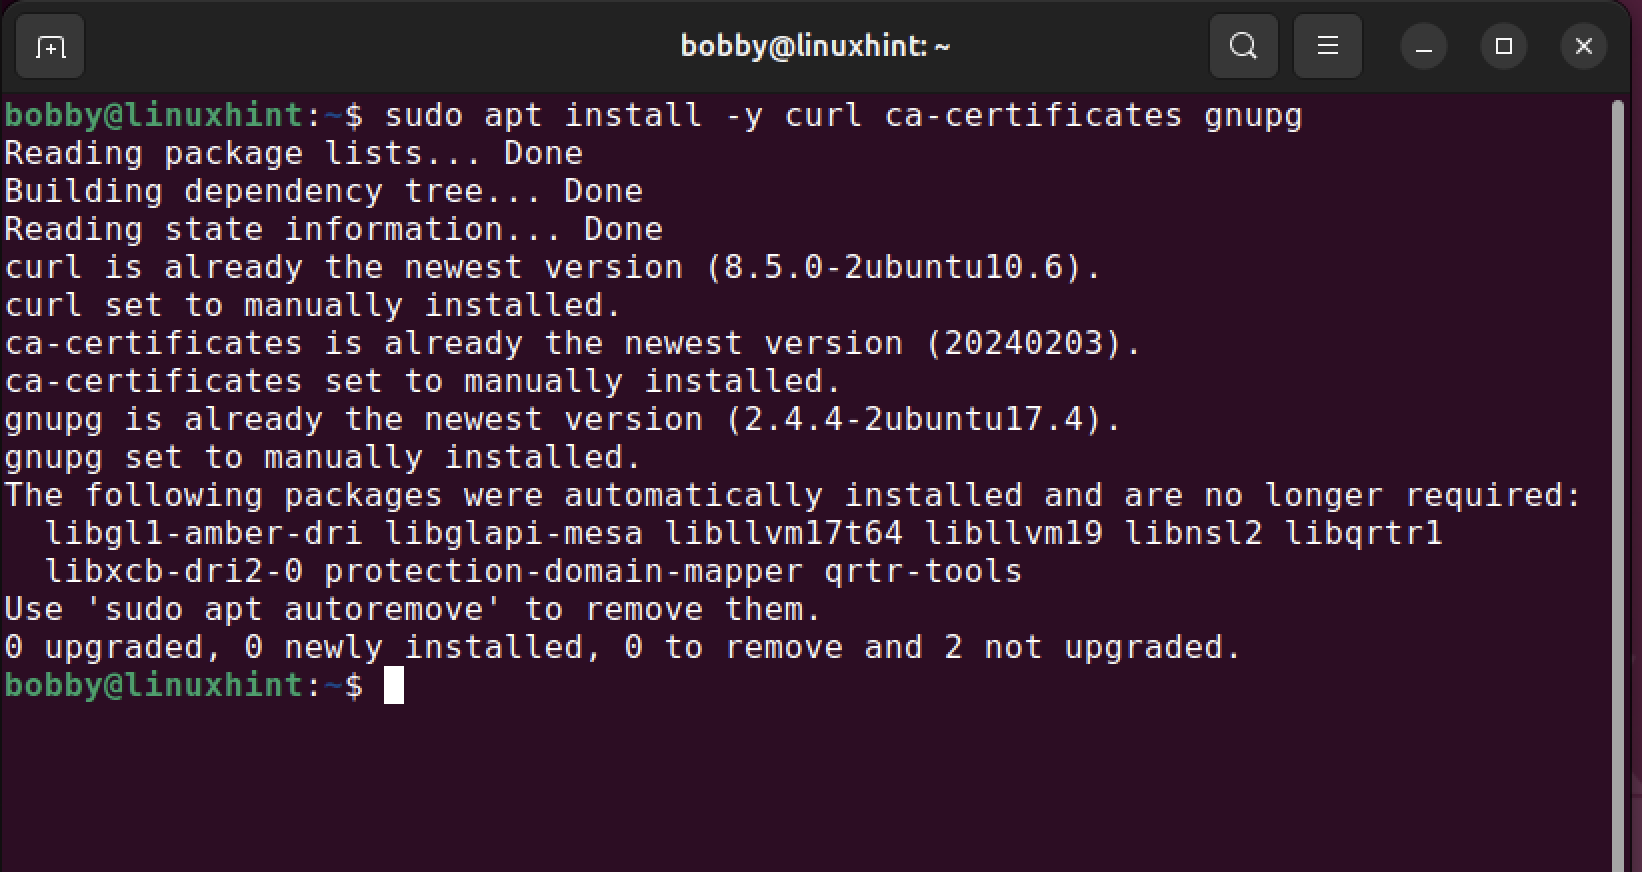
3. Install required dependencies (curl, ca-certs, gnupg)
You need to install the required dependencies:
sudo appropriate install -and curl ca certificates gnupg
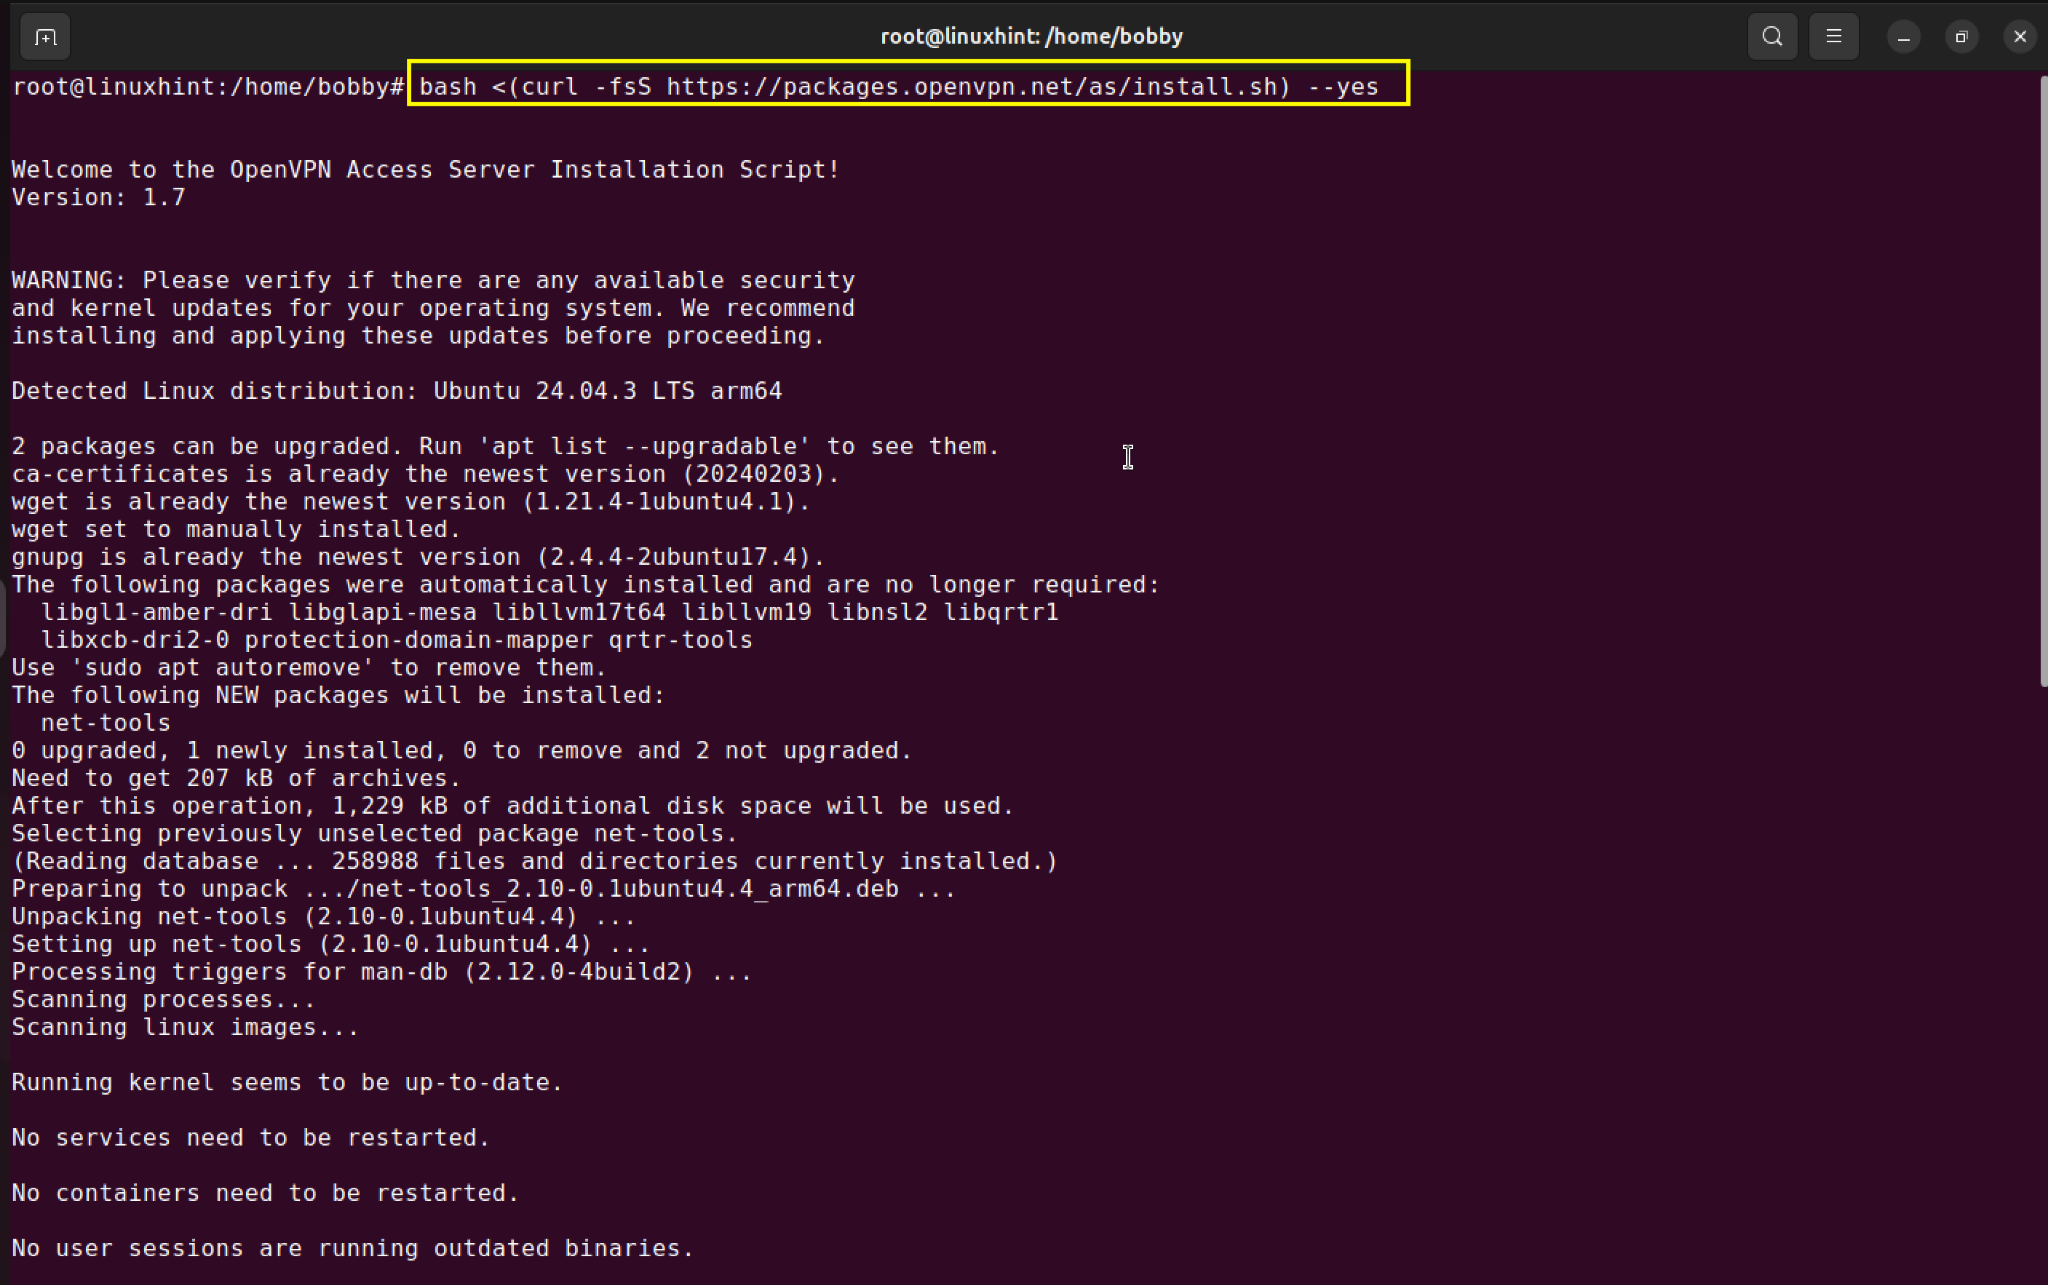
4. Switch to Root & Install OpenVPN Access Server
First, you need to become the root user:
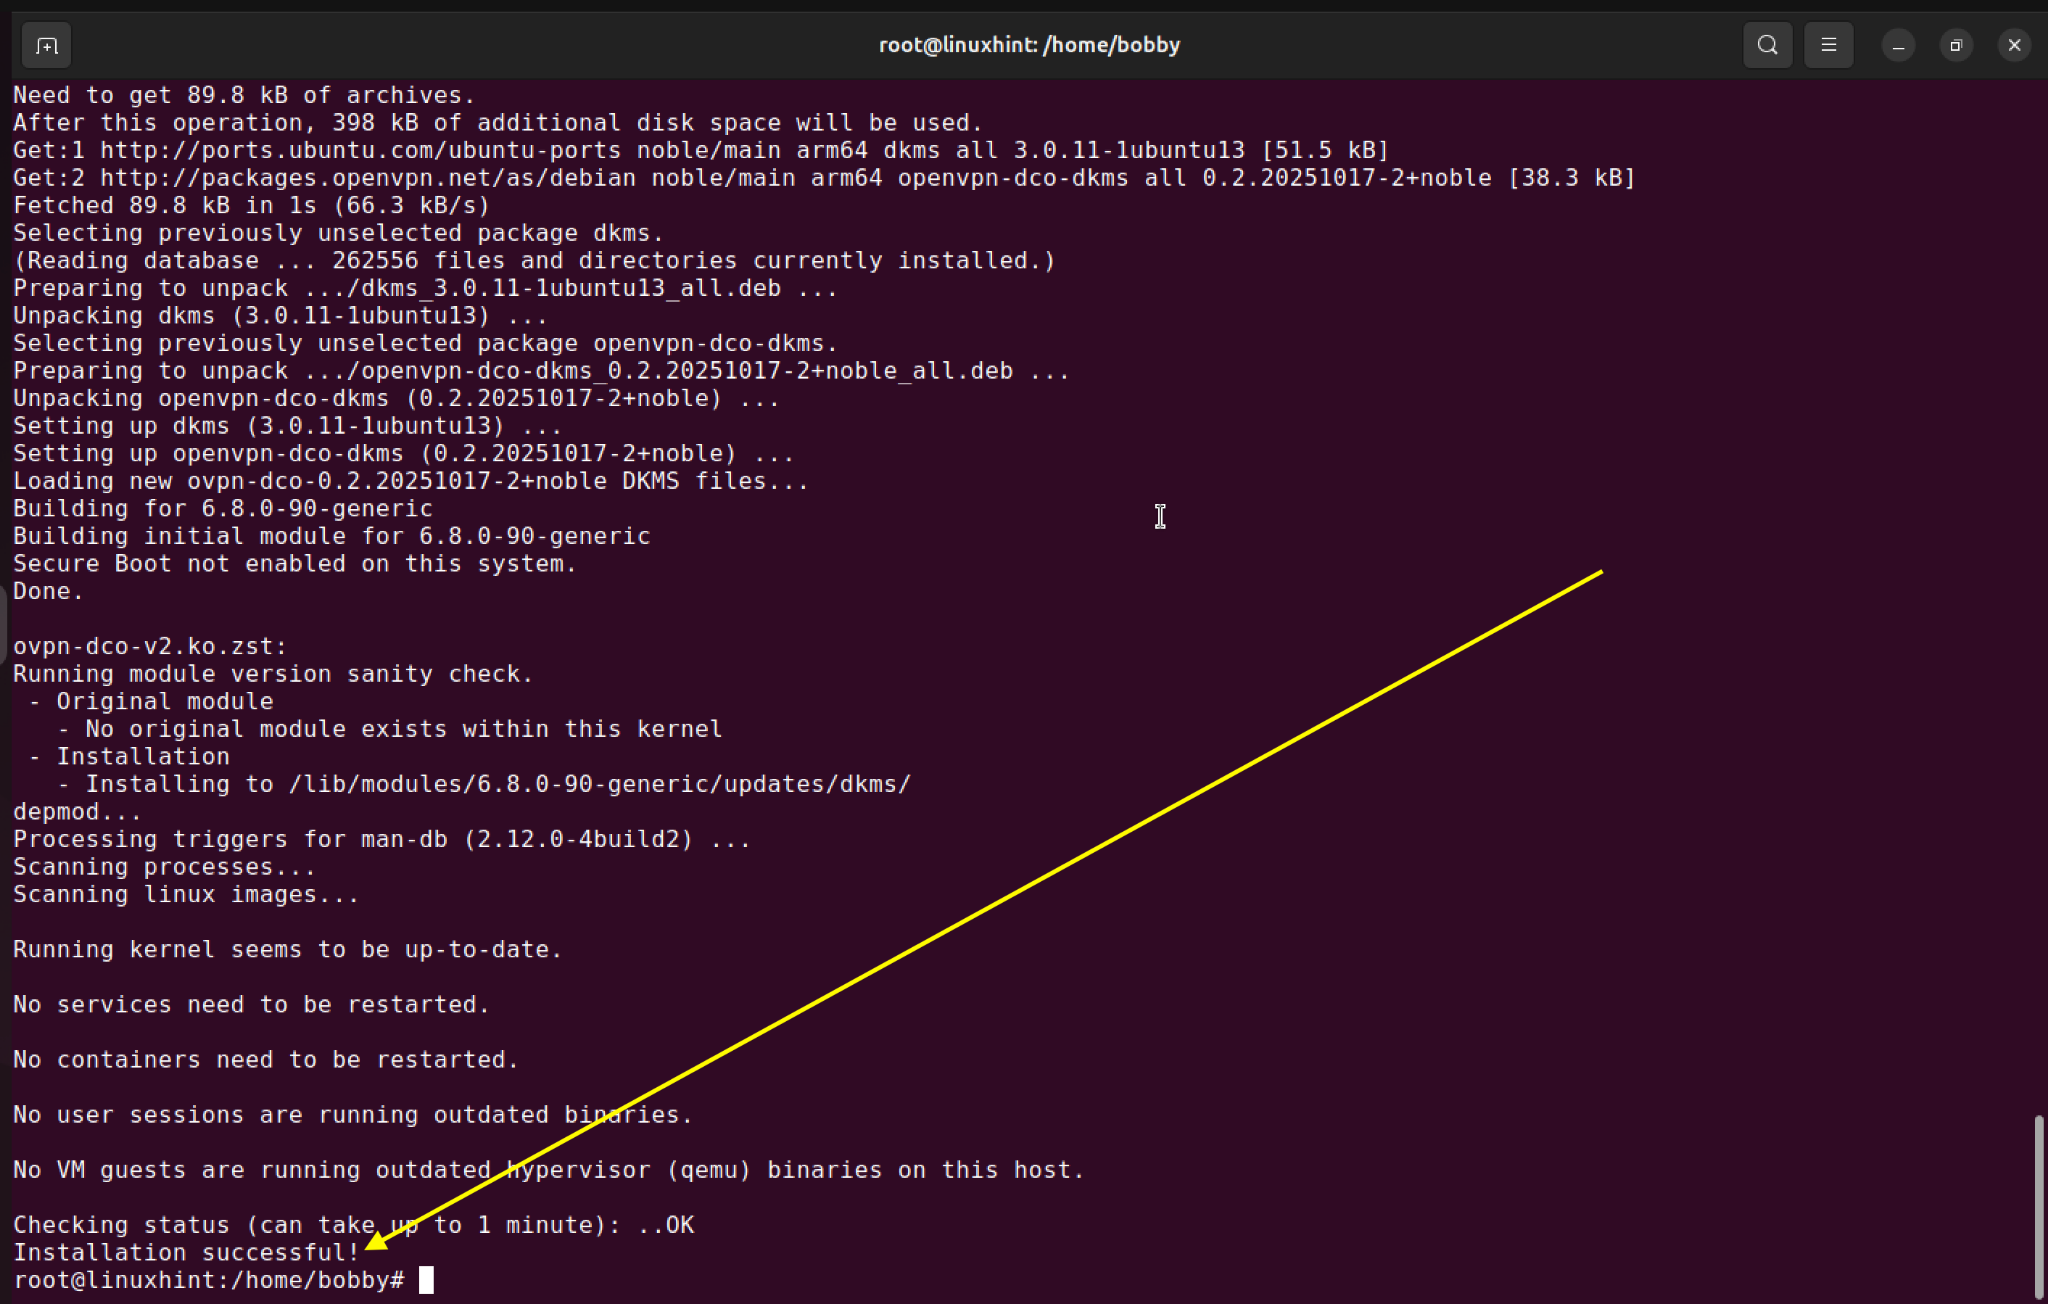
Then install the OpenVPN Access Server with this command:
Bash <(curl -fsS https://packages.openvpn.net/bait/install.sh) –yes
You will get the installation successful message:
5. Open the Admin UI and Login with Temporary Password
After the installation, scroll back and find this section where you will see Admin UI, Client UI, a username and a temporary password.
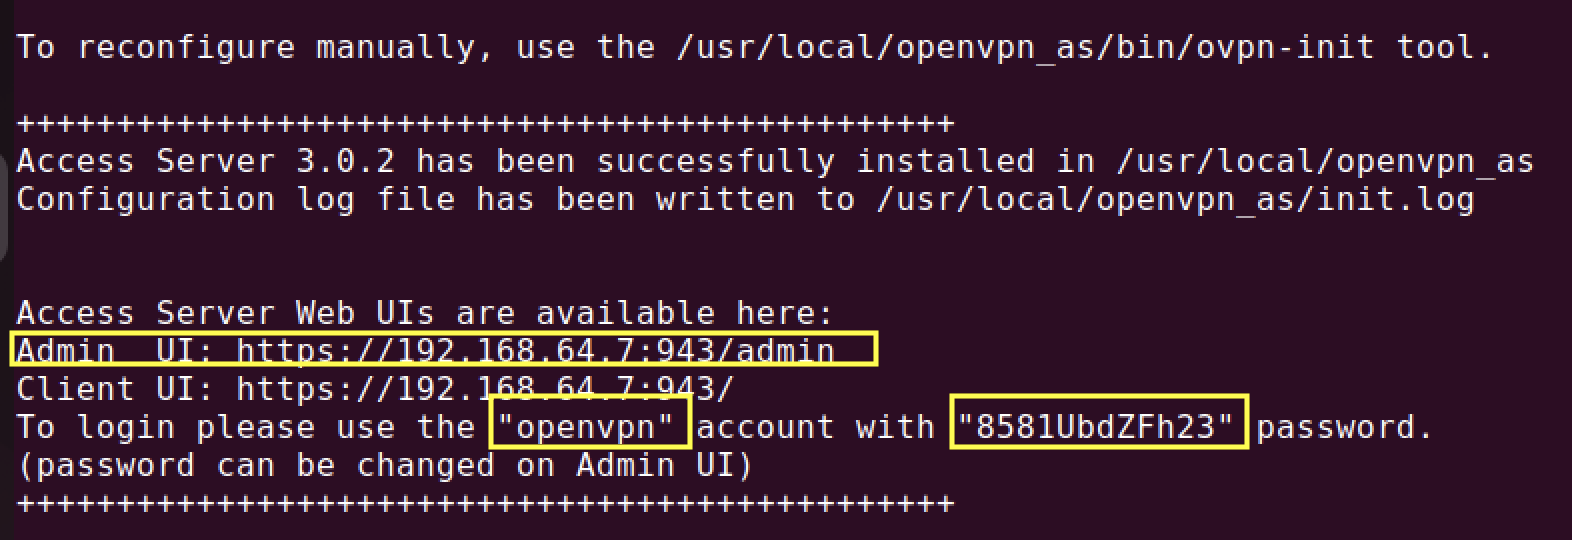
Copy the Admin UI address and paste it into the browser. It will give you a warning as it is a self-signed SSL certificate, so you need to click “Next” and then “Accept the risk and continue”.
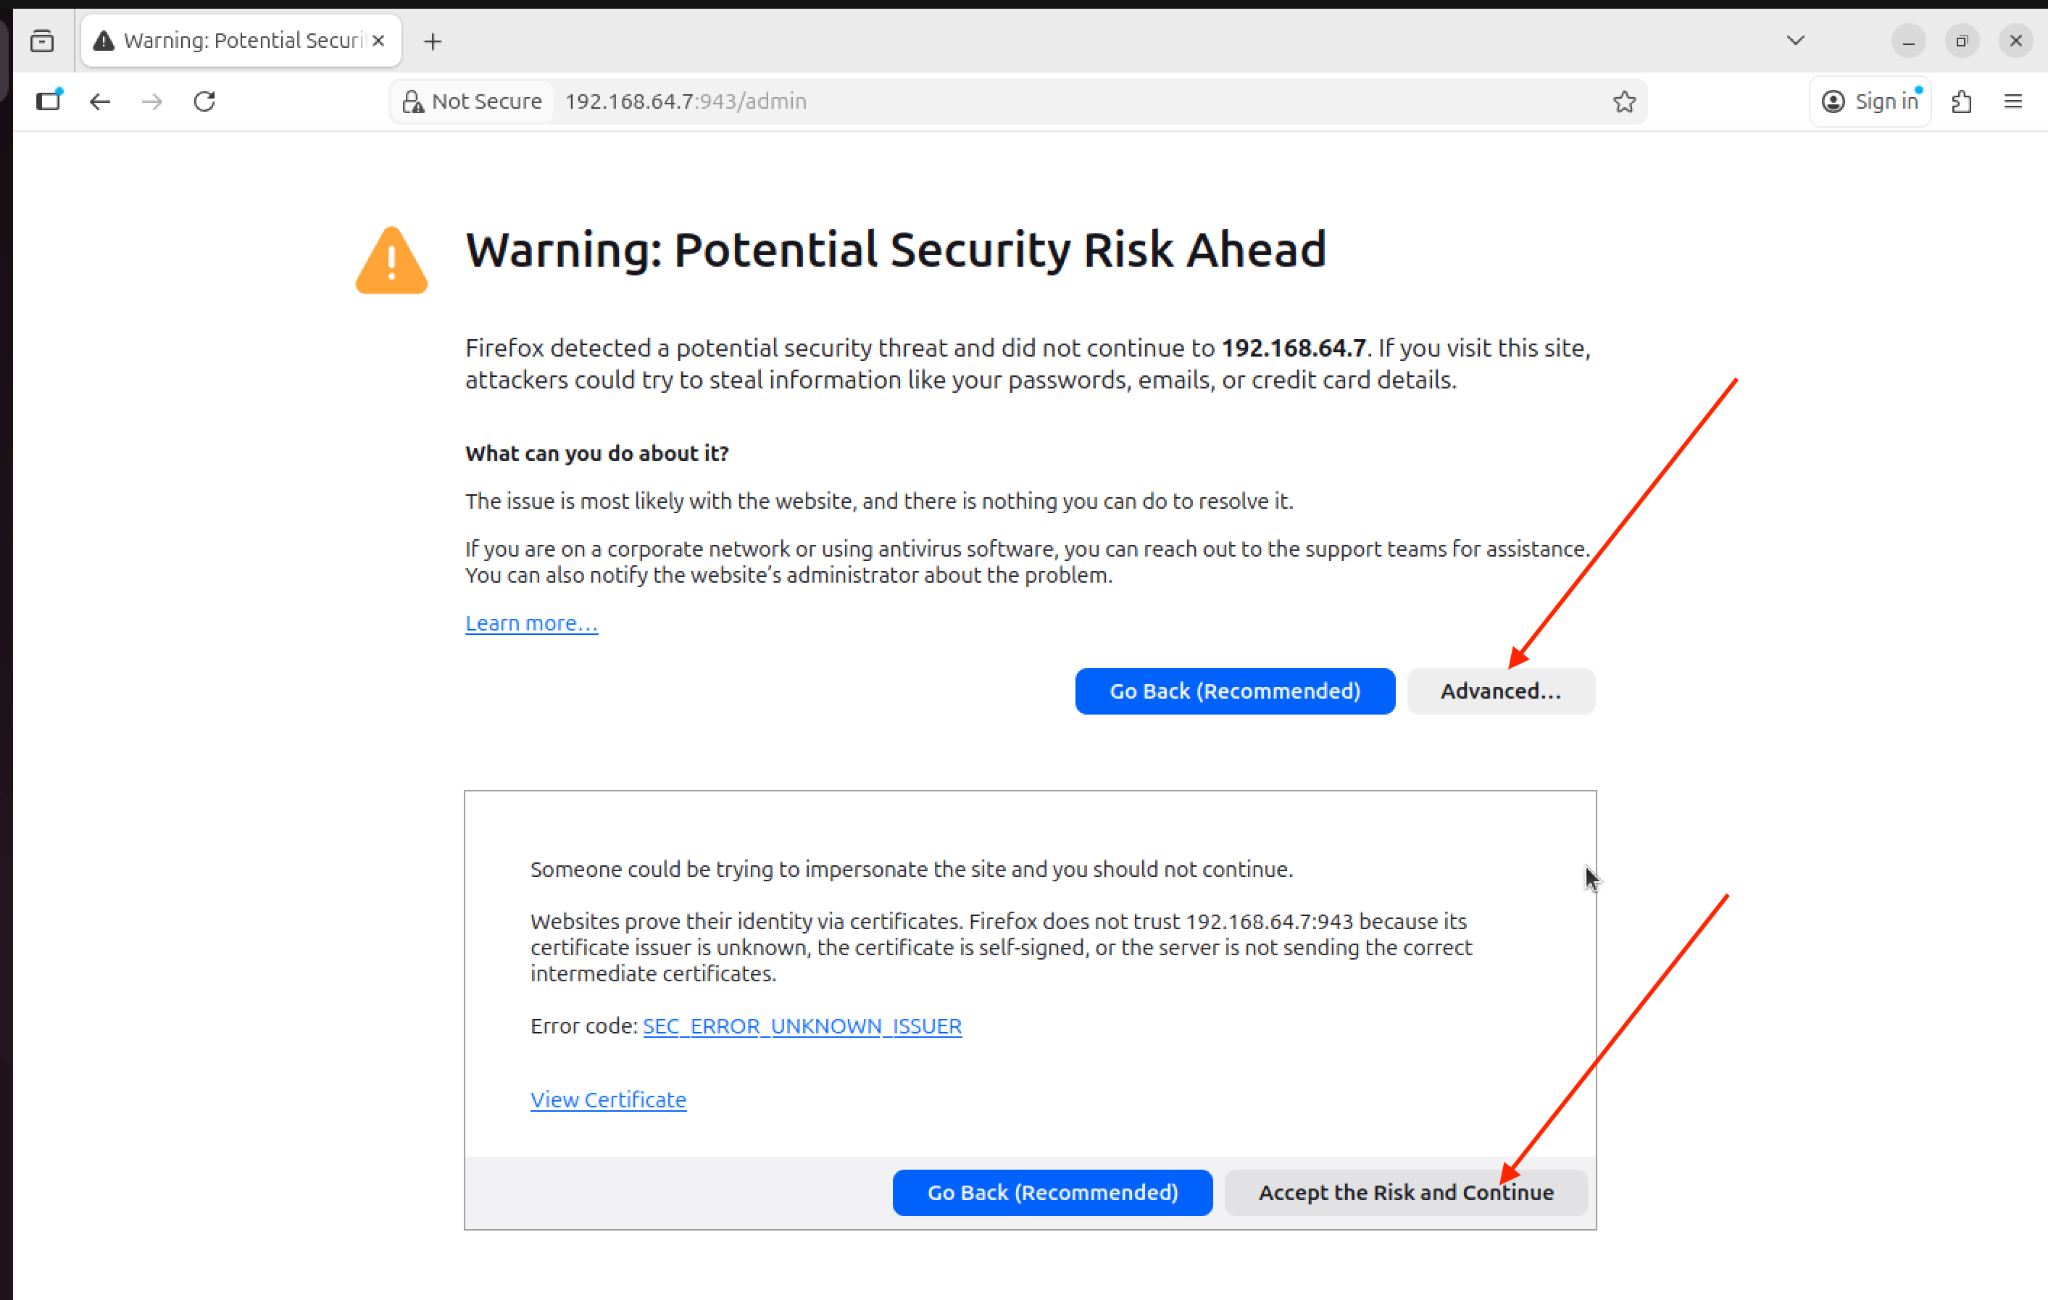
Now you will see a login screen like below where you enter your username and temporary password: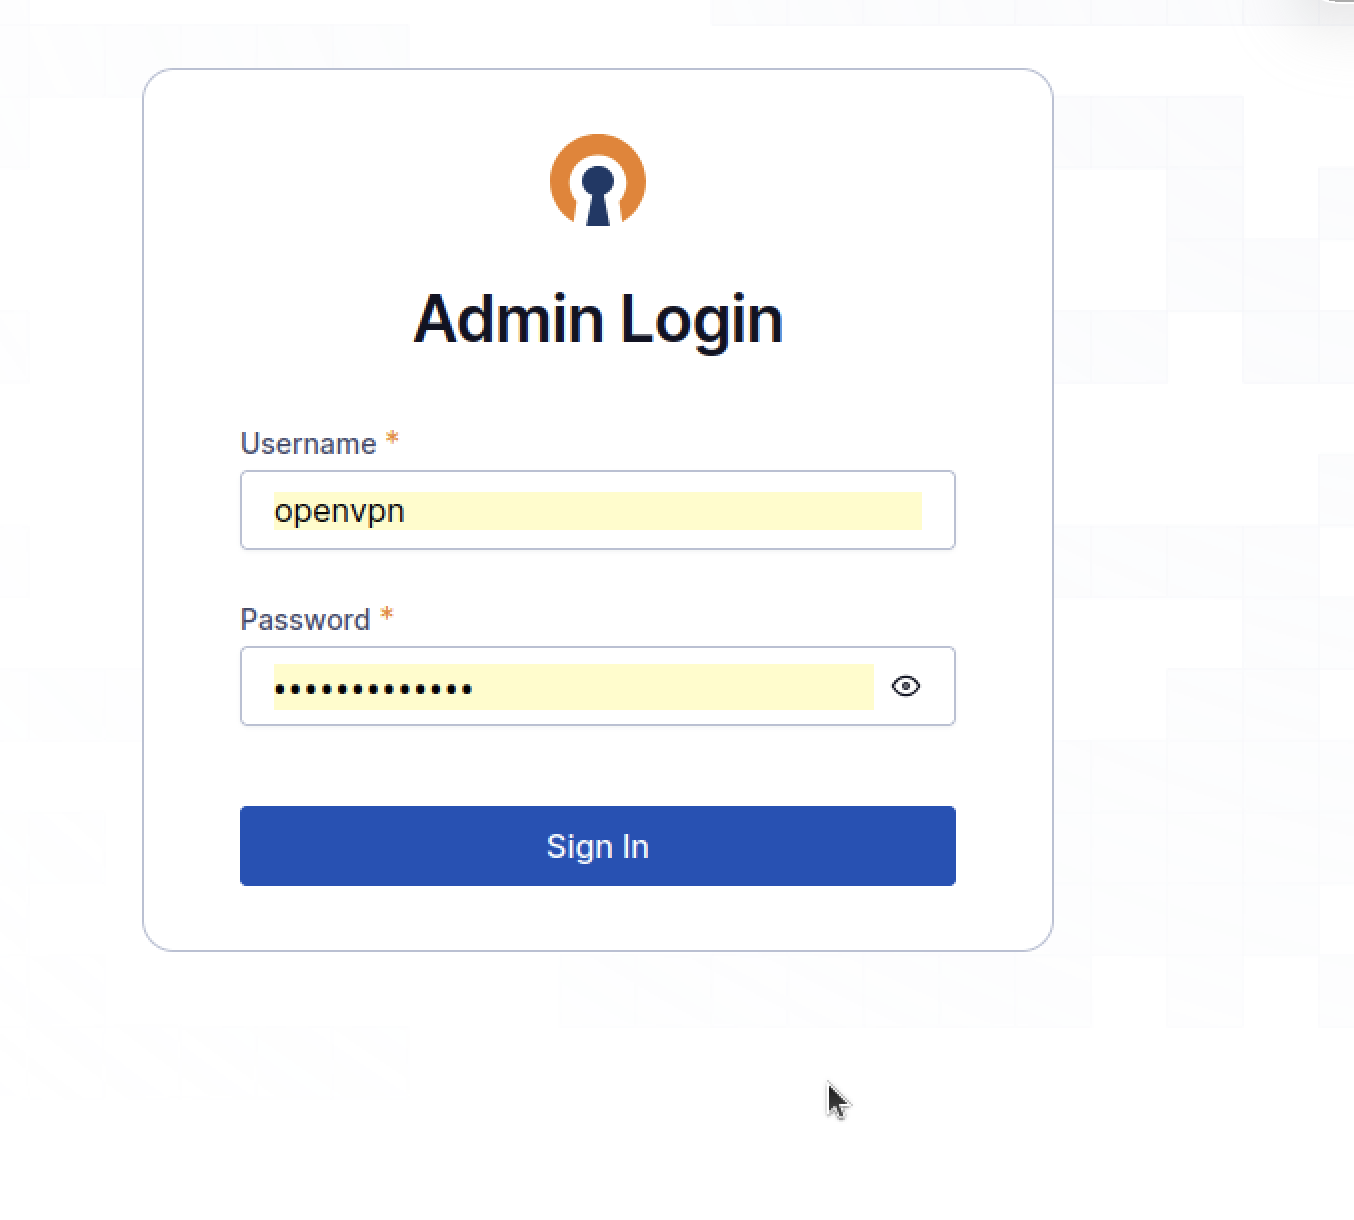
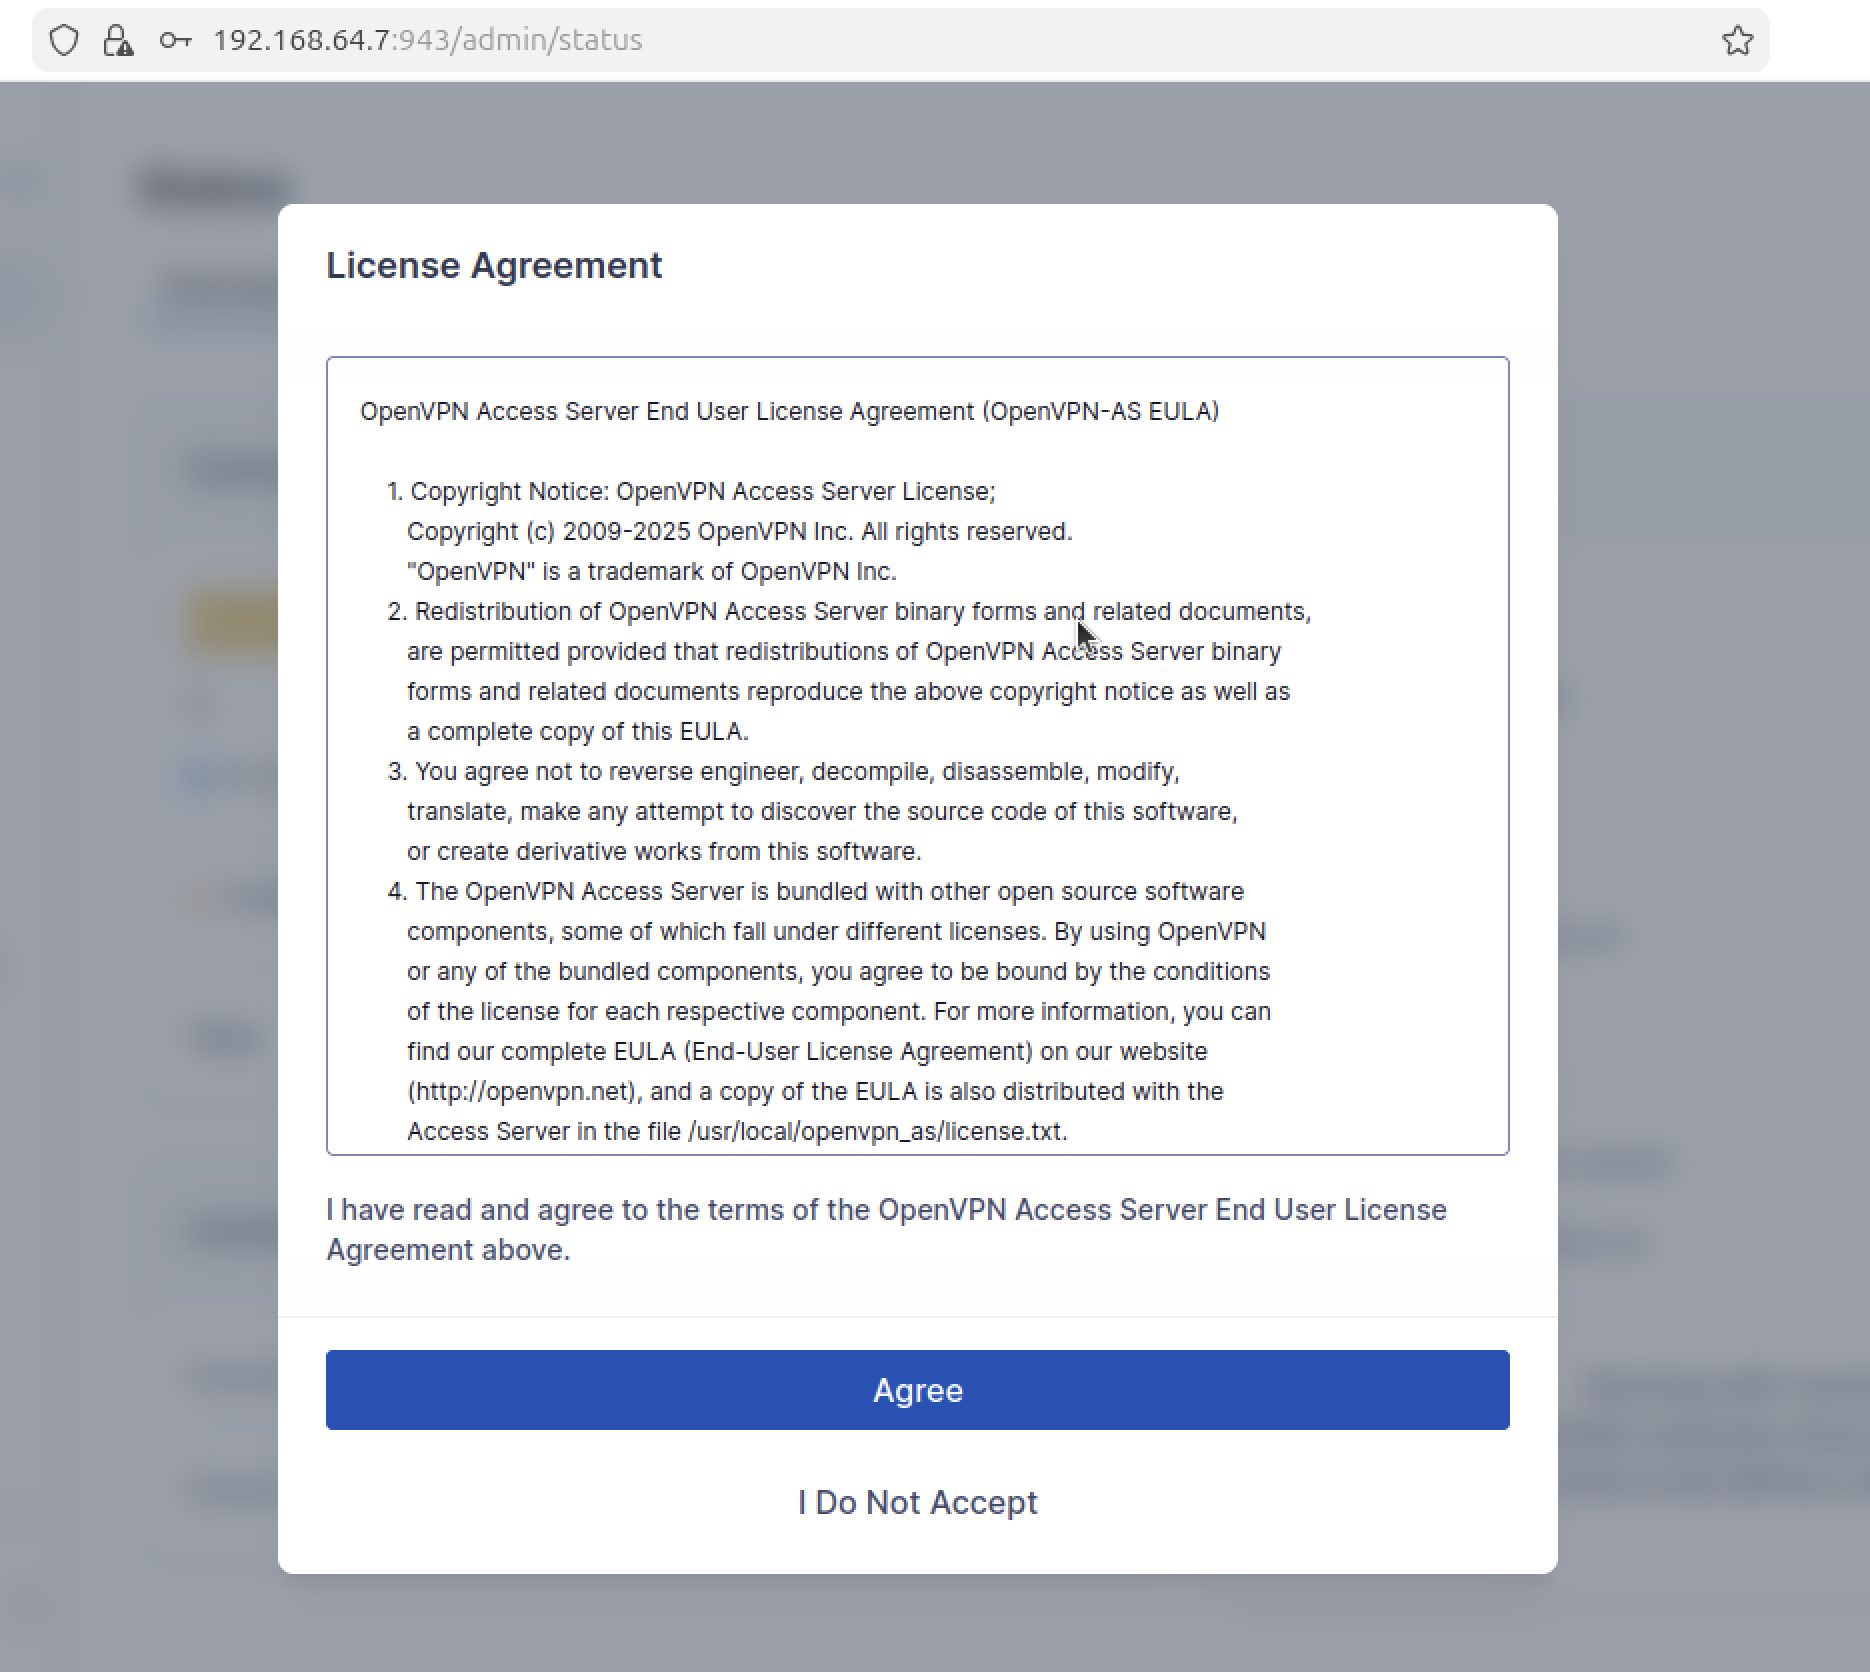
Once logged in, it will ask you to accept the license agreement. Read it and then accept it.
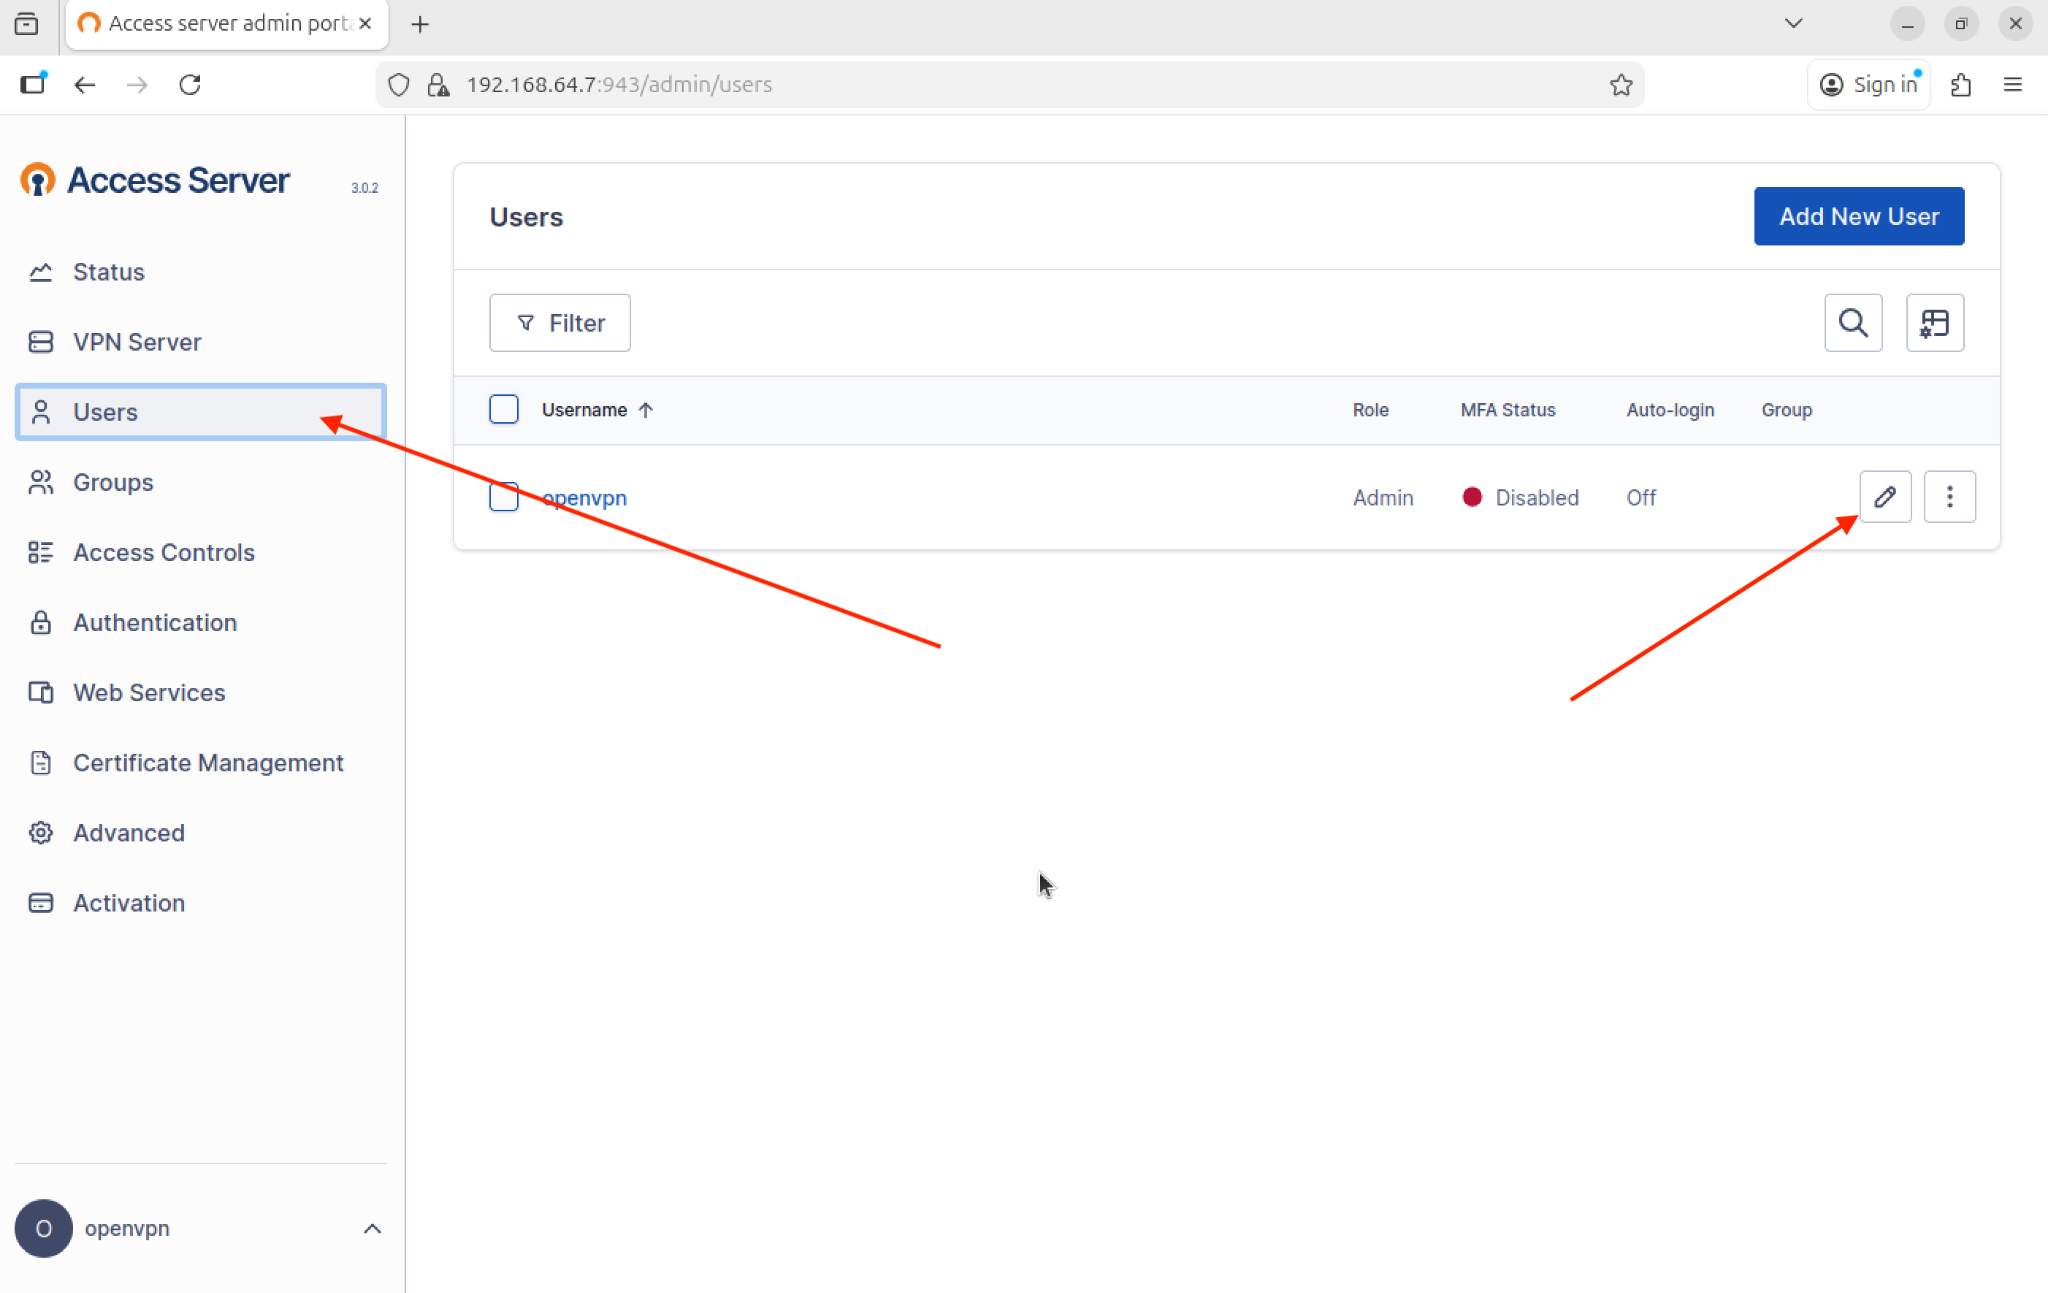
Once inside, now go to the “Users” tab, click on the pencil icon and change the temporary password and save changes.
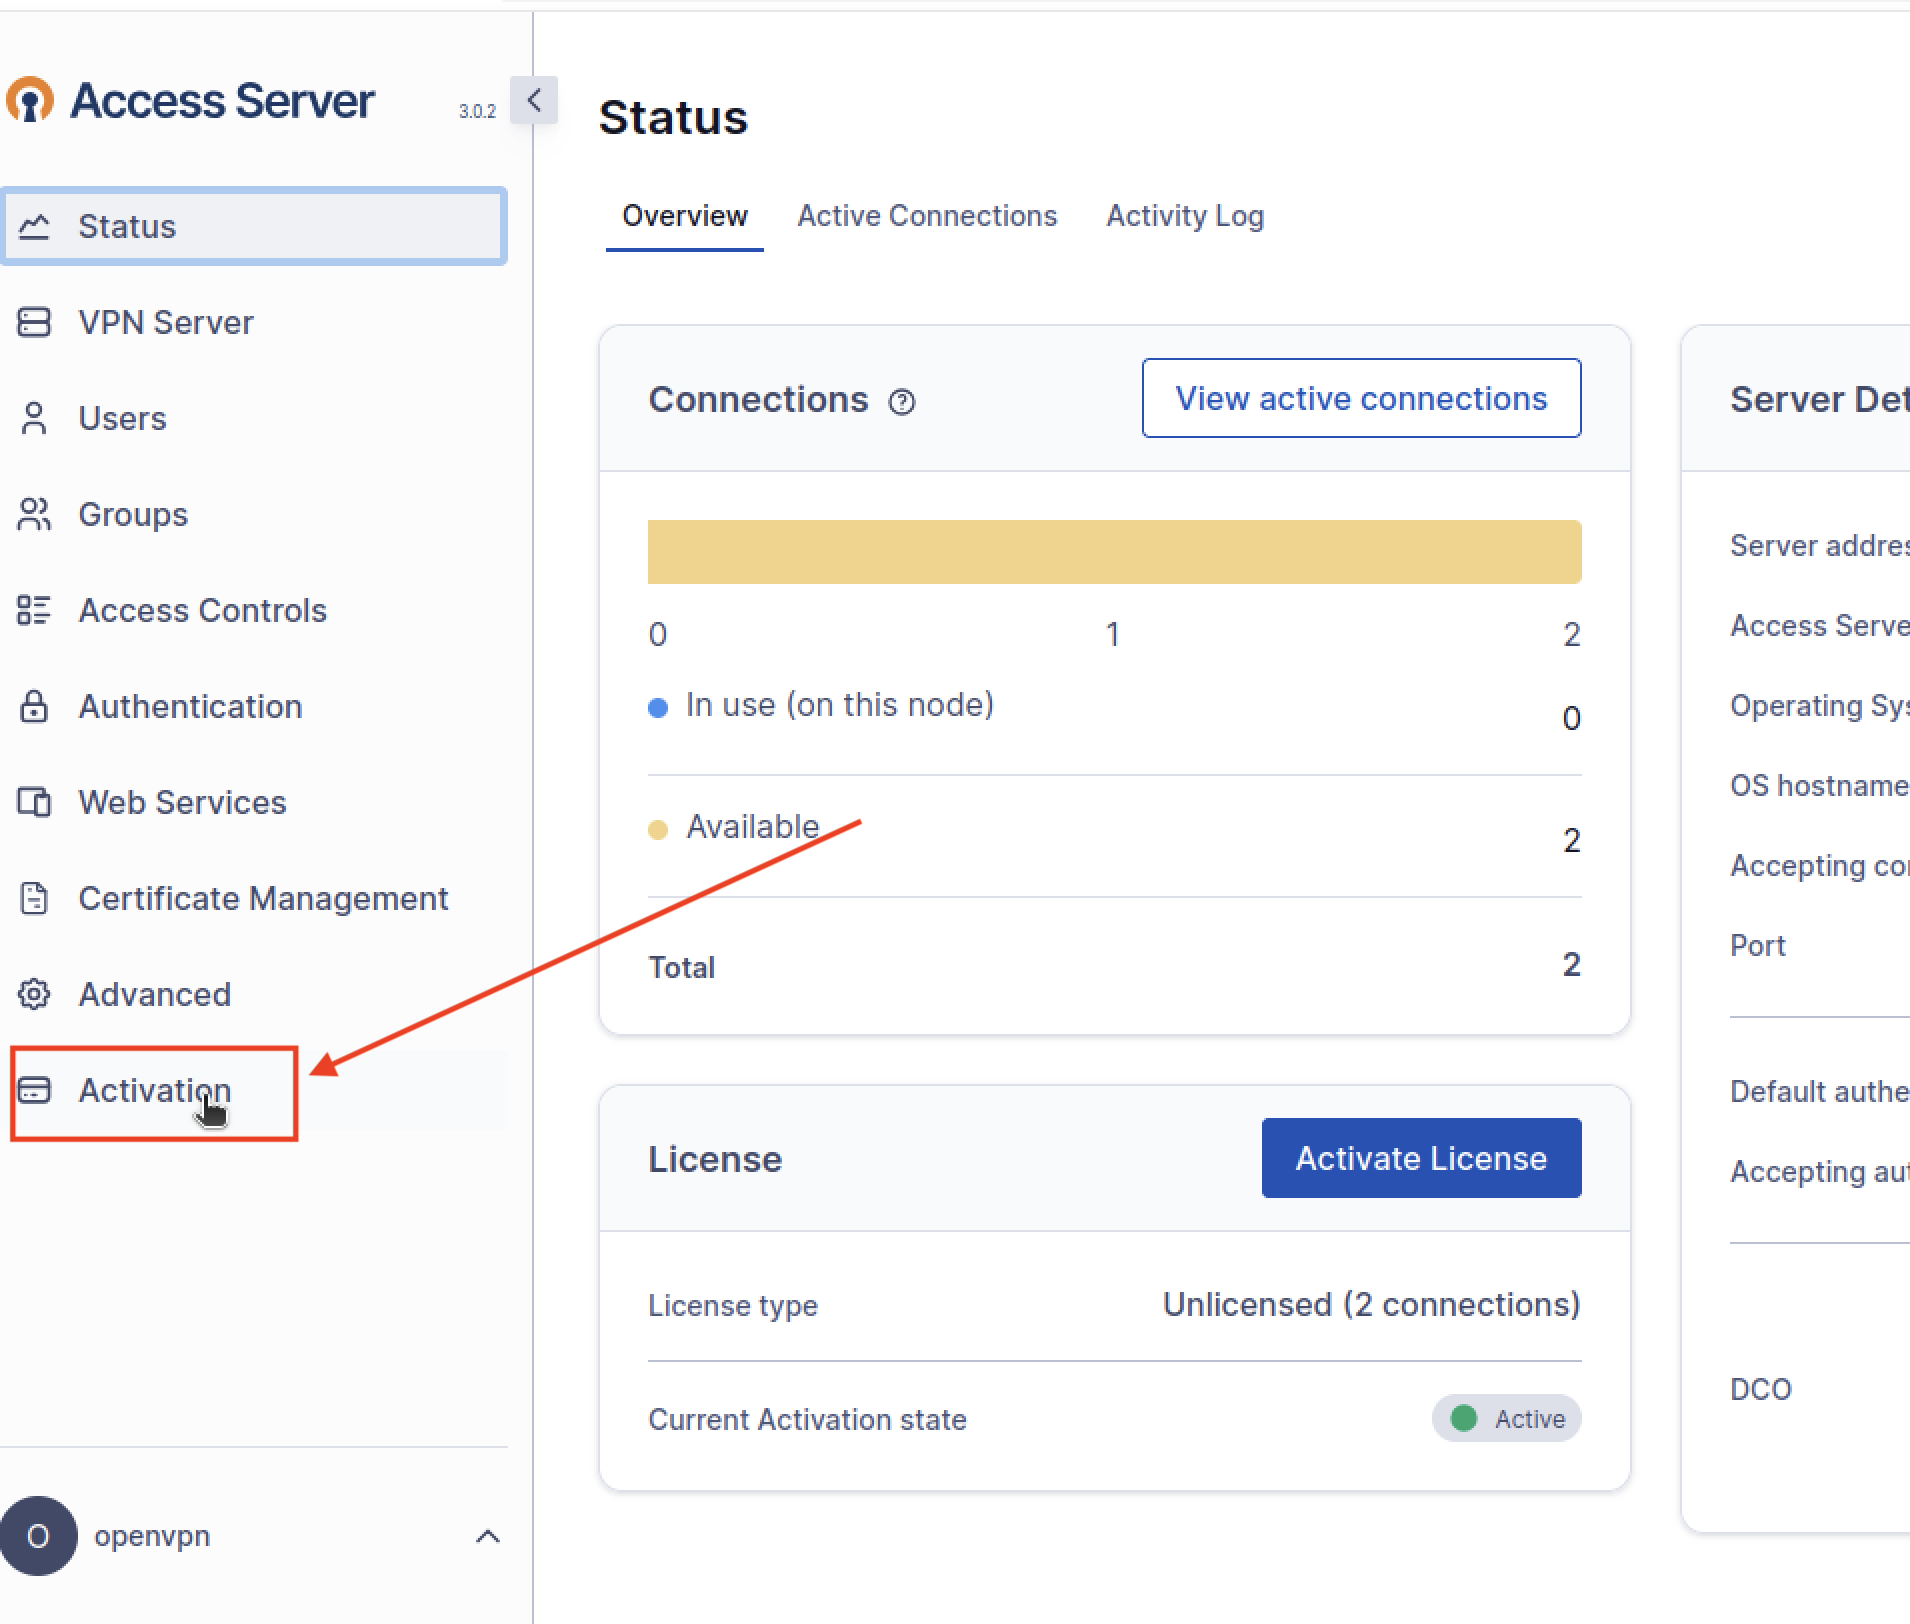
6. Activate OpenVPN Access Server (Enter Activation Key)
In your Admin UI, look at the bottom left where you will see the “Activation” tab. Click on it and you will see a pop-up type window where you have to enter the key.
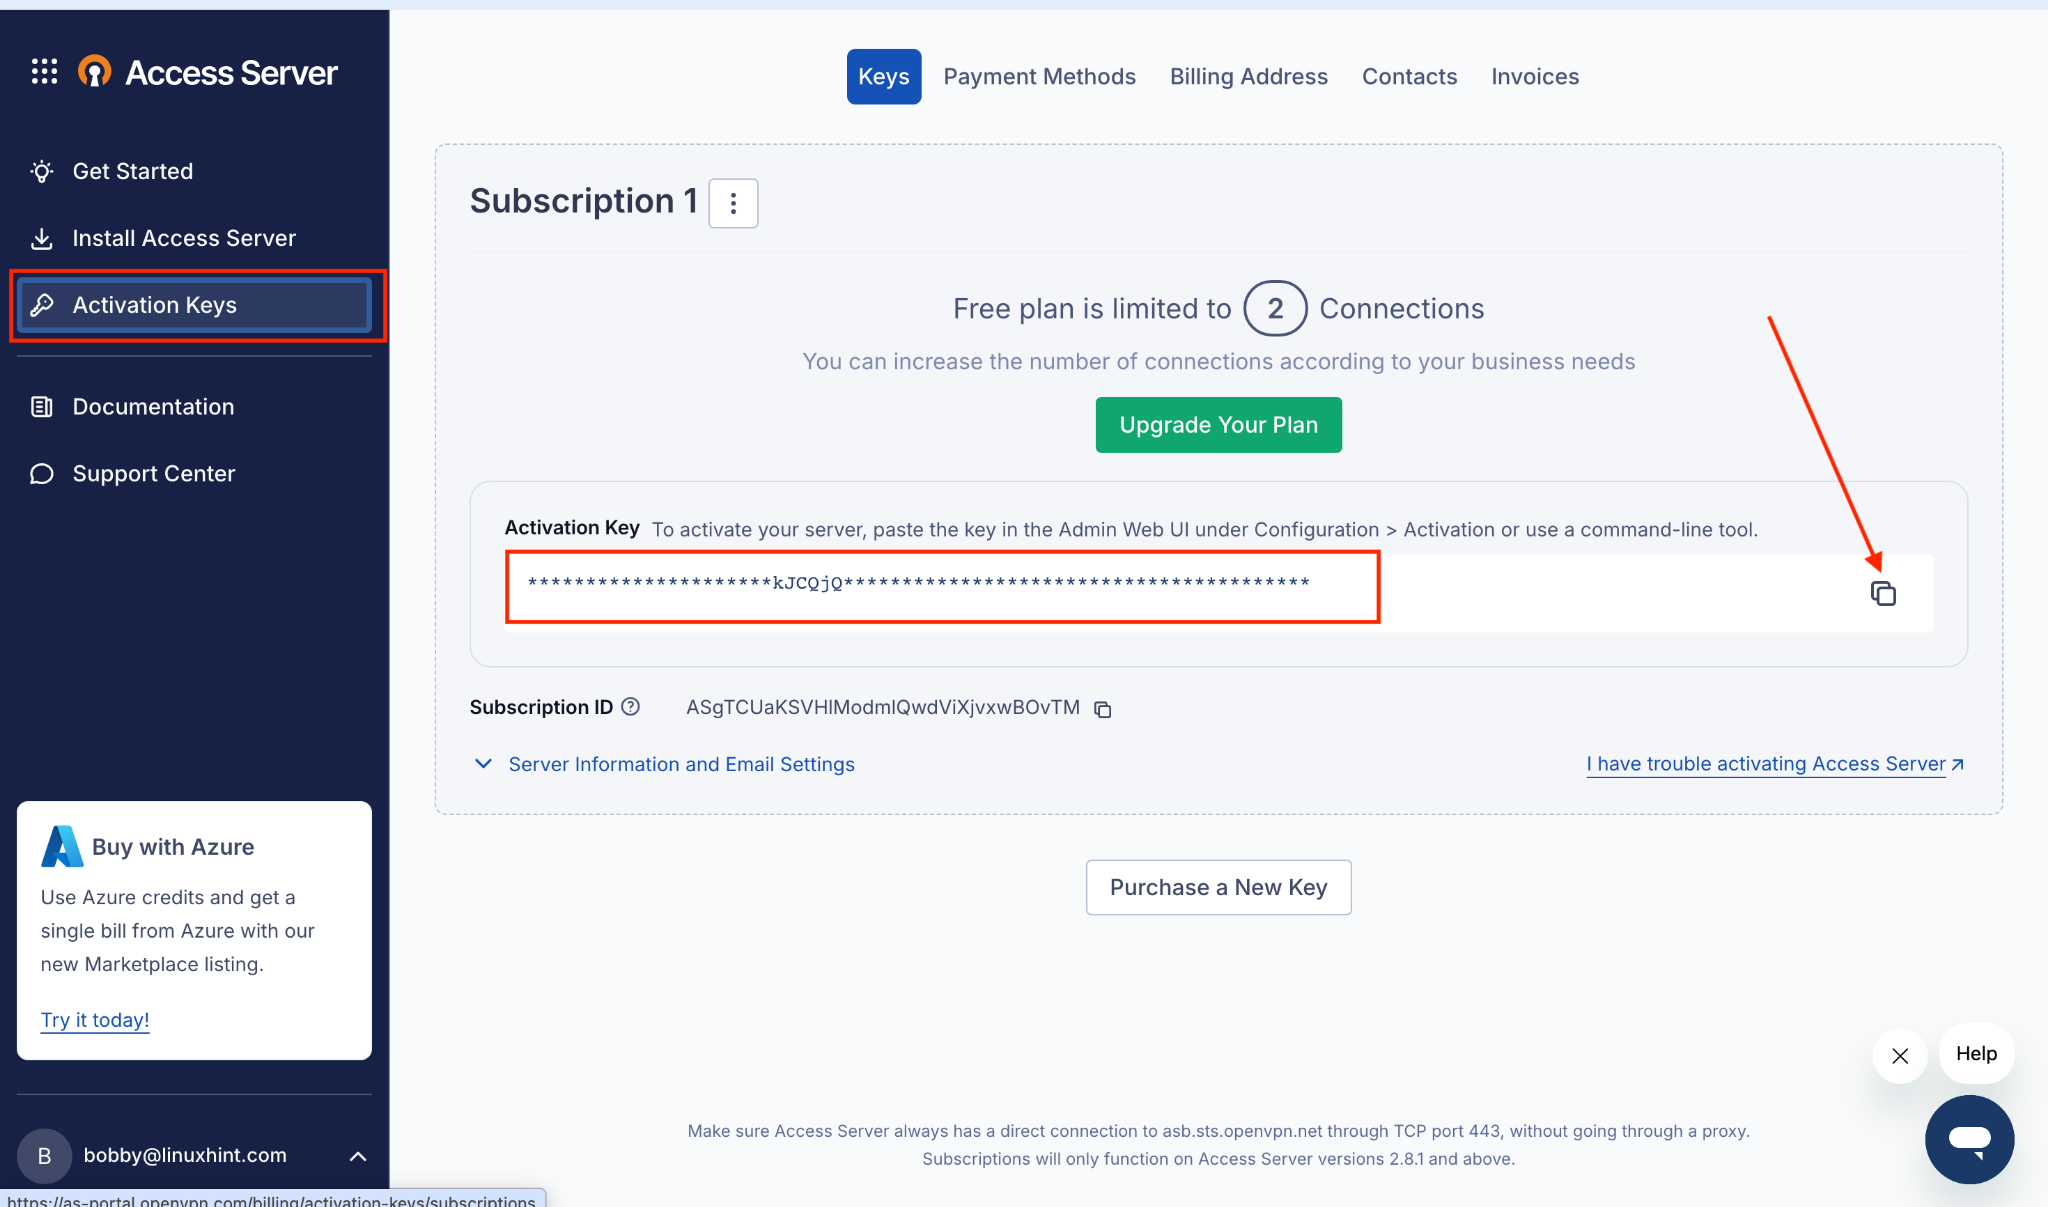
Now go to you OpenVPN Access Server portal.
Go to the “Activation Keys” tab and copy the key.
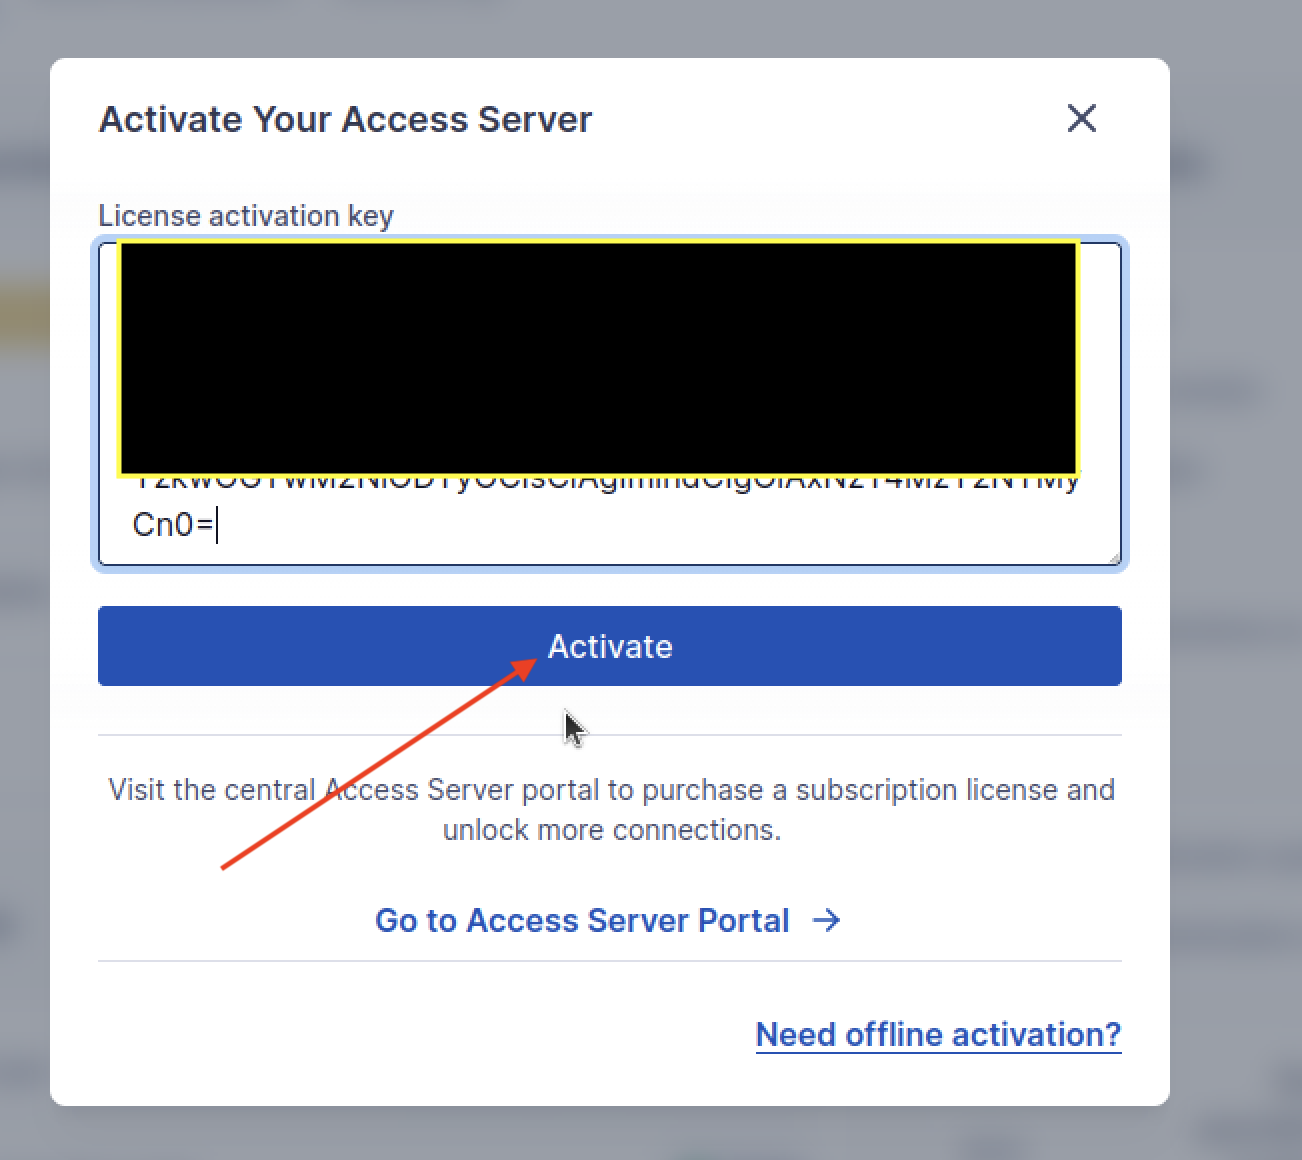
Come back to your Admin UI and paste the key in the same “Activation” tab pop-up window and click “Activate”:
7. Create a VPN user
Now you can start creating users for your team members. For that matter, in your Admin UI go to the “Users” tab.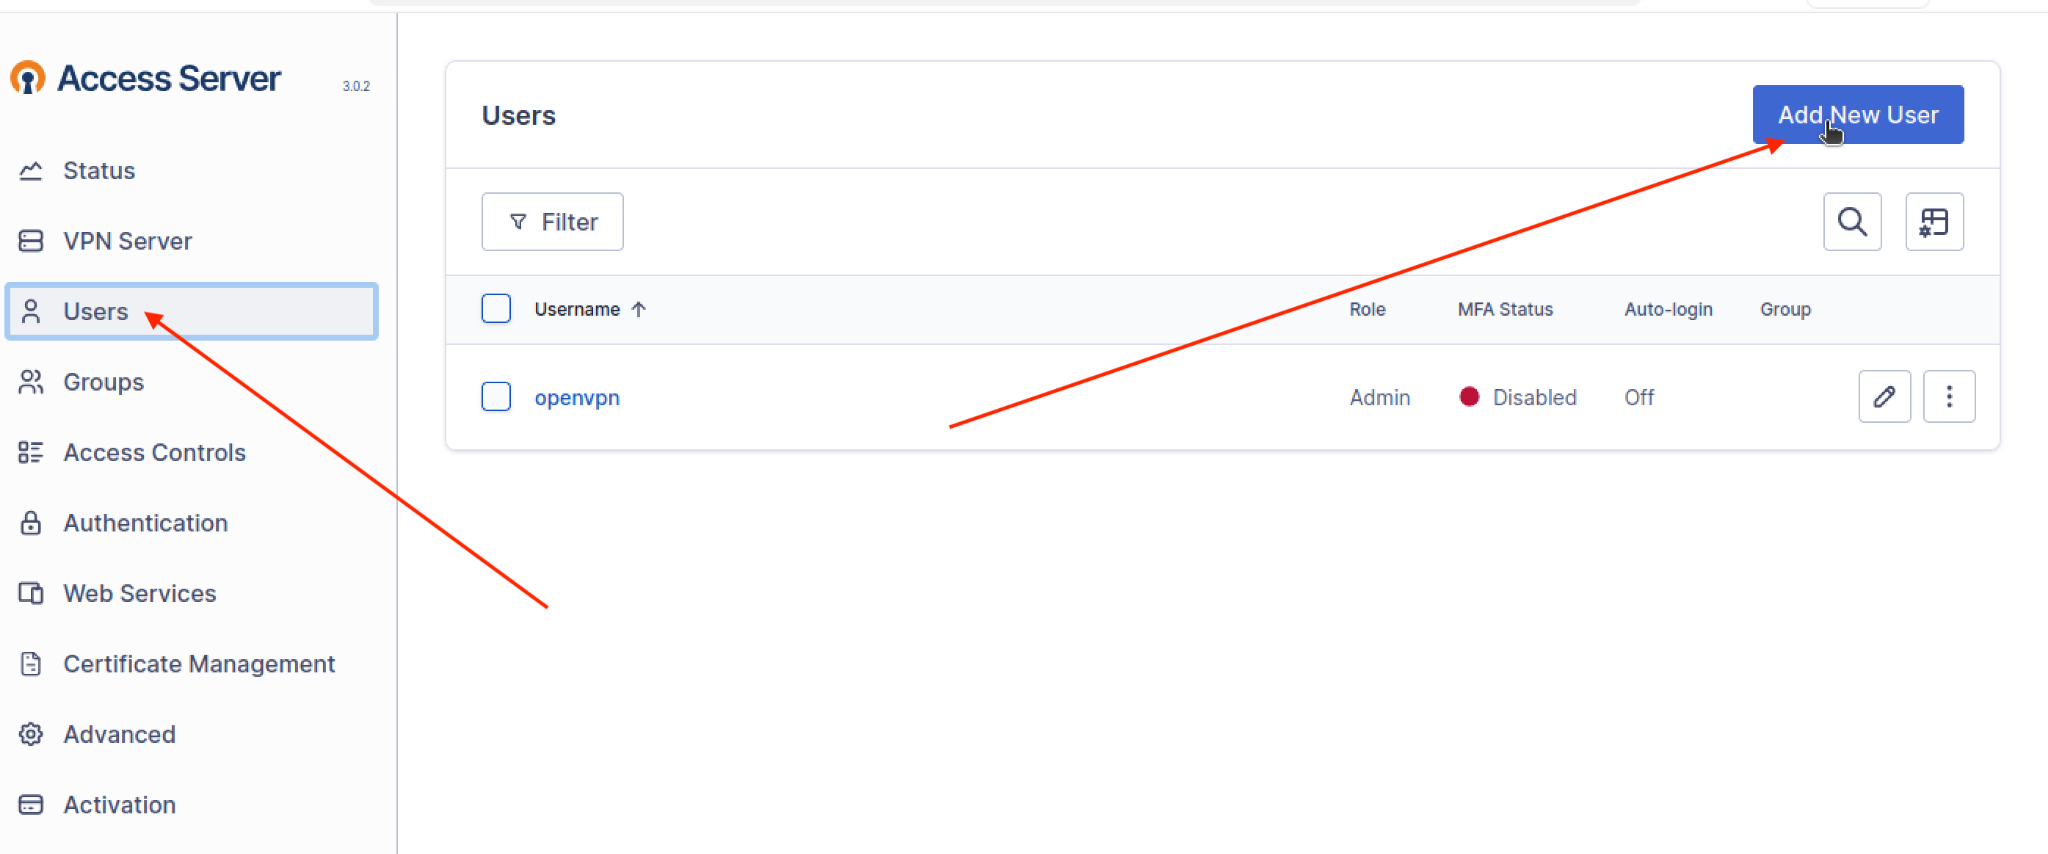
Type in the name of the new user, in my case I typed “bobby” and then you can assign it to a group if you want, I didn’t assign it to any group and then you can click “Save”.
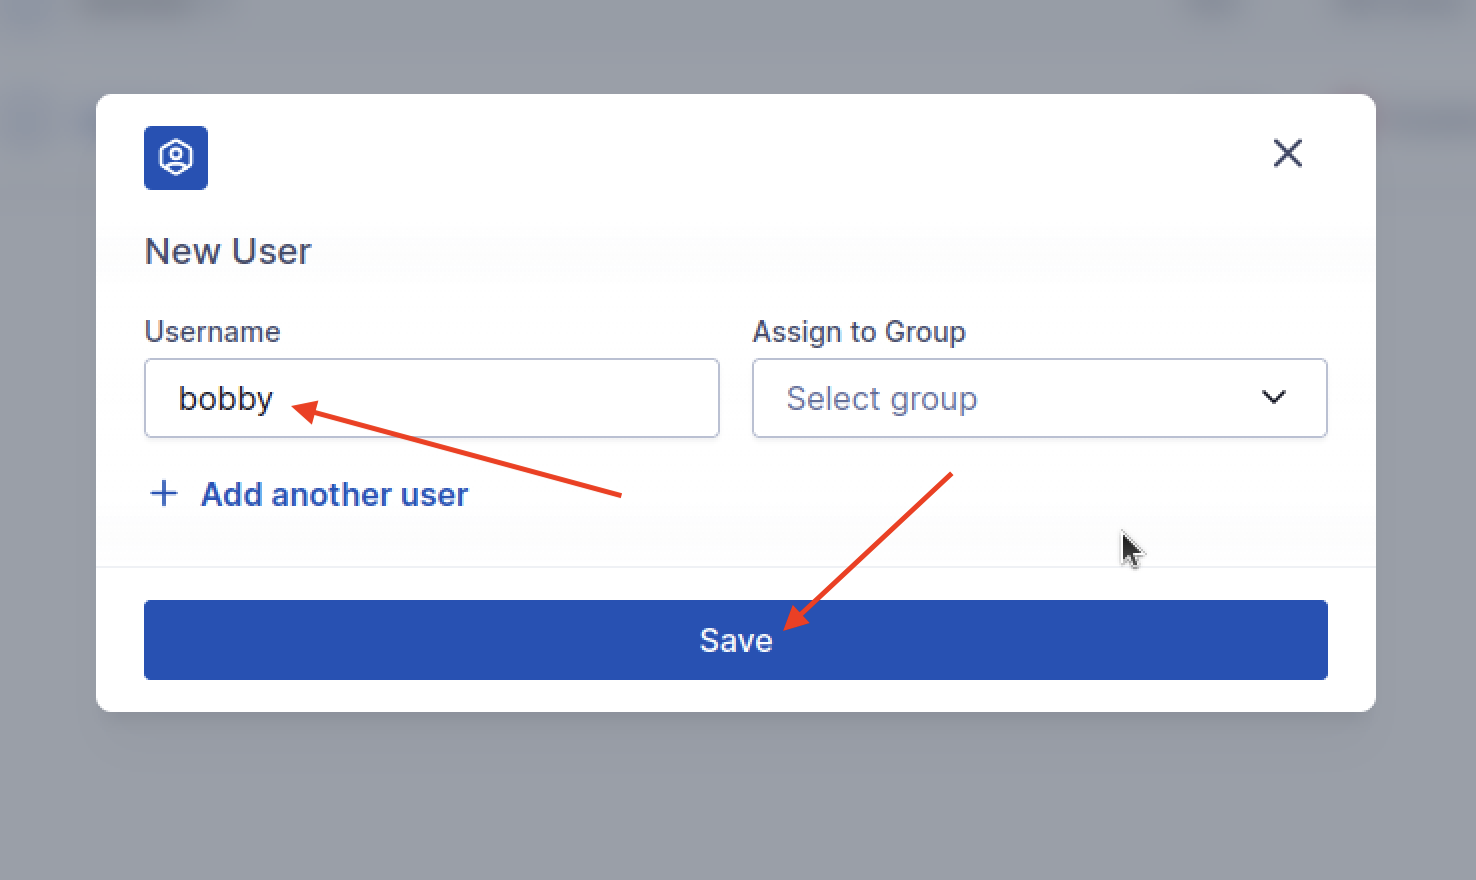
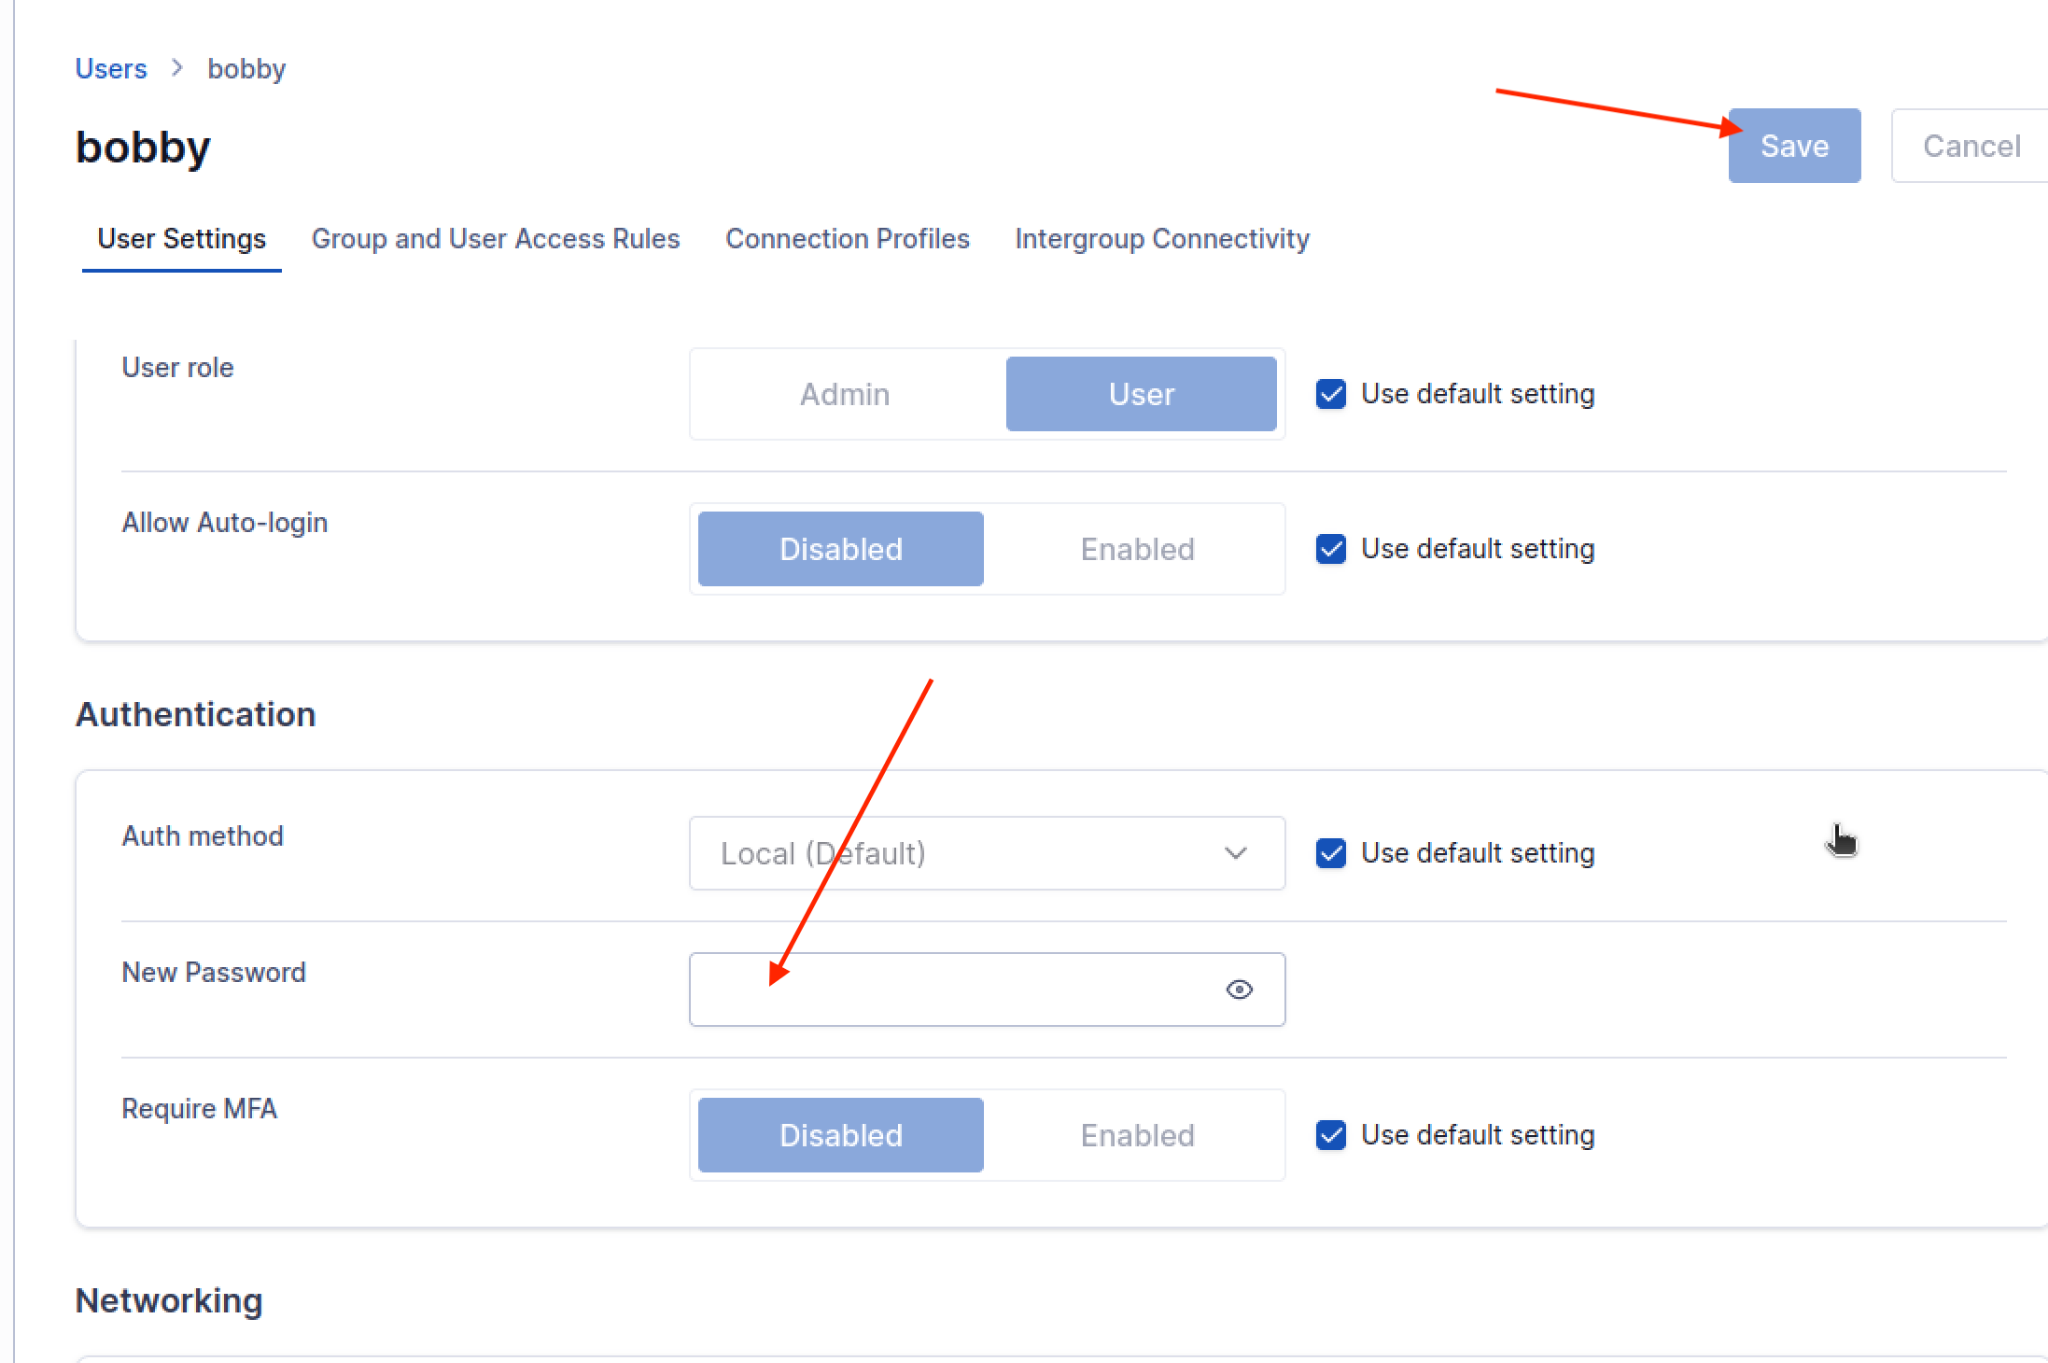
This will bring you to a window where you can add a password for the newly created user and save changes.
Part-2: Connect to OpenVPN Access Server with OpenVPN Connect
8. Open client UI and download profile (.ovpn)
Go to the client UI address you got at the time of installation:

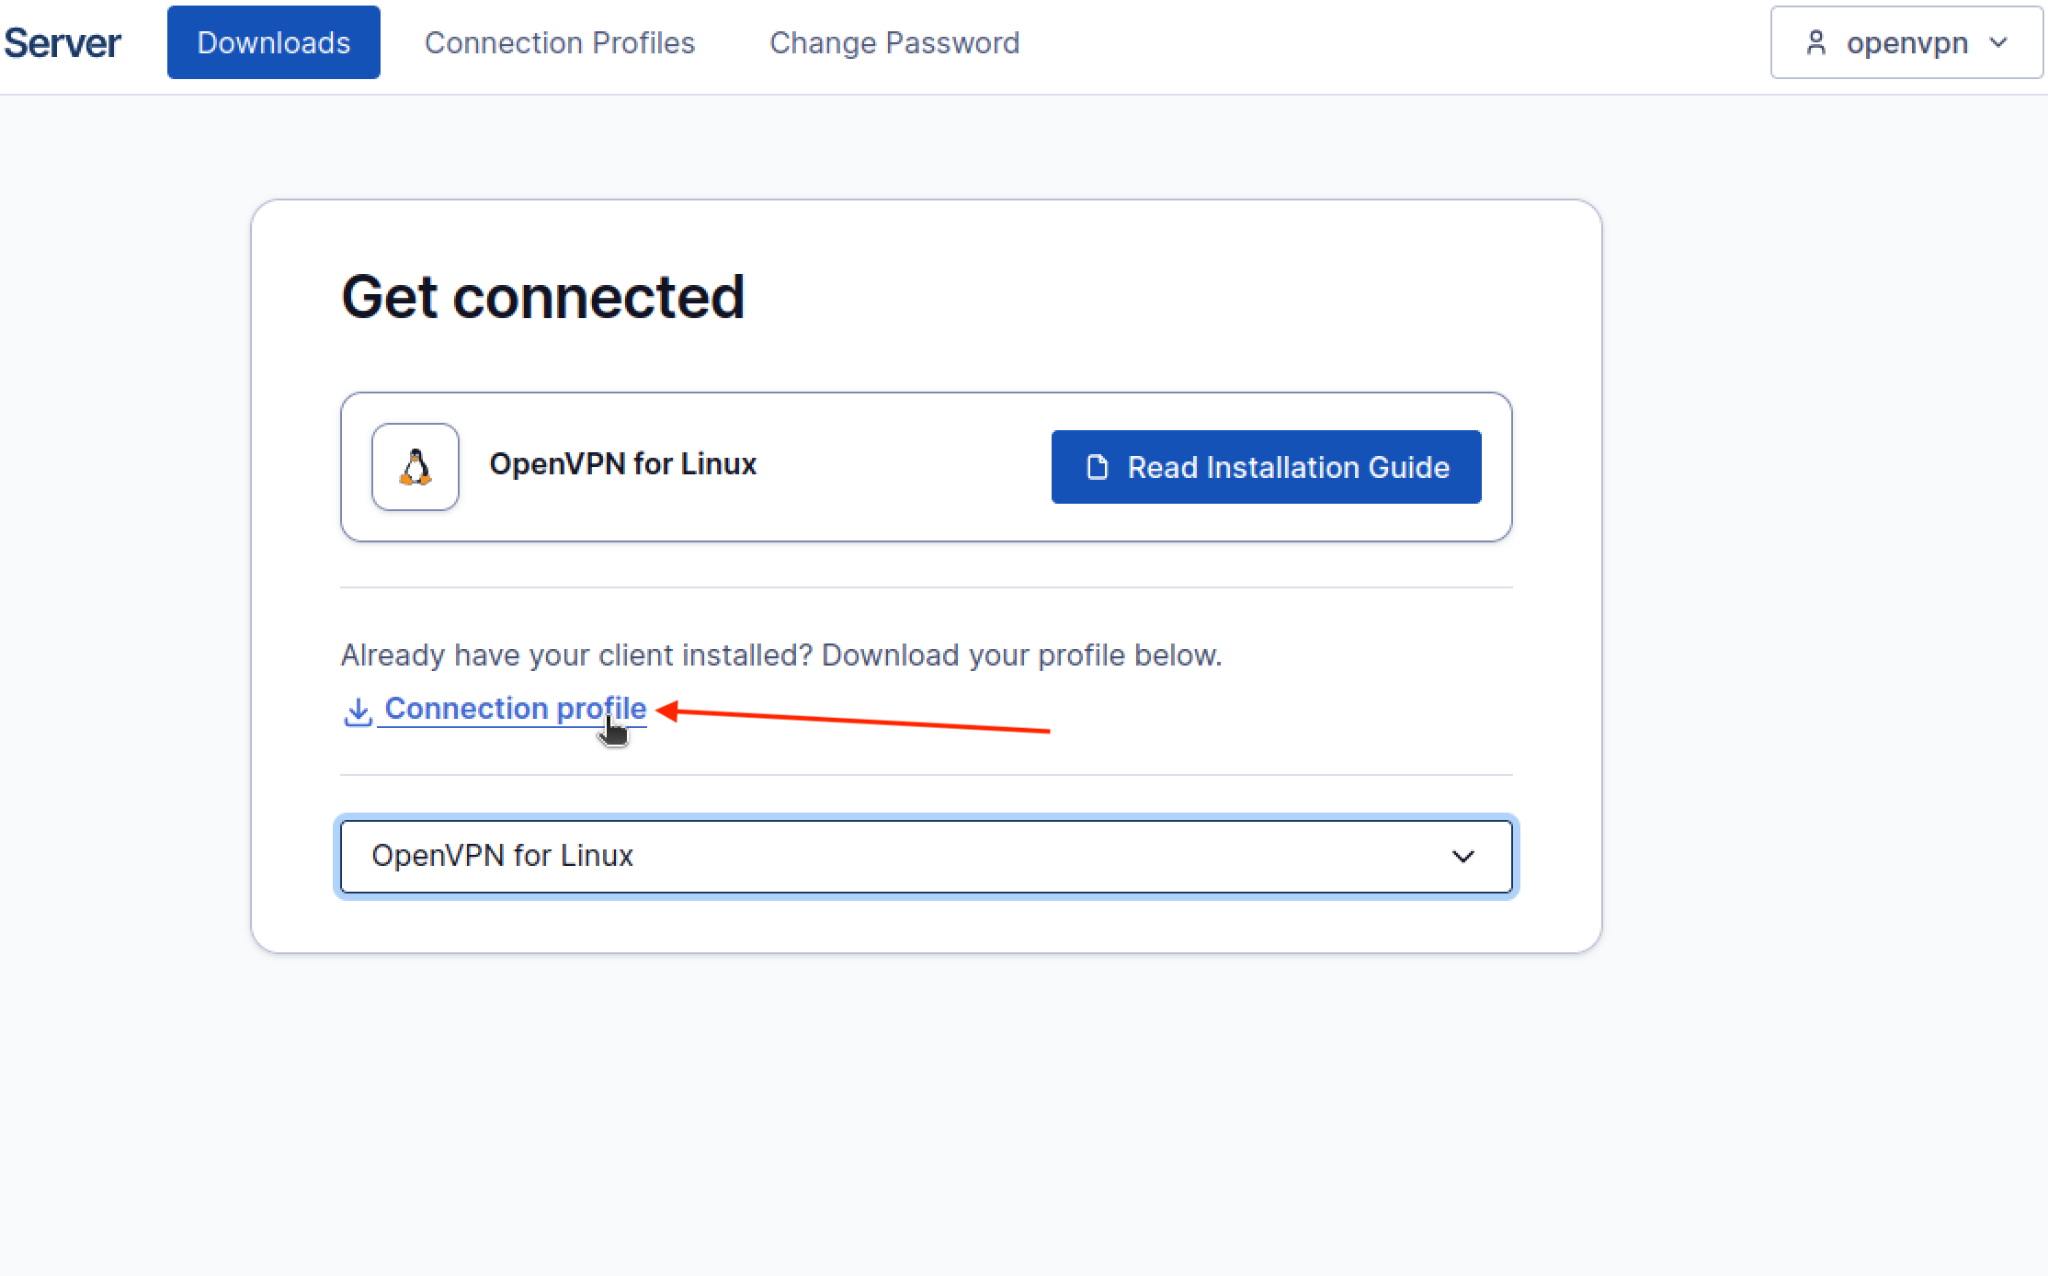
Select the platform, in my case it is Linux: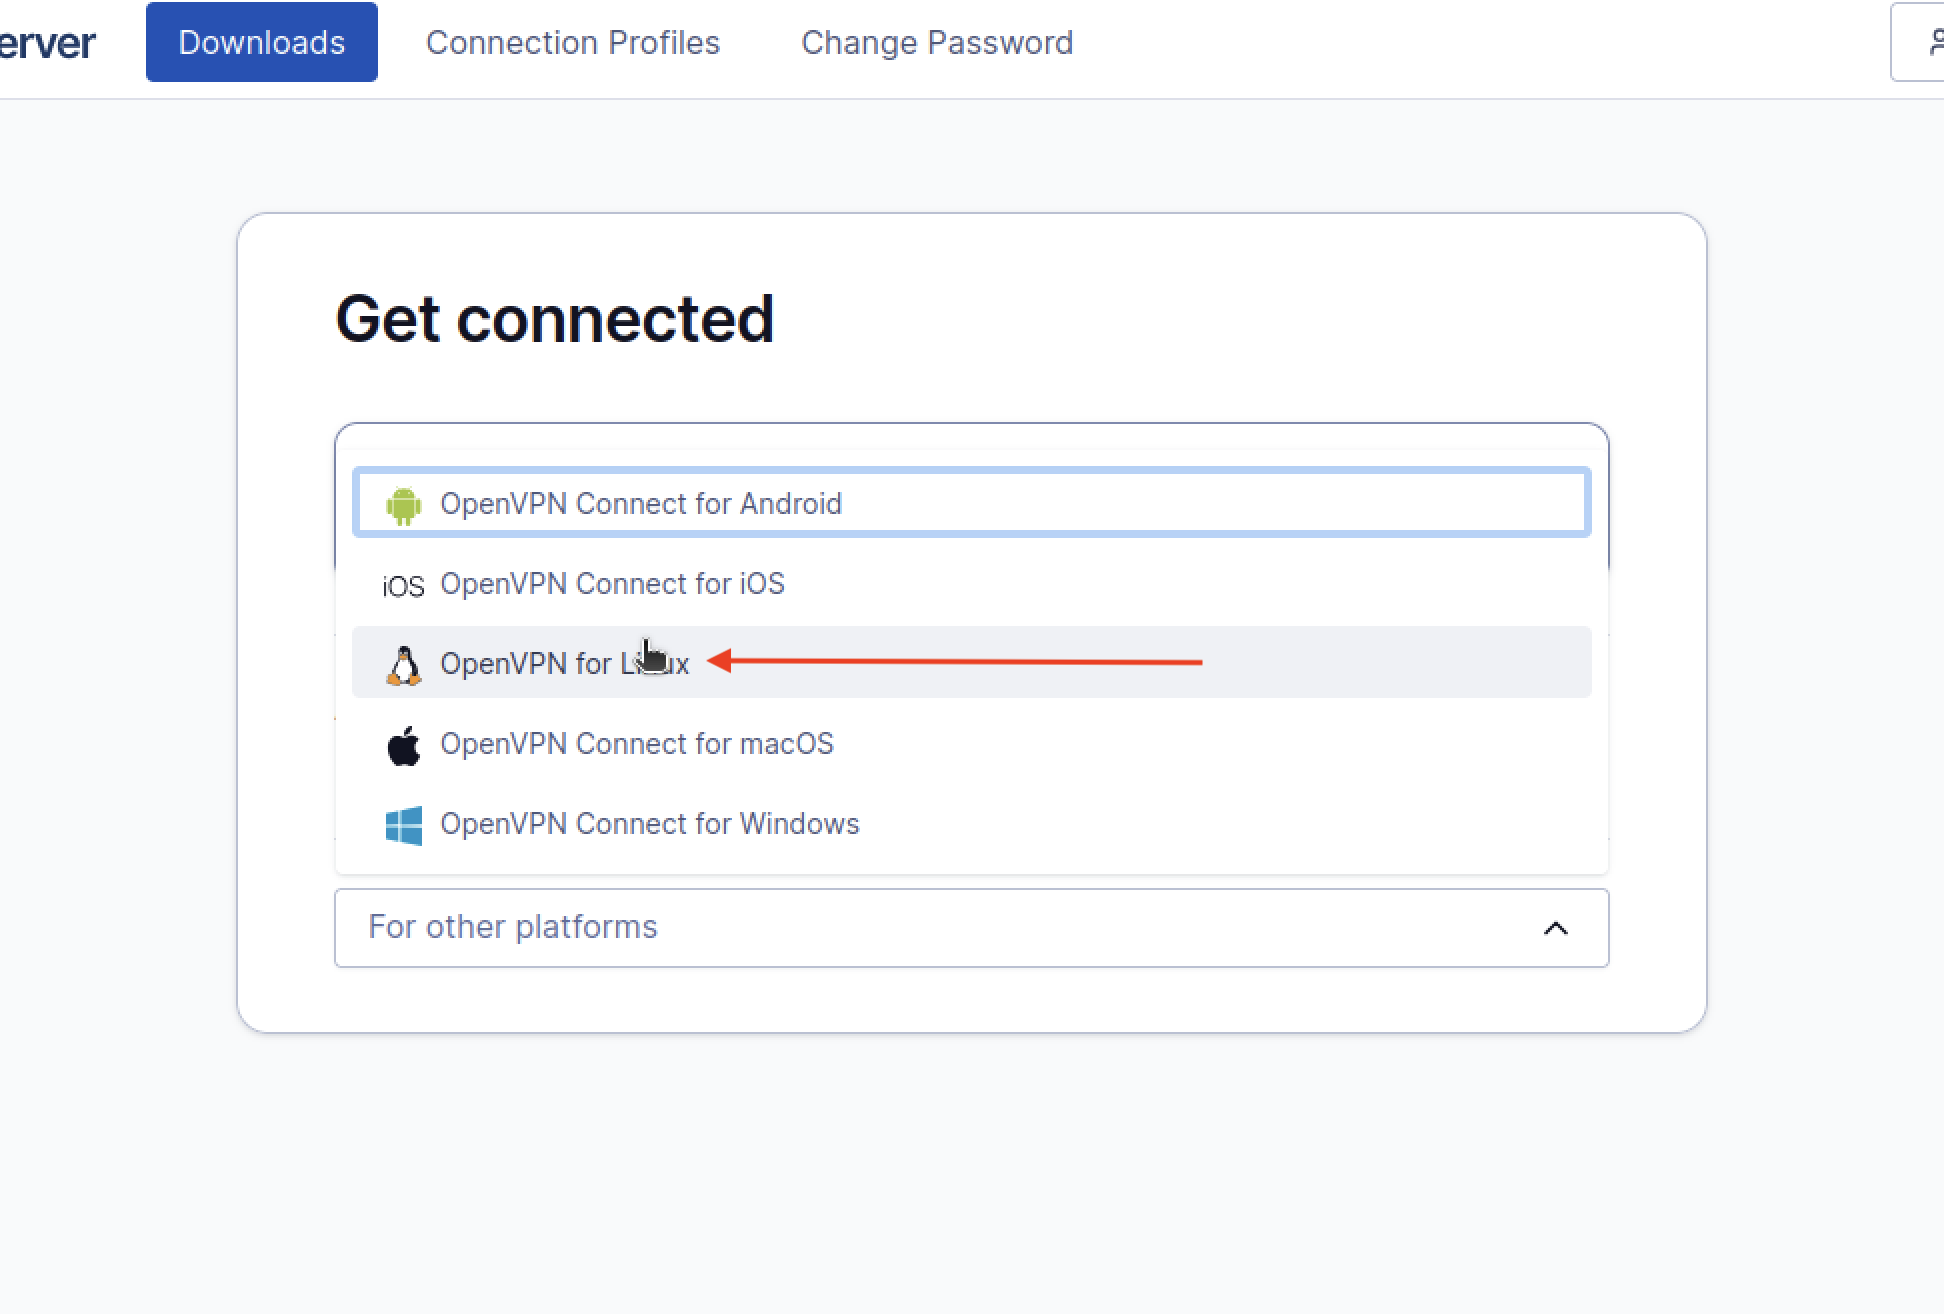
Then click on “Connection profile” to download profile:
9. Set up router port forwarding (for remote access)
Go to your router’s default gateway IP address and login and then find the option of port forwarding and click “New”:
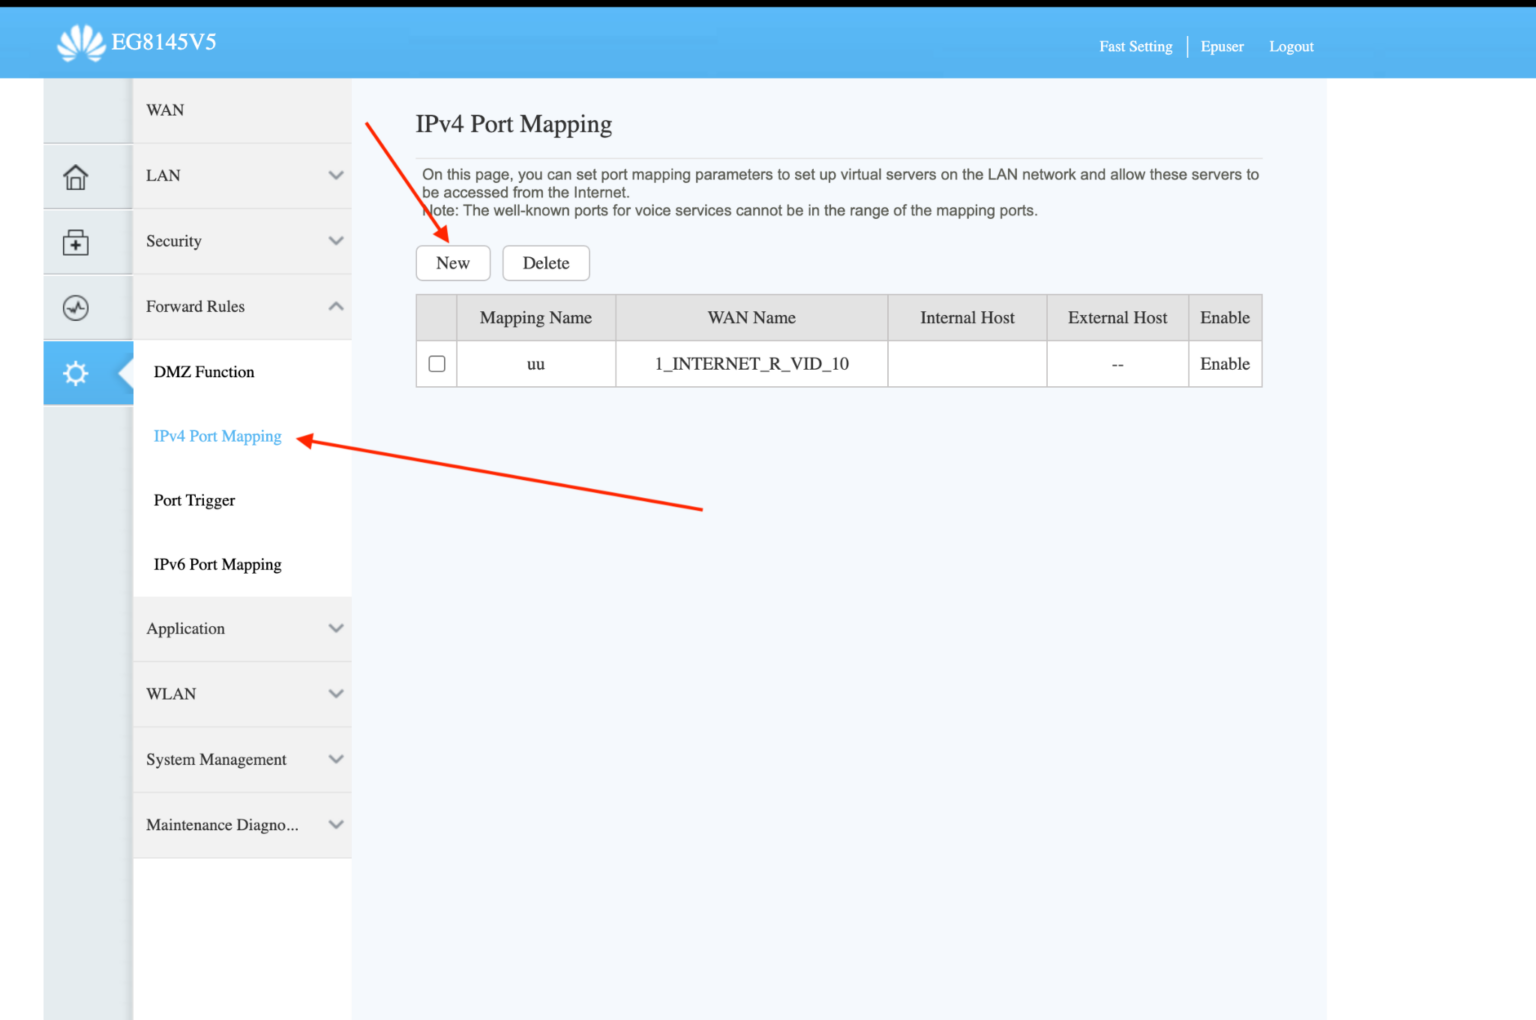
In my case it says “IPv4 Port Mapping”. In your case it might be different, it might say “Port Forwarding”, so keep that in mind.
Now add the relevant details and apply changes:
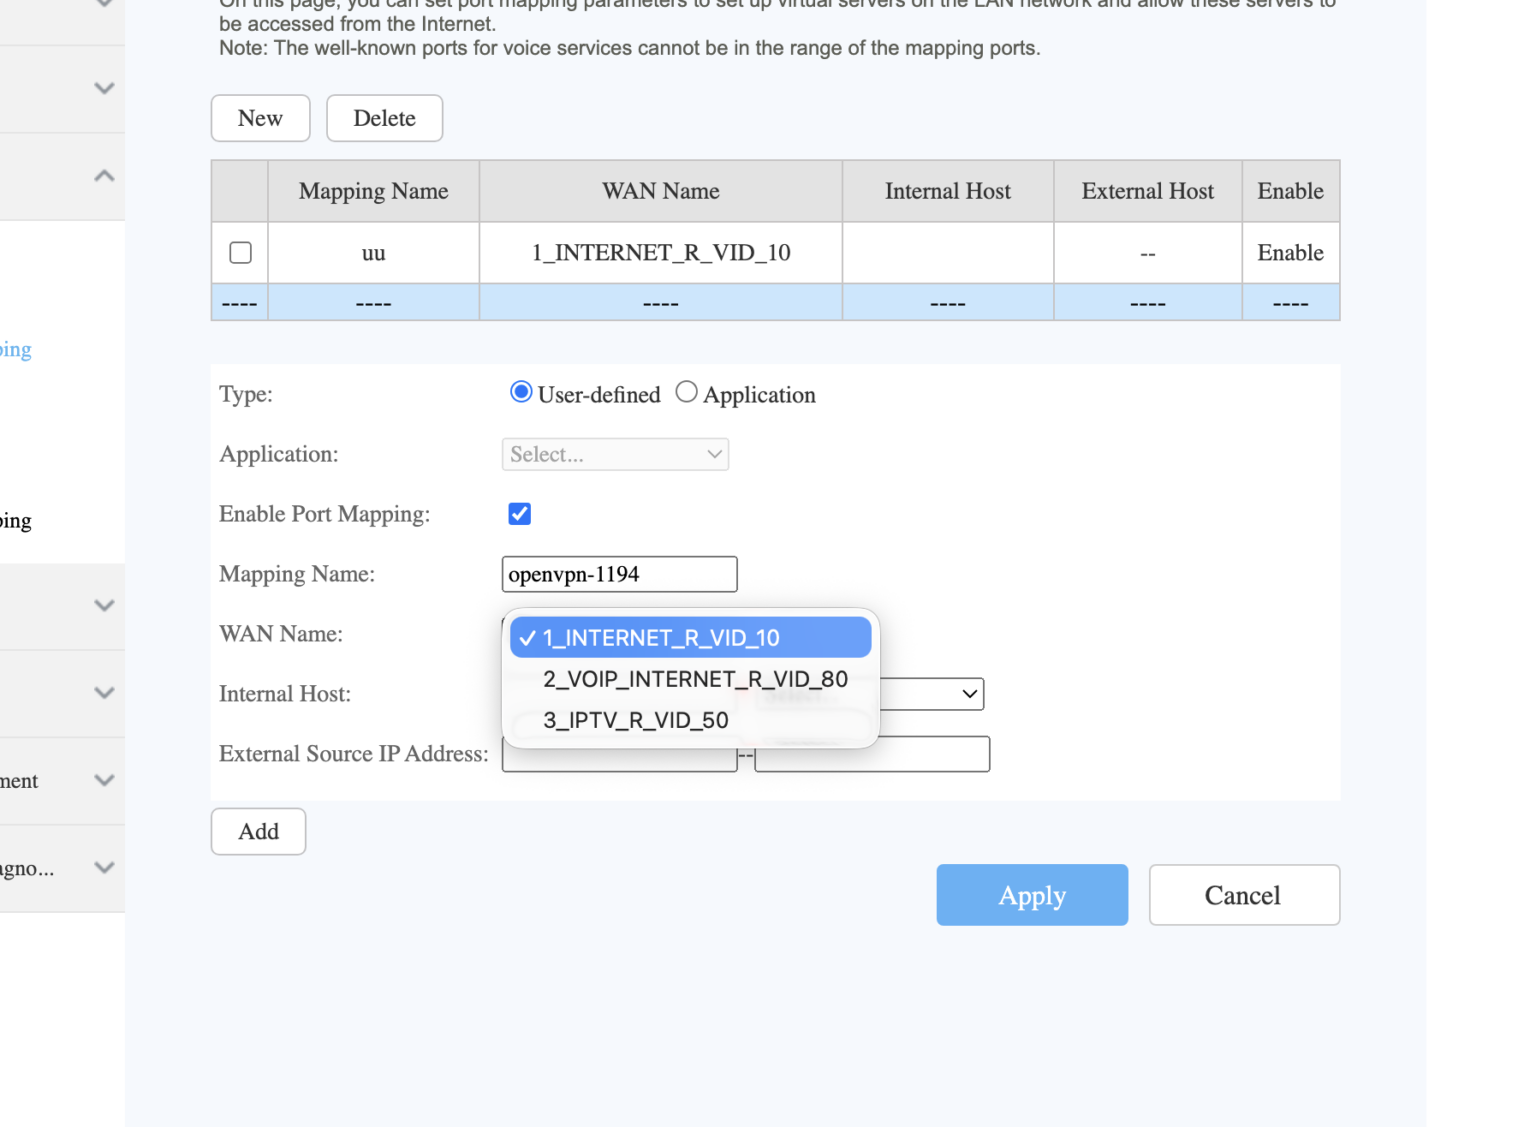
Keep a few things in mind when working with port forwarding:
A- UDP 1194 (VPN connection): This is the VPN traffic port and your device tunnels on this port.
B- TCP 943 (web portal): This is the web portal gateway for Admin UI and Client UI.
Important Note-1: With port forwarding, you will be able to access your OpenVPN Access Server from any WiFi network in the world or even mobile data. The only prerequisite should be that your VM is running. If you want to work on the same WiFi network, then skip port forwarding.
Important Note-2: While using a VM, for port forwarding, make sure your network is set to “Bridged” and not “Shared”. You can go ahead and edit your VM to find the “Network” option and there you can make this change.
10. Enter profile in OpenVPN Connect
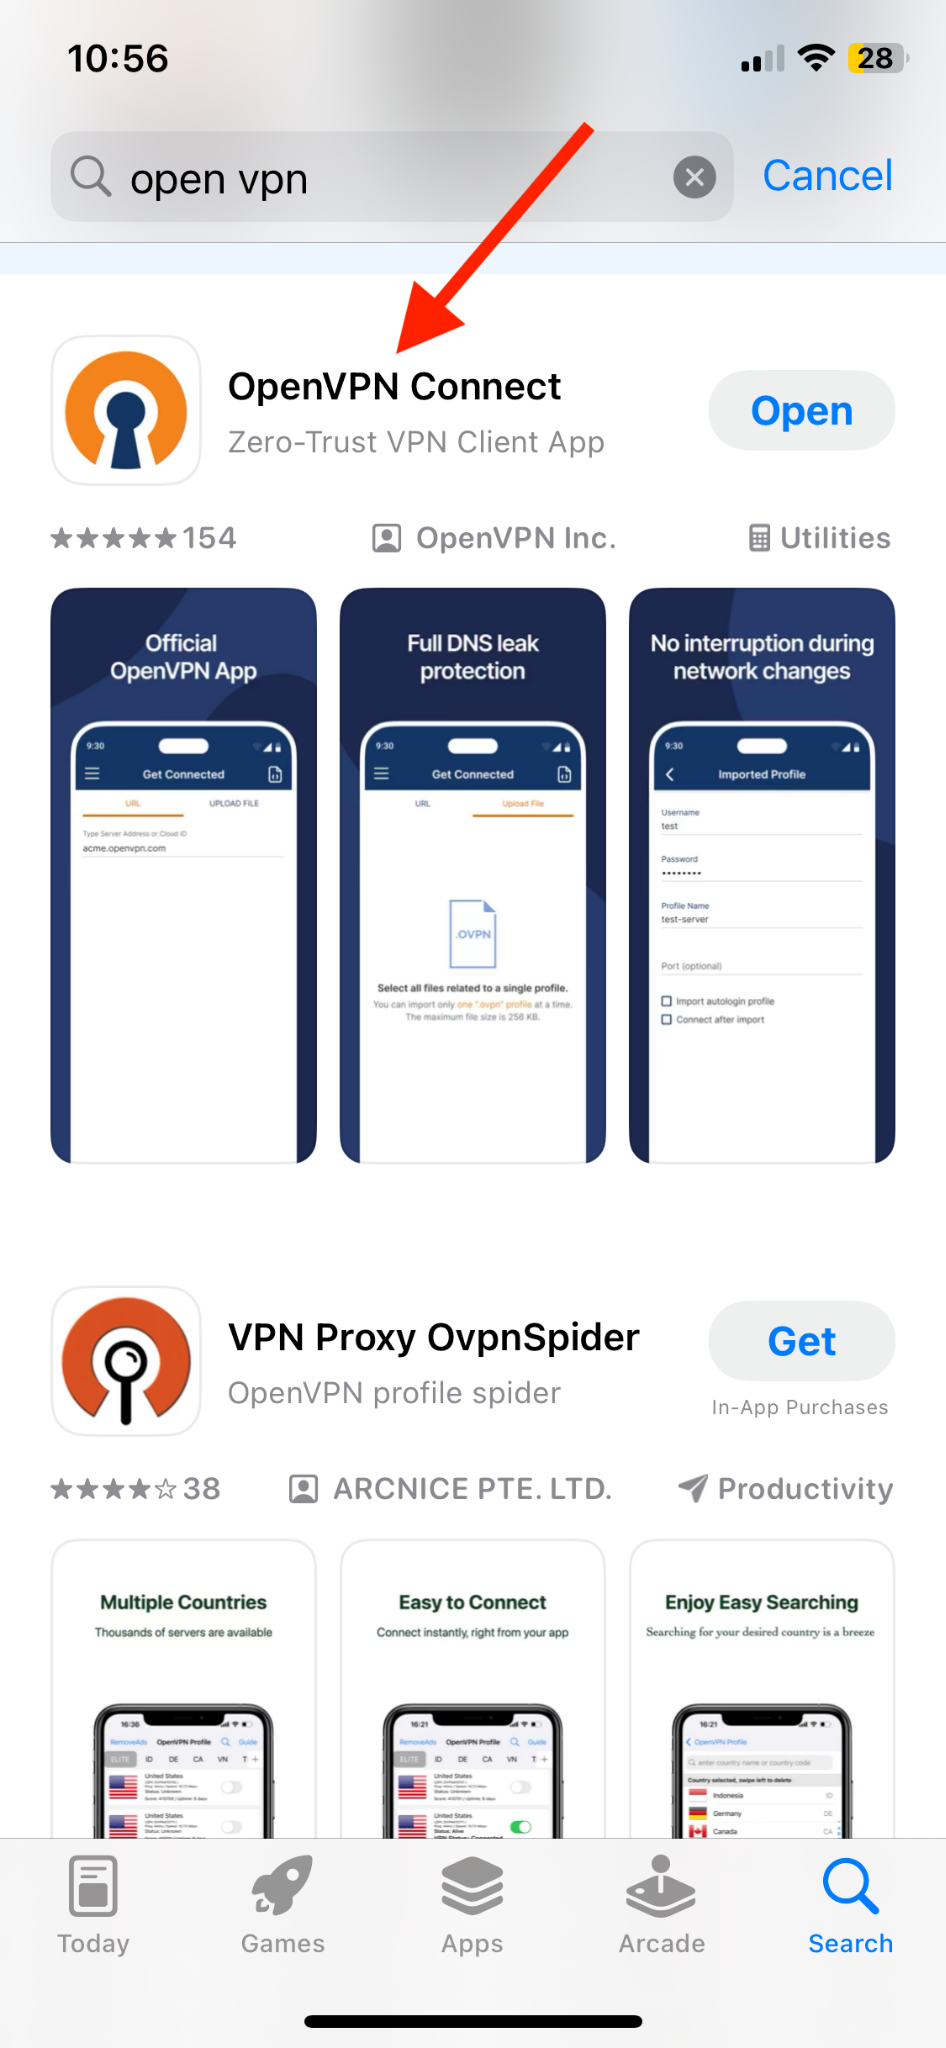
You can download and install OpenVPN Connect on any of your devices such as iPhone, Android, Windows, Mac OS or Linux.
For this I quickly picked up my iPhone and searched for OpenVPN Connect and installed the app.
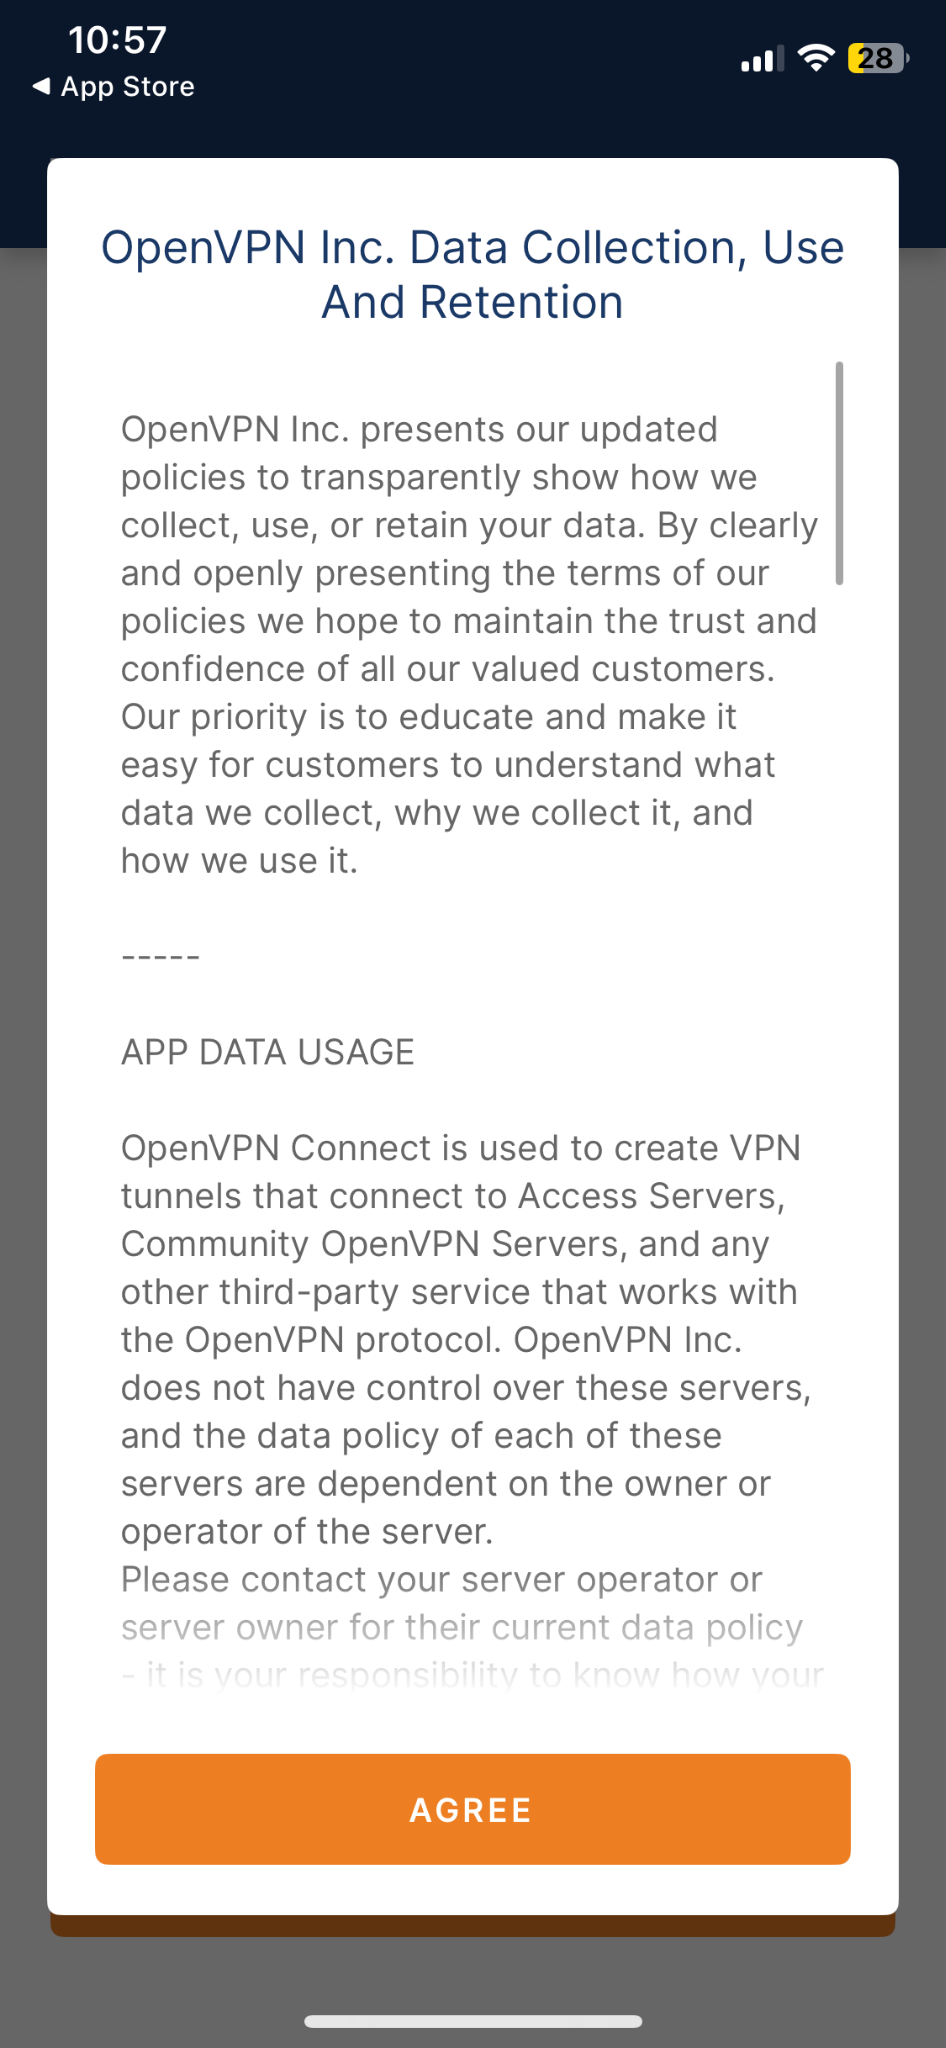
After opening the app, you can read the license agreement and click “Agree” once you’ve read it:
Tap “Upload” and upload the “Connection Profile” we downloaded in step 8.
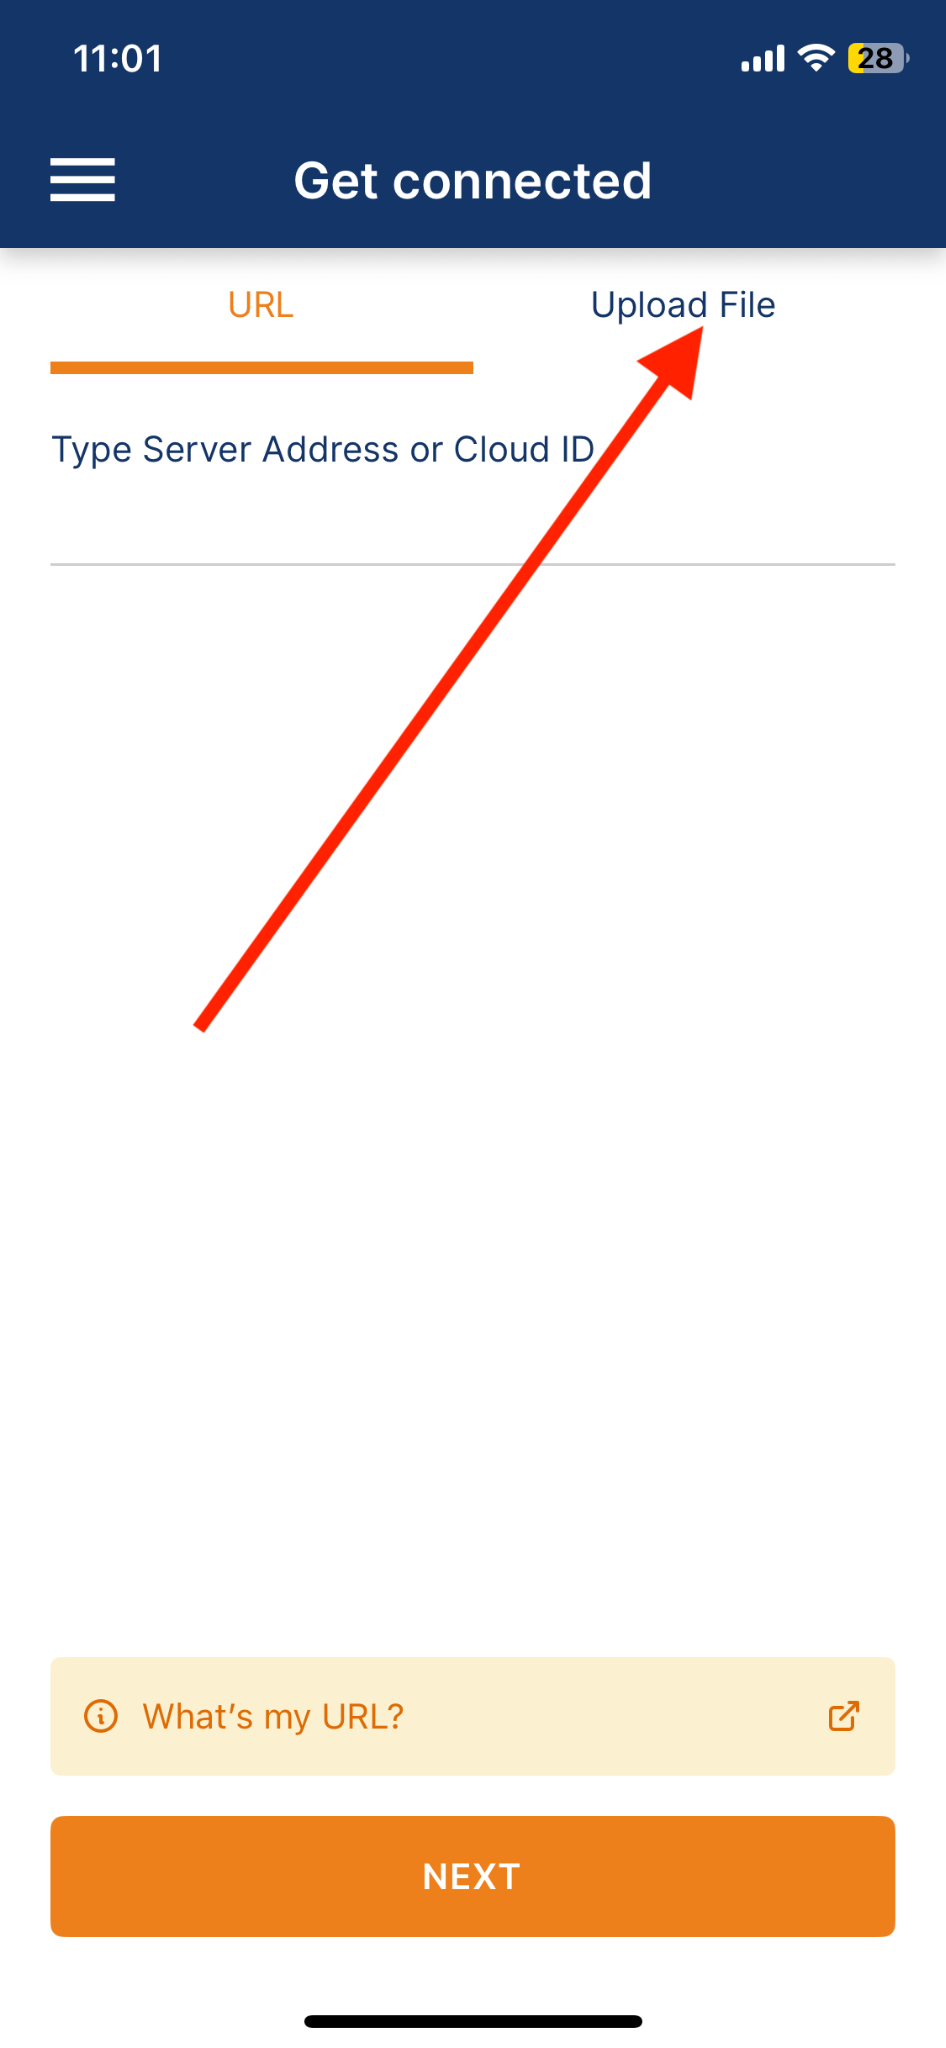
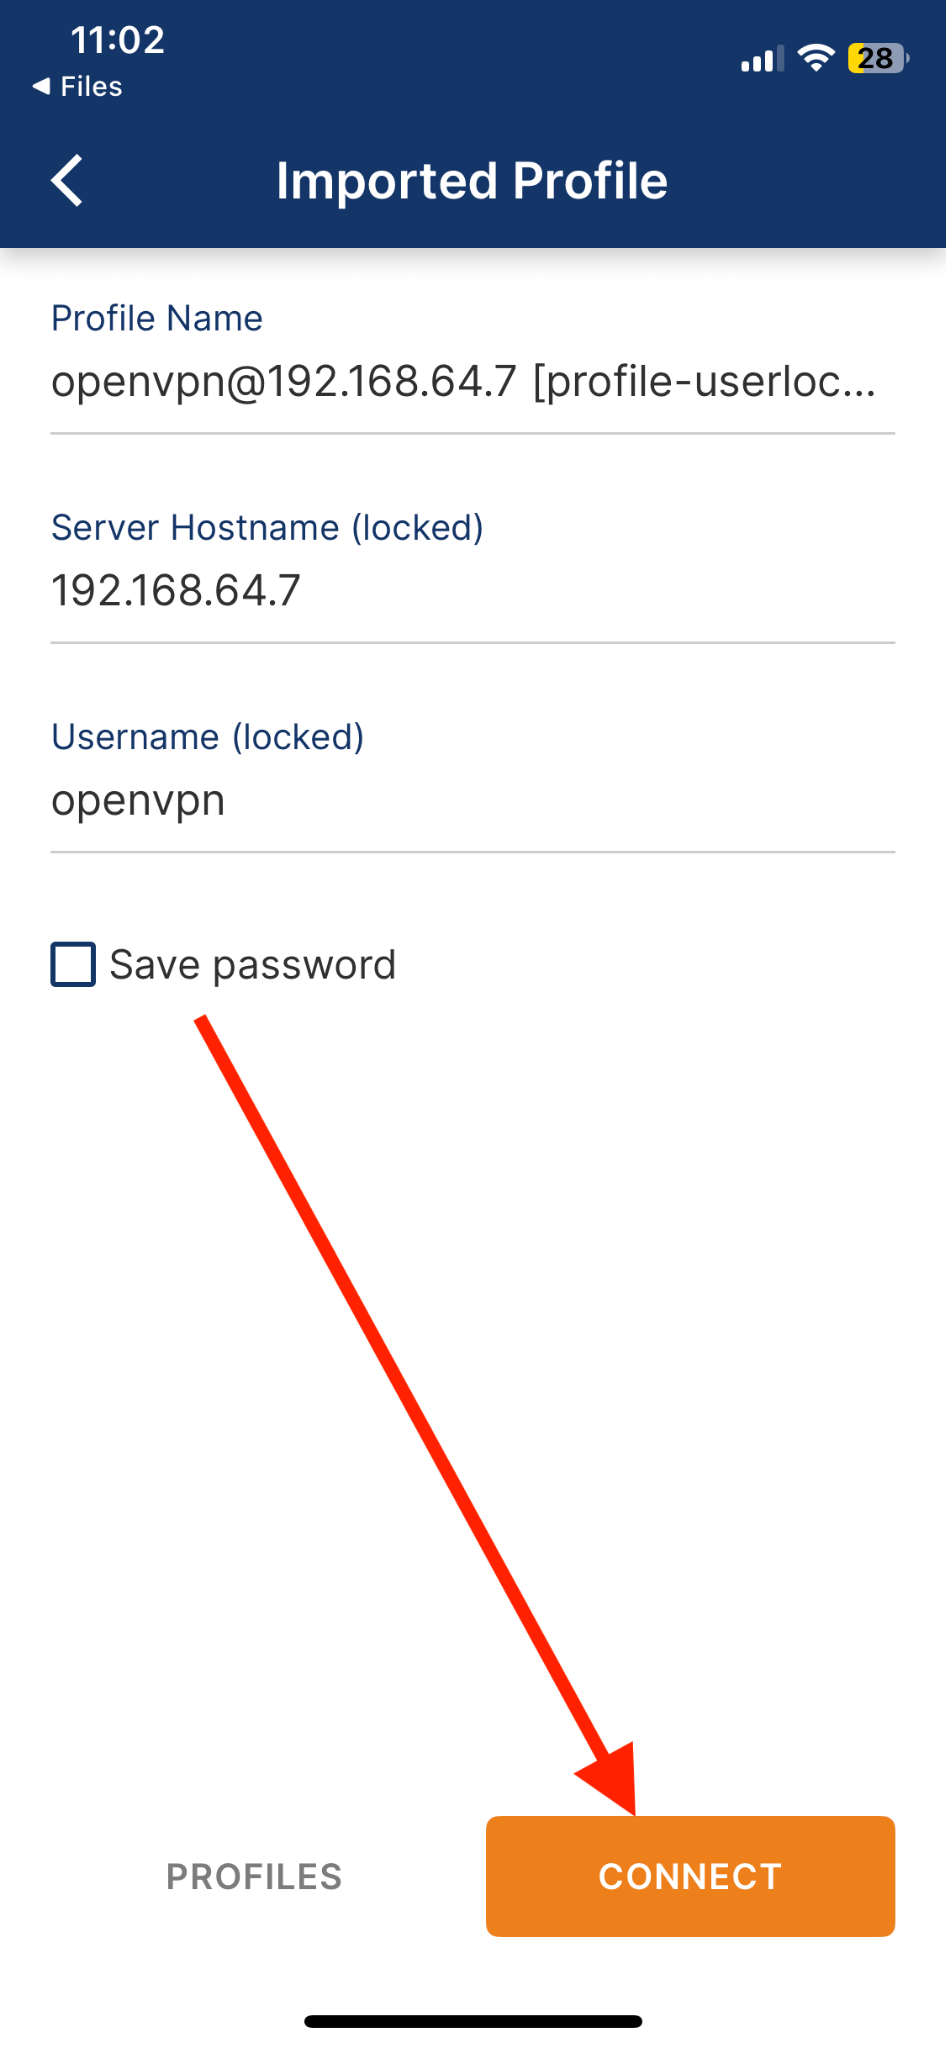
You can also go to your “Connection profile” file location and open it with the “OpenVPN Connect” application. It will show you the details, after checking it, click on “Connect”.
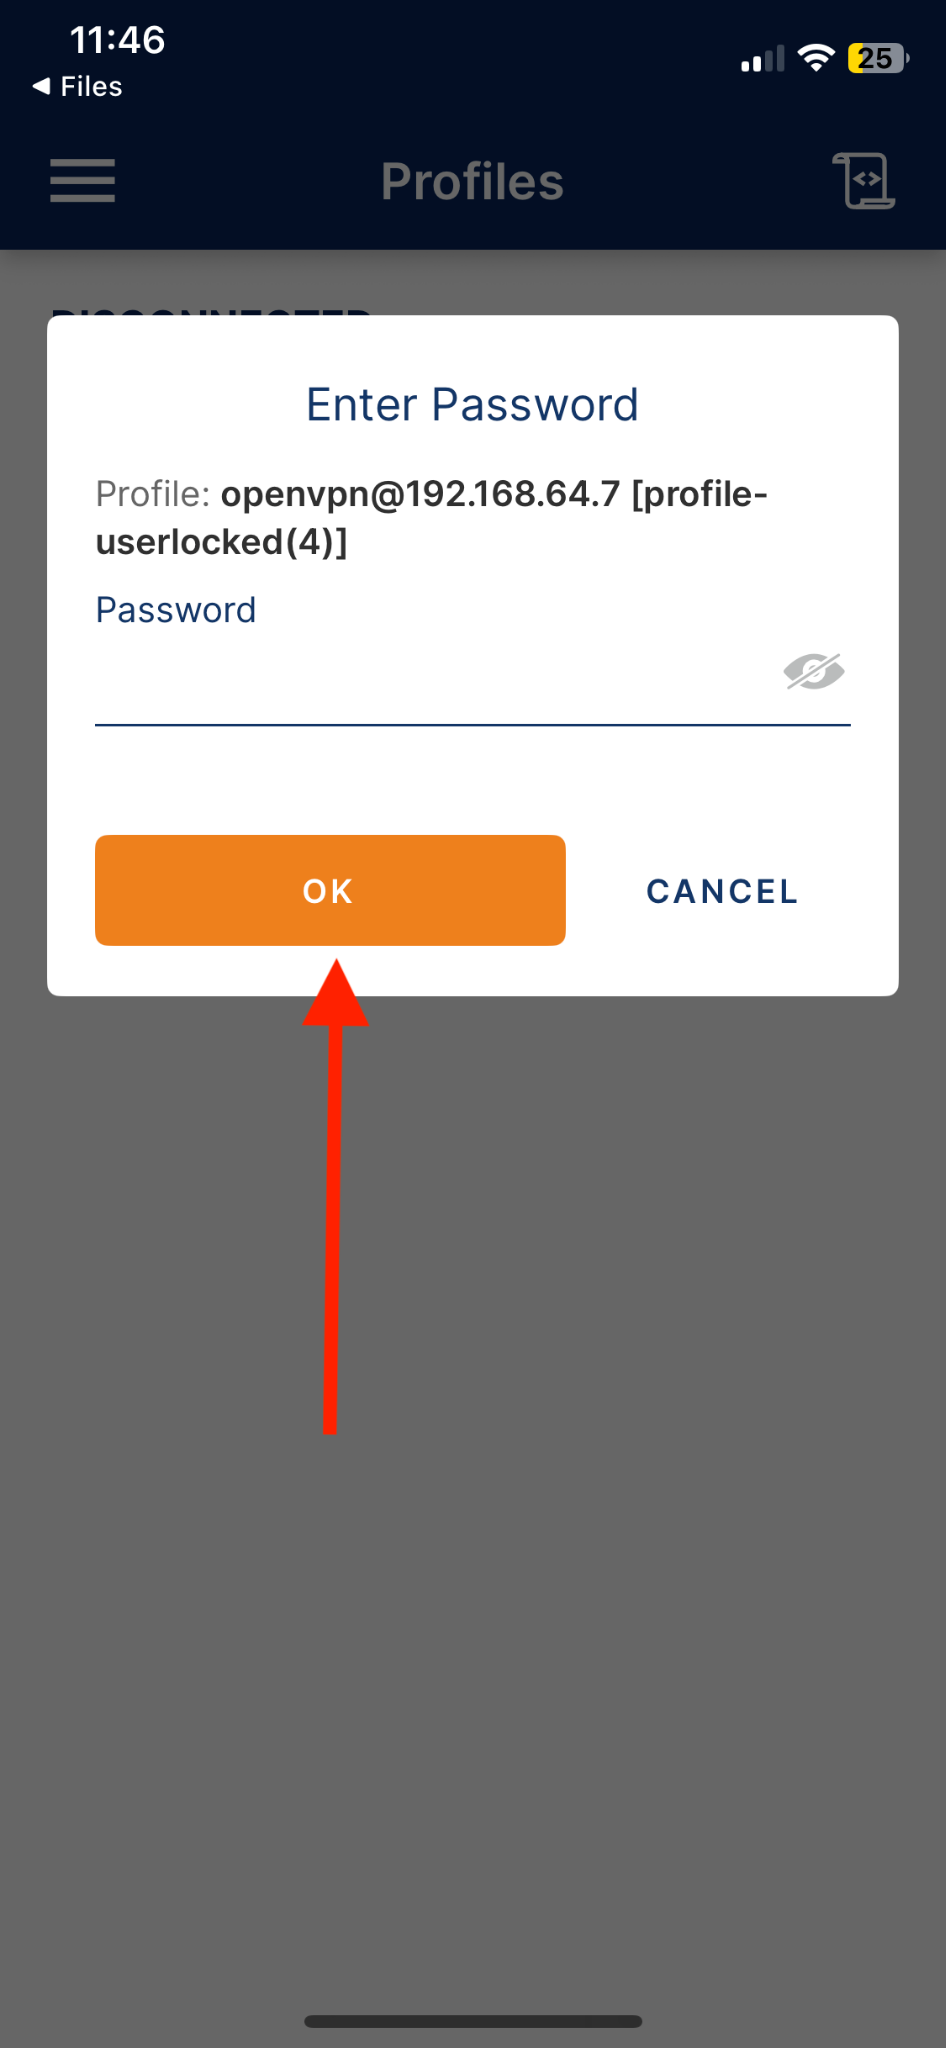
Enter your password at the prompt and then click “OK”.
11. Check if VPN is working
Now verify if your connection was successful and if your VPN is working.
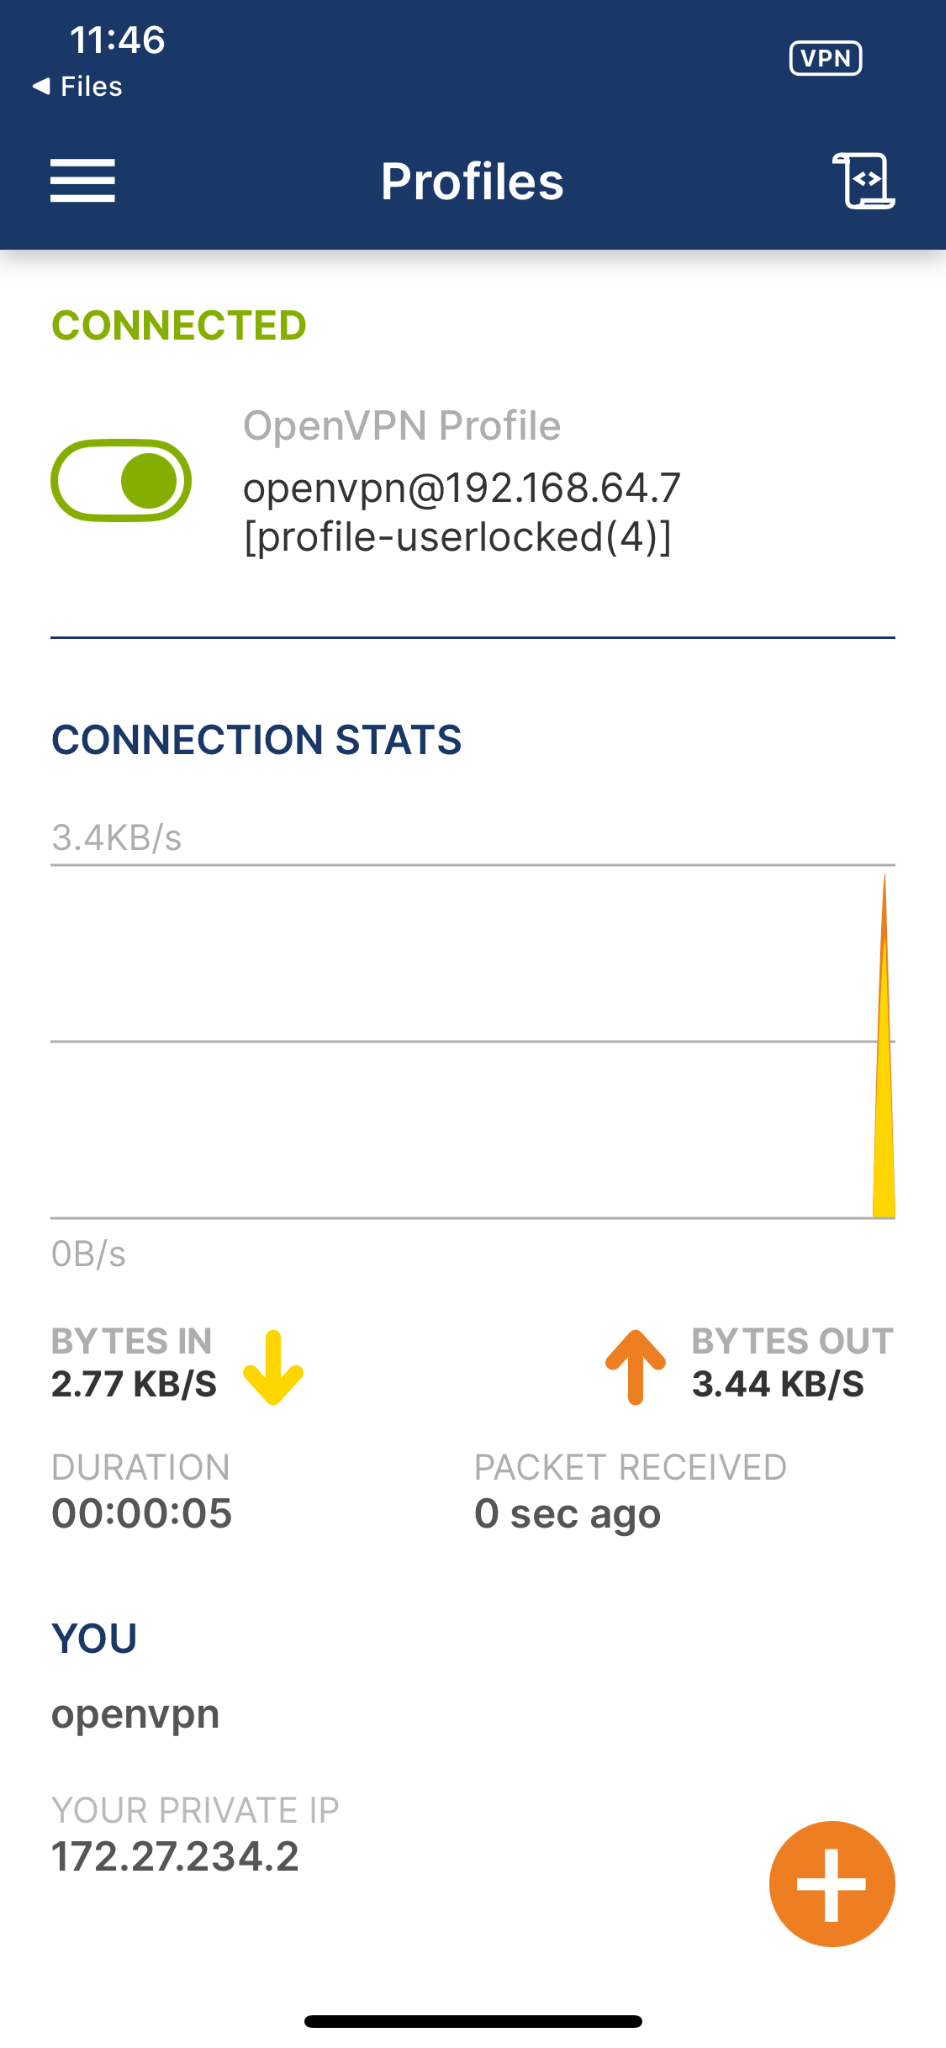
Everything works fine in our case and the fun part is that even if you turn on your mobile data your VPN will still work and even if you move to any other location your VPN will still work as long as your VM is active and running.
Final Thoughts
OpenVPN Access Server is a powerful tool when it comes to the privacy and security of your distributed teams and your business infrastructure. Although the Internet is not private, your team can be anywhere in the world and still be protected by the encrypted secure tunnel that OpenVPN Access Server creates between the user and your server. If you use a cloud server or a Linux server with a public IP address, you can simply share this link with your team members: https://your-ip/943 which is your client UI. And of course, you can skip step 9 (port forwarding) in the case of cloud or linux servers that have a public IP address. For cloud servers or any servers with public IP addresses, you will need firewall rules instead of port forwarding. You only need port forwarding if you have home servers. OpenVPN Access Server’s installation guides are available for all supported platforms on their web portal.


![[keyword]](https://learnxyz.in/wp-content/uploads/2026/03/1772411196_6-कारण-जिनकी-वजह-से-मेरा-Google-फ़ोटो-से-काम.png)
![[keyword]](https://learnxyz.in/wp-content/uploads/2026/04/1777310540_Microsoft-is-trying-to-limit-our-options-this-time-with.jpeg)