![[keyword]](https://learnxyz.in/wp-content/uploads/2026/02/RapidRAW-Basics-–-How-to-cull-your-photographs.jpg)
At the end of the day, after a nice photo session in the woods or a professional photo portrait shoot, many of us can’t wait to get back home, sit down behind our computer, plug in our memory card, and start working on the new images we have captured. The first step is usually downloading and organizing these images in our photo library, like I have explained in my previous article. And now you maybe want to start to edit your images, but before you begin, there’s an important stage that often determines the quality of your final collection: decide which photographs are keepers and which aren’t worth keeping. This process of assessing your photographs is called culling. In this tutorial, I will explain how to cull your photographs in RapidRAW and what tools you have available to support this process.
Content of the article
- Introduction
- Photo culling in general
- Photo culling in RapidRAW
- Final words
Introduction
Culling your photos, which simply means the review process of the photos you have taken, may sound like a logical and straightforward step, but it can quickly become overwhelming when you are faced with hundreds or even thousands of image files from a single photo shoot. Here the right tools and approach make a real difference. In this tutorial, I’ll show you in what way RapidRAW supports you in the culling process and which features help you not only to efficiently separate the keepers from the less successful shots, but also to organize your library in a way that makes finding images later much easier. By the end of this tutorial, you will see how this culling stage not only saves time, but also sets the foundation for a smoother and more enjoyable photo editing workflow.
Photo culling in general
The process of culling your new photos is not only an important step in your digital photography workflow, because it saves you time later in your editing stage, reduces an overload of all-look-the-same images, and makes sure you only end up with a smaller set of your very best images. Above all, it’s just a really enjoyable experience to go through the photography story of your day or photo shoot again and to anchor the memories even more firmly before moving on to editing the photos. Let’s look at some characteristics of the culling process.
Get rid of technically inferior photos
No matter how skilled we are as photographers, in our haste or through a lack of thinking, we often take photos that are poorly exposed, out of focus, blurry, show motion blur, etc. These photos are definitely not suitable for your final portfolio and are certainly not candidates for further editing. All technically unusable photos are the first to be discarded.
Exclude all duplicates and look-alikes
In this age of digital photography, we tend to shoot a lot of photos in sequence in a short amount of time, so we end up with exposures that are virtually identical. Unlike the analog era, where we could, for example, take 36 photos on a 35mm film roll and therefore had to be more intentional about what we wanted to capture, in this digital age we have virtually unlimited storage space and think less about one photo more or less. This often results in a great many similar photos. In our culling process, it’s therefore good to reduce that overload of nearly identical photos to only the unique and necessary images.
Don’t edit photos that aren’t worth editing
It might seem obvious, but if you don’t first carefully review all your photos and determine which ones are worth editing and ultimately worth keeping, you’ll waste a lot of time that could have been better spent elsewhere. Consider a wedding shoot, which can sometimes result in thousands of images. Ultimately, you’ll never hand over all the photos to your clients or include them in a wedding album. You only want to keep your best photos—the ones that will be most valuable to you, your clients, your family, or your friends.
Culling helps tell the story
Perhaps less so for a day of nature photography, where, for example, the focus is often primarily on creating individual fine art photographs, but when we’ve photographed a holiday or a wedding day, there’s a story to tell. With thousands of photos, initially there’s no good visual narrative to tell, but through the culling process, in which we intentionally choose to delete and keep photos, we can begin to piece together that visual story.
Optimize your photo library
Even though storage space is incredibly cheap these days, that doesn’t mean we shouldn’t be more intentional about what we want to keep and save and what we don’t need. A well-organized photo library containing only your most important photos will also help you find the right ones more easily in the long run and enjoy only your best captures later, without being bothered by all the unimportant, incorrectly exposed, technically substandard, duplicate, and similar photos. If you consistently manage your photo library, you’ll know that you’re only looking at the truly important captures or moments.
So, now let’s find out how RapidRAW helps us in our photo culling process.
Photo culling in RapidRAW
Before you start editing your RAW files, you first want to select, cleanup, and categorize your images. RapidRAW enables you to do this in an effective and efficient manner with the help of ratings, color labels and tags. And there is even an automated culling feature available in RapidRAW.
Within RapidRAW you can quickly view a collection of images, you can add a star rating of 1 to 5 stars and later filter on it, you can add one or more tags and later search on them, you can use color labels and filter on them, and you can filter on characteristics like RAW vs Non-RAW, file name, and date modified.
Automated culling
RapidRAW offers a functionality to automatically support you in your culling process. With this functionality you can automatically group similar images based on a similarity threshold and filter blurry images based on a blur threshold. So, how does this work in RapidRAW?
- Select a folder holding multiple images and select all the images in that folder (via Ctrl + A).
- Now right-click on on of the images, choose the option Productivity.
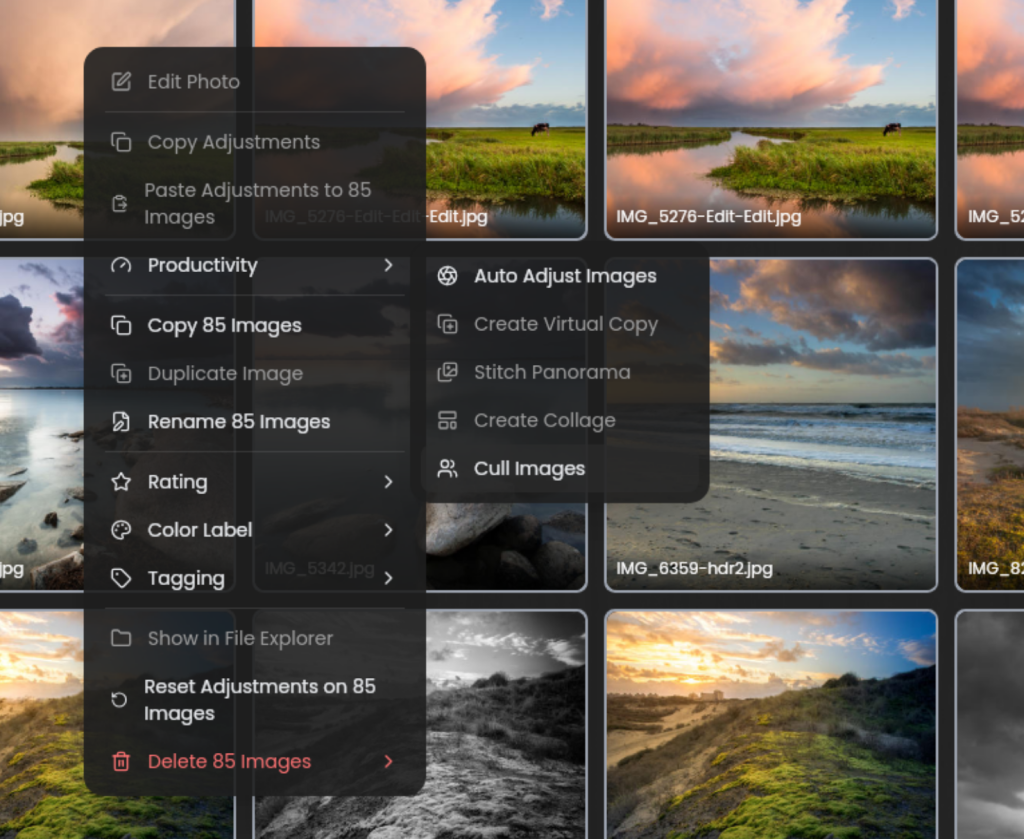
3) Now choose Cull Images.
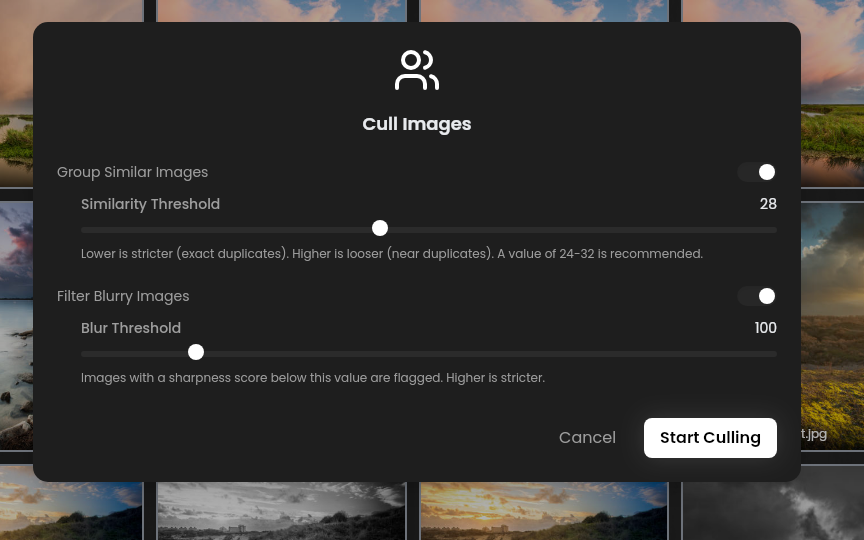
Here you see you can automatically group similar images based on a similarity threshold and filter blurry images based on a blur threshold in one go.
4) Leave the proposed values as they are and click Start Culling.
Now you get the culling suggestions:
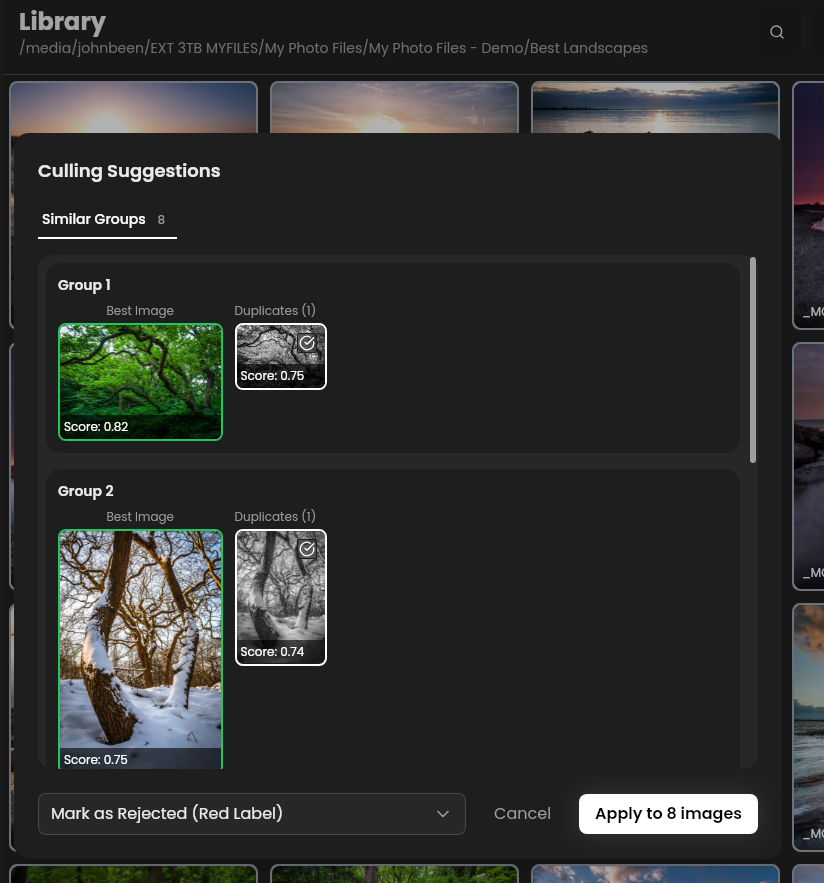
Here you see that there where 8 similar groups of images found. Every group shows the best image and the duplicates. You have the option to mark the images as rejected with a red label, set rating to 1 star, or move to trash. It did not found blurry images.
5) Choose Mark as Rejected (Red Label) and click Apply to X images.
Note: you can use this tool in different ways. If you choose in the Group Similar Images a low threshold, it will find exact duplicates, but if you use a less strict value, it will find comparable images, like for example images with a comparable composition, images with trees vs images without trees, etc. Just play a bit with it.
Rating
The Rating functionality helps you cull and organize your photos according to your assigned quality level, expressed as 1 to 5 stars. Suppose you took a set of beautiful landscape photos during your vacation, but within that beautiful set, only three are of such a quality that they’re suitable for hanging on your wall or displaying in a digital gallery. You can then give those three fantastic photos a higher star rating than the rest within the selected set. It’s helpful to create a fixed star system for yourself that you then always stick to. Personally, I use the following star ratings:
- 1 star – keep temporarily, but probably delete later
- 2 stars – doubtful, need extra analysis
- 3 stars – good shot, standard quality
- 4 stars – impressive shot, great quality
- 5 stars – once-in-a-lifetime image
So, how does this work in RapidRAW?
- Select a folder holding your images and select an image in that folder.
- Now right-click on one of the image (you can also give the same rating to multiple images), choose the option Rating and select the number of starts you want to assign.
Now the rating is visible in the right top corner of your image.

Color labeling
The Color Label functionality helps you cull and organize your photos according to your assigned quality level or next step action, expressed in different colors. Personally, I don’t use color labels to differentiate in image quality levels. I think star ratings are far more logical for that, because of the intrinsic order. But you can use color labels for more functional differentiation, for example the red color label for images that need to be trashed, green for the parents of the bride, etc.
So, how does this work in RapidRAW?
- Select a folder holding your images and select an image in that folder.
- Now right-click on one of the image (you can also give the same color label to multiple images), choose the option Color Label and select the color you want to assign.
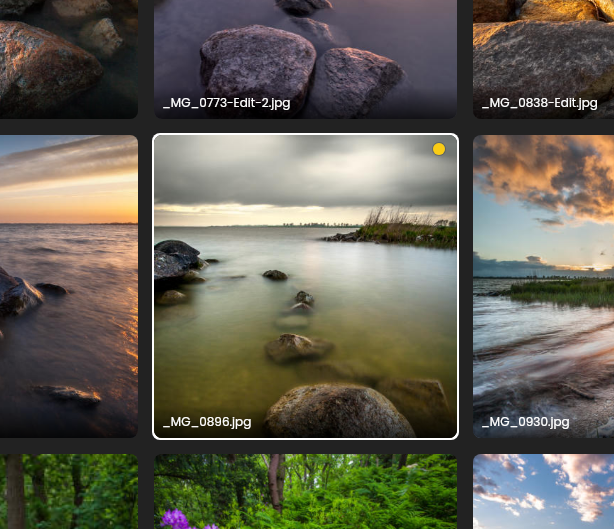
Now the color label is visible in the right top corner of your image.
Tagging
The advantage of the Tag, which is just a label, is that you can assign multiple Tags to a photo. This makes it in certain situations a better organization tool than organizing in a specific folder structure, because you can place a photo in only one folder, while you can give multiple tags to a single image. A Tag is folder location-independent and thus independent of the limitations a folder structure inherently imposes. Suppose you’re making wedding photos, and some of them are taken in a beautiful, expansive landscape. Will you place this photo in a Wedding folder or in a Landscape folder? In this case, you could assign two Tags to the photo: both the Wedding and Landscape tags. But you can use tags also to support the story telling of photos, by tagging it based on specific events within the same project, or different moments within the same photo shoot holding multiple photos of that moment, etc.
So, how does this work in RapidRAW?
- Select a folder holding your images and select an image in that folder.
- Now right-click on one of the image (you can also give the same Tag to multiple images), choose the option Tagging.
- Type the tag that you want to assign, or select one of the tags you already created before and click the plus sign to store the tag. While you are in this pop up screen, you can add multiple tags to the same image.
Tag settings
In the previous screenshot, you can see that there are some tag shortcuts available as well. You can remove or add tags via the Settings of RapidRAW.
- Click on the home button in the top right corner of RapidRAW.
- Click on the gear / settings icon on the home screen to open the settings.
- In the General tab scroll down to the Tagging section.
Here you can remove or add shortcuts.
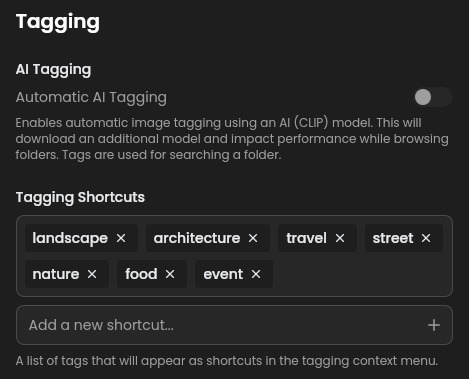
In the above screenshot you also see the option to enable automatic AI Tagging. This options enables automatic tagging using an AI model. When enabled, this will download an additional model to support automated tagging, but will impact the performance of the RapidRAW application.
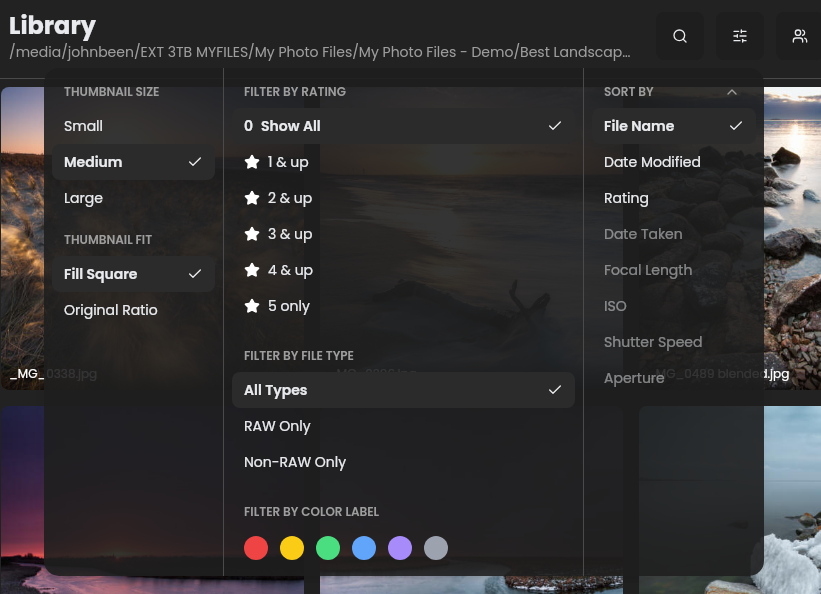
Searching and filtering
We’ve discussed various tools above that can help you with your culling process. While it’s great that you can assign star ratings, color labels, or tags to one or more images, you’ll also want to be able to use them later. And that’s possible with the search function and the view options.
Search: The Search option allows you to search by Tag or File name.
View Options: View Options allows you to filter by rating and color label.
Final words
Culling isn’t just about trimming down your collection of photos. It’s about rediscovering the story behind every photo shoot. With the culling tools in RapidRAW, you can build a collection that reflects both your memories and your very best work. In many ways, culling is the bridge between capturing a moment and bringing that moment to life in editing.
Far from being a purely technical step, culling is a rewarding part of the photography journey. It saves time later in the editing stage, keeps your library free from duplicates and look‑alike shots, and leaves you with a refined selection of images you’re truly proud of. Even more importantly, it gives you the chance to relive the story of your shoot—revisiting moments, emotions, and memories—before moving on to the creative process of editing.
Thanks for following along with this tutorial. I hope your next culling session with RapidRAW will feel smoother, faster, and more enjoyable. See you in my next RapidRAW tutorial!
Have a look at my latest book on Linux, in Paperback or Kindle format.
For more info on my book click here.
When you want to buy the book click on the image below.
If you appreciate what I do on this website…,